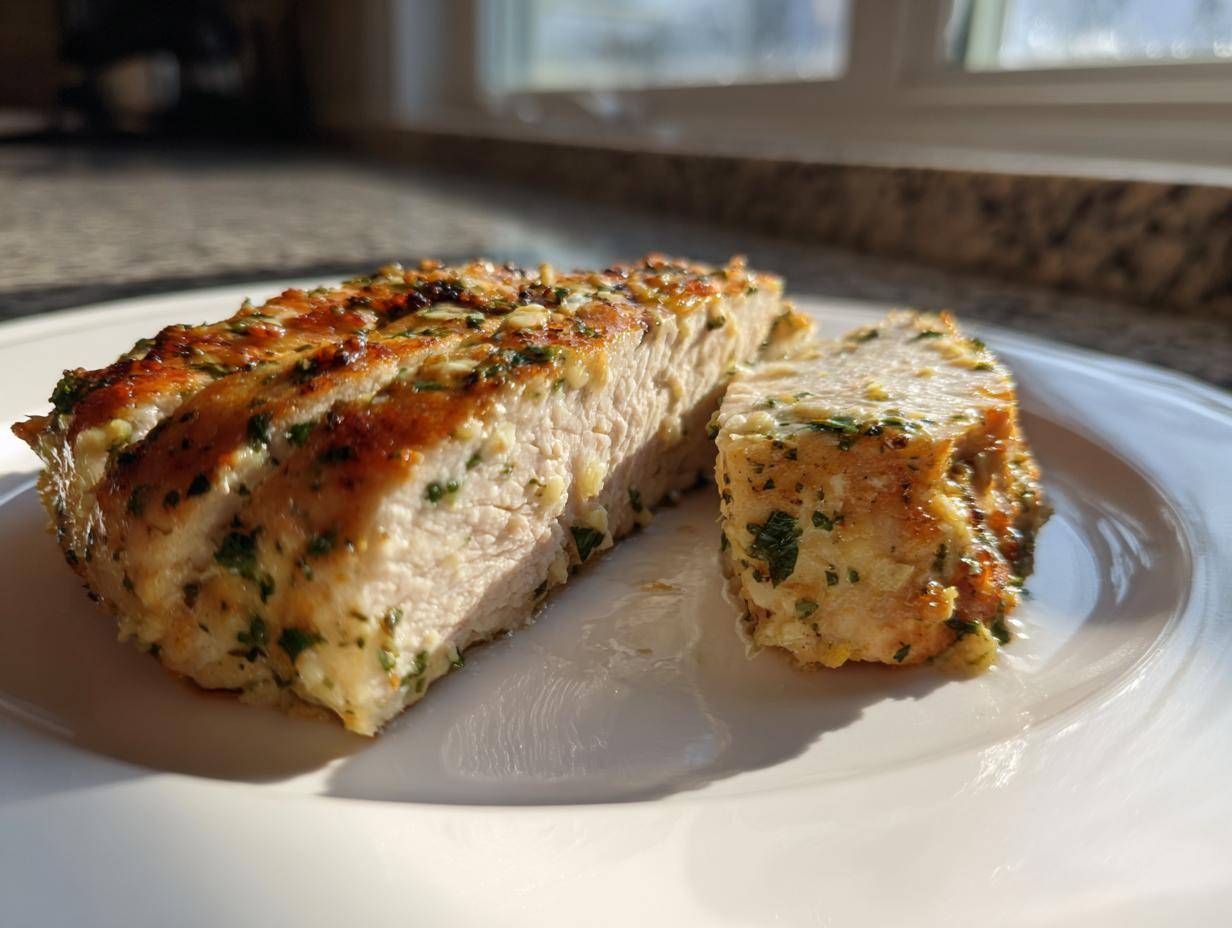
Oh, let’s just be honest for a second: If you asked me what the biggest nightmare in the home kitchen is, it wouldn’t be sourdough starter or fussy sauces. Nope, it’s bone-dry chicken breast. It’s the reason so many people swear off cooking it at all! I’ve rescued *so* many sad, pale pieces of poultry in my time, and I swear I’ve finally cracked the code for the perfect **baked chicken breast**. It’s not about complicated marinades or obscure gadgets; it’s about solid technique married to a killer flavor combo. That’s why I’m giving you my Foolproof Juicy Garlic Butter Baked Chicken Breast recipe today. I promise, after you try this method, you’ll never go back to rubbery chicken again. This is my go-to for a fast, healthy weeknight meal, and honestly, it’s so reliable, I use it constantly for meal prep too!
Why This Foolproof Juicy Baked Chicken Breast Recipe Works
You’ve seen a million recipes for oven-baked chicken, so what makes mine different? Honestly, it’s treating the chicken breast with the respect it deserves! Most dishes fail because of one simple mistake: overcooking. But this method is built specifically to stack the odds in your favor for a juicy result, every single time.
- It guarantees a moist result, even if you’re just throwing it together after work.
- The garlic butter melts right into the meat, adding incredible flavor without extra fuss.
- Total cook time is less than 30 minutes, making it one of the best easy chicken breast dinners out there.
Achieving Melt-In-Your-Mouth Tender Baked Poultry
The real secret to tender baked poultry isn’t a special brine (though we mention that later!); it’s temperature control. I’m serious about pulling this chicken out the second it hits 165 degrees Fahrenheit. If you overshoot that by even two degrees, you start squeezing out all the moisture you worked so hard to keep in. And please, don’t skip the resting! Letting the meat sit for five to ten minutes after it leaves the oven allows those juices to redistribute instead of pouring out onto your cutting board.
Simple Seasoning Baked Chicken Breast for Weeknight Chicken Breast Ideas
When you’re rushing for weeknight chicken breast ideas, you don’t need 15 ingredients. This recipe champions the power of simplicity. The garlic butter is just four things mixed together, and it does triple duty: it seasons, adds crucial fat for richness, and helps the outside brown nicely. Prep time is barely ten minutes. You mix the butter, you pat the chicken, you bake. That’s it! It’s the definition of a straightforward, yet incredibly flavorful, option.
Ingredients for Your Foolproof Juicy Garlic Butter Baked Chicken Breast
When you’re going for a foolproof method, you need to treat your ingredients right from the start. Don’t just grab anything! Every single item here plays a specific role in keeping this baked chicken breast tender. The softness of that butter is key for easy blending, and trust me, you want the garlic freshly minced—it blooms in the oven flavor!
Here’s the exact list of what you need for four servings. Grab everything out before you start mixing so you can knock out that ten-minute prep time easily.
- 4 boneless, skinless chicken breasts (about 6-8 oz each)
- 1 teaspoon salt
- 1/2 teaspoon black pepper
- 1/2 teaspoon paprika
- 1/4 teaspoon garlic powder
- 4 tablespoons unsalted butter, softened (this needs to be room temperature!)
- 2 cloves garlic, minced
- 1 tablespoon fresh parsley, chopped
See? It’s all simple stuff you probably have right now, but it adds up to the best texture.
How to Prepare Your Easy Chicken Breast Dinner: Step-by-Step Instructions
This is where the magic happens, and I honestly think these few simple steps are the core of why this turns into such an easy chicken breast dinner and not a cooking disaster. We’re moving fast here because the initial prep is super quick. My goal is always to get these into the oven by minute 10 so we can enjoy a 30 minute chicken dinner!
Prepping the Chicken and Garlic Butter Mixture
First things first—get that oven screaming hot! You want it at 400°F (200°C) before anything touches the pan. While it warms up, take your chicken breasts. Seriously, listen to me: you have to pat these things bone dry with paper towels. If the surface is wet, your seasonings and butter are just going to slide right off, leaving a sad, under-seasoned piece of poultry waiting for you.
While the chicken dries, whip up your topping. Just mash that softened butter with the minced garlic and parsley until you have a lovely, fragrant compound butter. Next, sprinkle both sides of that incredibly dry chicken with your salt, pepper, and paprika. Now, if you have some breasts that look like one is thick on one end and super skinny on the other, grab a meat mallet or rolling pin and give the thick parts a few gentle whacks—just until they’re roughly the same thickness. This is how you guarantee the simple seasoning baked chicken cooks evenly!
Baking and Resting for the Best Baked Chicken Breast Method
Once seasoned, pop the chicken into your baking dish—I use a standard 9×13, lightly greased. Top each piece with about a tablespoon of that gorgeous garlic butter. Now, the bake time is listed as 20 to 25 minutes, but these times are only suggestions. The real test for the best baked chicken breast method is an instant-read thermometer. Pull your chicken the second the thickest part reads 165 degrees Fahrenheit (74°C). Don’t be tempted to check it too early!
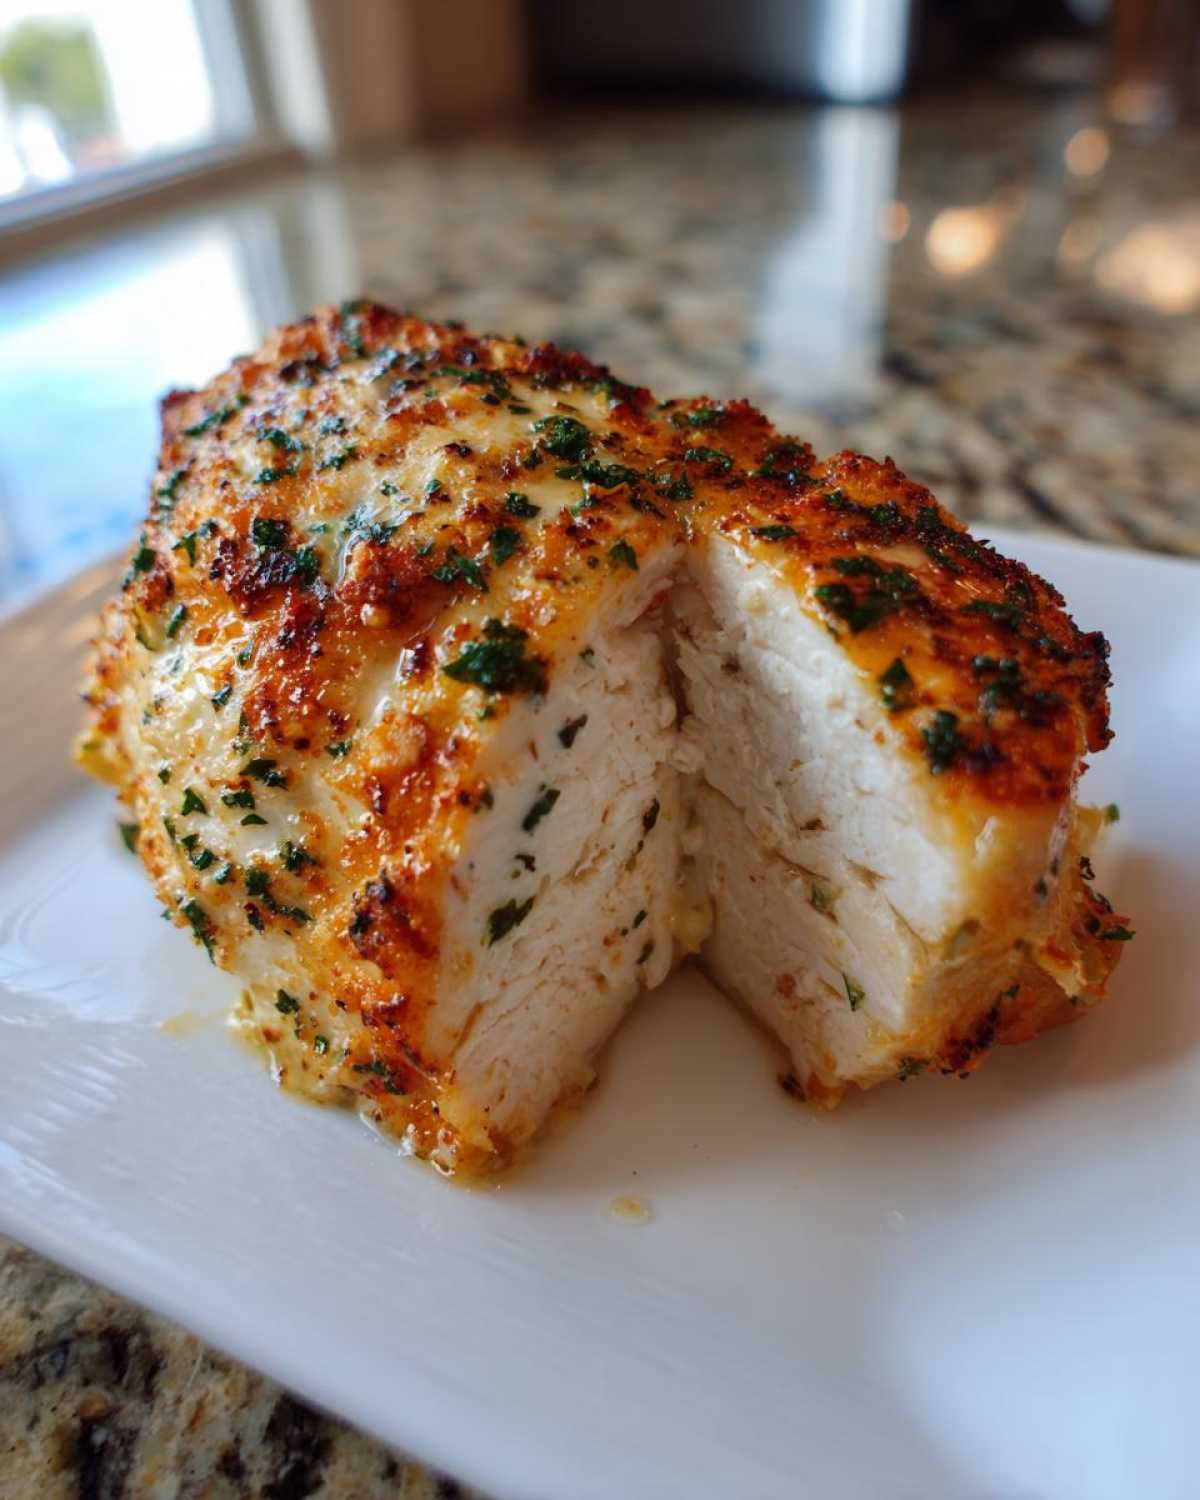
The final, absolutely crucial step for any baked chicken breast for meal prep or immediate dinner is resting. Take them out, cover them loosely with foil, and let them chill out for a full 5 to 10 minutes. This lets the meat relax and keeps those juices locked inside. If you cut into it immediately? All that hard-earned moisture runs onto the plate, leaving you with dry meat. Don’t skip the rest!
Ingredient Notes and Substitutions for Tender Baked Poultry
Okay, if you are *really* worried about having anything less than perfect tender baked poultry, I have two expert tricks you should know, right from the notes section. First, let’s talk about that extra insurance policy against dryness: brining! It sounds fancy, but it’s just a quick soak. Mix one cup of water with one tablespoon of salt, drop the chicken breasts in for fifteen minutes, and then—and this is key—pat them aggressively dry before seasoning. That little step makes a huge difference!
Second, I mentioned it before, but it bears repeating because it’s a huge factor in even cooking: thickness matters. If you buy those huge, thick chicken breasts, they will take longer to cook than the thin ones, meaning the thin ends get dry while the thick middle just finishes cooking. If your breasts aren’t uniform, just take a piece of plastic wrap and gently pound the thickest parts down just a bit. You want them all roughly the same thickness. This tiny effort guarantees your entire batch of garlic butter chicken breast turns out juicy at the same time. It’s all about technique, honestly!
Tips for Perfect Baked Chicken Breast for Meal Prep
Meal prepping chicken breasts is awesome because you always have a healthy protein ready to go, but if you prep it wrong, it’s dried out by Tuesday lunch! My biggest tip for anyone planning on having baked chicken breast for meal prep is to slice it *after* it has completely cooled down. Don’t slice it hot off the resting rack!
Slice the cooled chicken against the grain into strips or cubes—this makes reheating much easier and guarantees tenderness in smaller portions. Store the sliced chicken in airtight containers. Honestly, this garlic butter version lasts beautifully for four days in the fridge because of the fat content, but I wouldn’t push it past day five. When you go to reheat it, use a quick splash of water or broth in the container before microwaving. That little bit of steam is your friend for keeping your prepped portions tasting nearly as good as the first day!
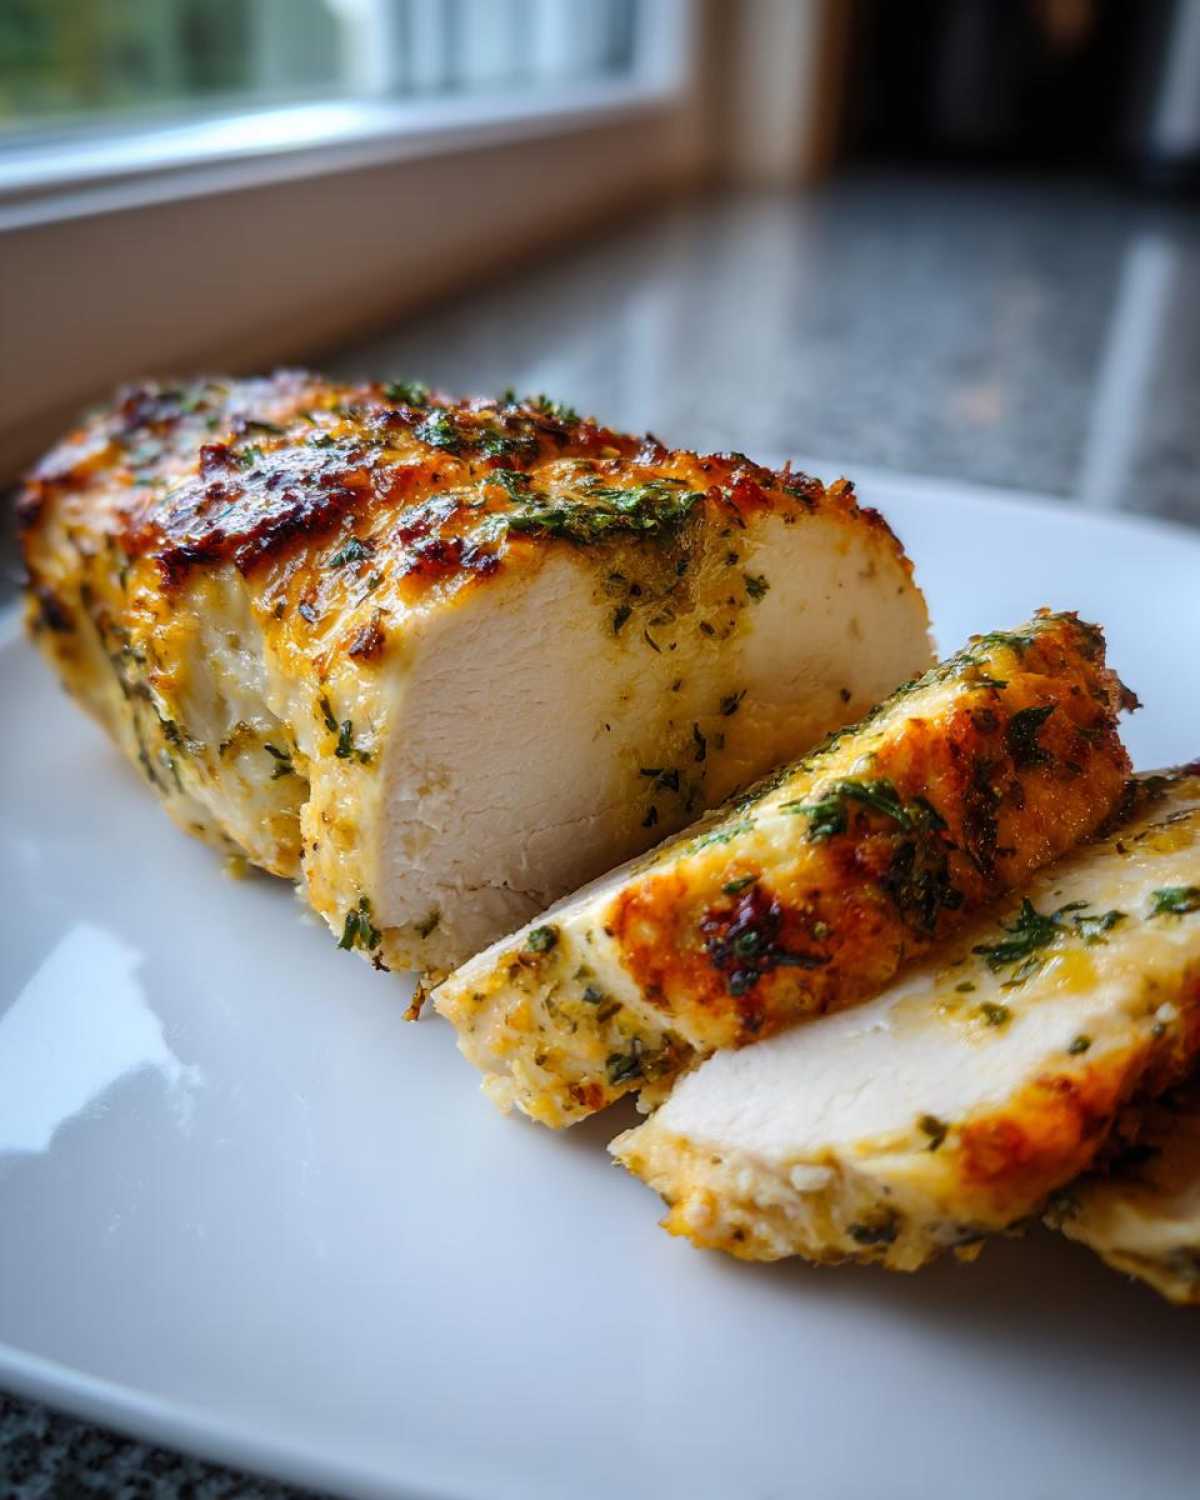
How to Cook Chicken Breast in Oven: Troubleshooting Common Issues
Okay, let’s talk about what happens when this whole process goes wrong, because it happens to the best of us! If you’ve followed all the steps and you still end up with chicken that tastes like cardboard, you probably made one of two classic errors. I want you to trust this recipe, but I also want you to know how to save yourself next time!
The number one reason for a dry **baked chicken breast** is simply overcooking. It is so easy to forget about the pan for an extra five minutes, especially when you’re juggling dinner prep. If your chicken comes out dry, check your internal temperature next time. Were you guessing, or did you rely only on time? My rule is: you *must* use a thermometer. If the meat was over 170°F when you pulled it, that’s why it’s tough. Remember, 165°F is done, and the resting is non-negotiable!
What about seasoning that won’t stick? Sometimes you mix that beautiful garlic butter and spoon it on, but when you pull the tray out, the topping is just melted into a sad puddle underneath. This almost always means the surface of the chicken wasn’t dry enough to begin with. If there’s any moisture on the meat, the fat in the butter (which is what holds the spices) can’t adhere properly. Next time, spend an extra minute patting down every single side of that poultry until it feels a little tacky. That simple patting technique is the secret to great adhesion for any simple seasoning baked chicken.
And finally, if your chicken seems tough but the thermometer read 165°F when you pulled it out? You skipped the rest period. That resting step is literally how you convince the juices to stay inside the muscle fibers instead of aggressively rushing out onto your nice cutting board. Make yourself a cup of tea while it rests. Stare into the oven. Do whatever you need to do to wait those five to ten minutes!
Serving Suggestions for Your Quick Chicken Oven Recipe
Honestly, this garlic butter chicken breast is so flavorful it barely needs anything next to it, but you probably don’t want to eat plain chicken every night! Since we aim for a quick chicken oven recipe, the sides should be fast too. I usually lean on simple vegetable roasts that go into the oven at the same time as the chicken, maybe tossing them in the same pan if there’s room!
Here are my three favorite pairings to make this a complete, balanced dinner:
- Roasted Asparagus or Green Beans (tossed with a little olive oil and salt, they cook perfectly alongside the chicken).
- Quick Lemon Herb Quinoa or Rice (cooks while the chicken rests!).
- A simple side salad full of crunchy lettuce and a bright vinaigrette to cut through the richness of the butter.
It’s an incredibly healthy baked chicken recipe that tastes like you spent way more time than you did!
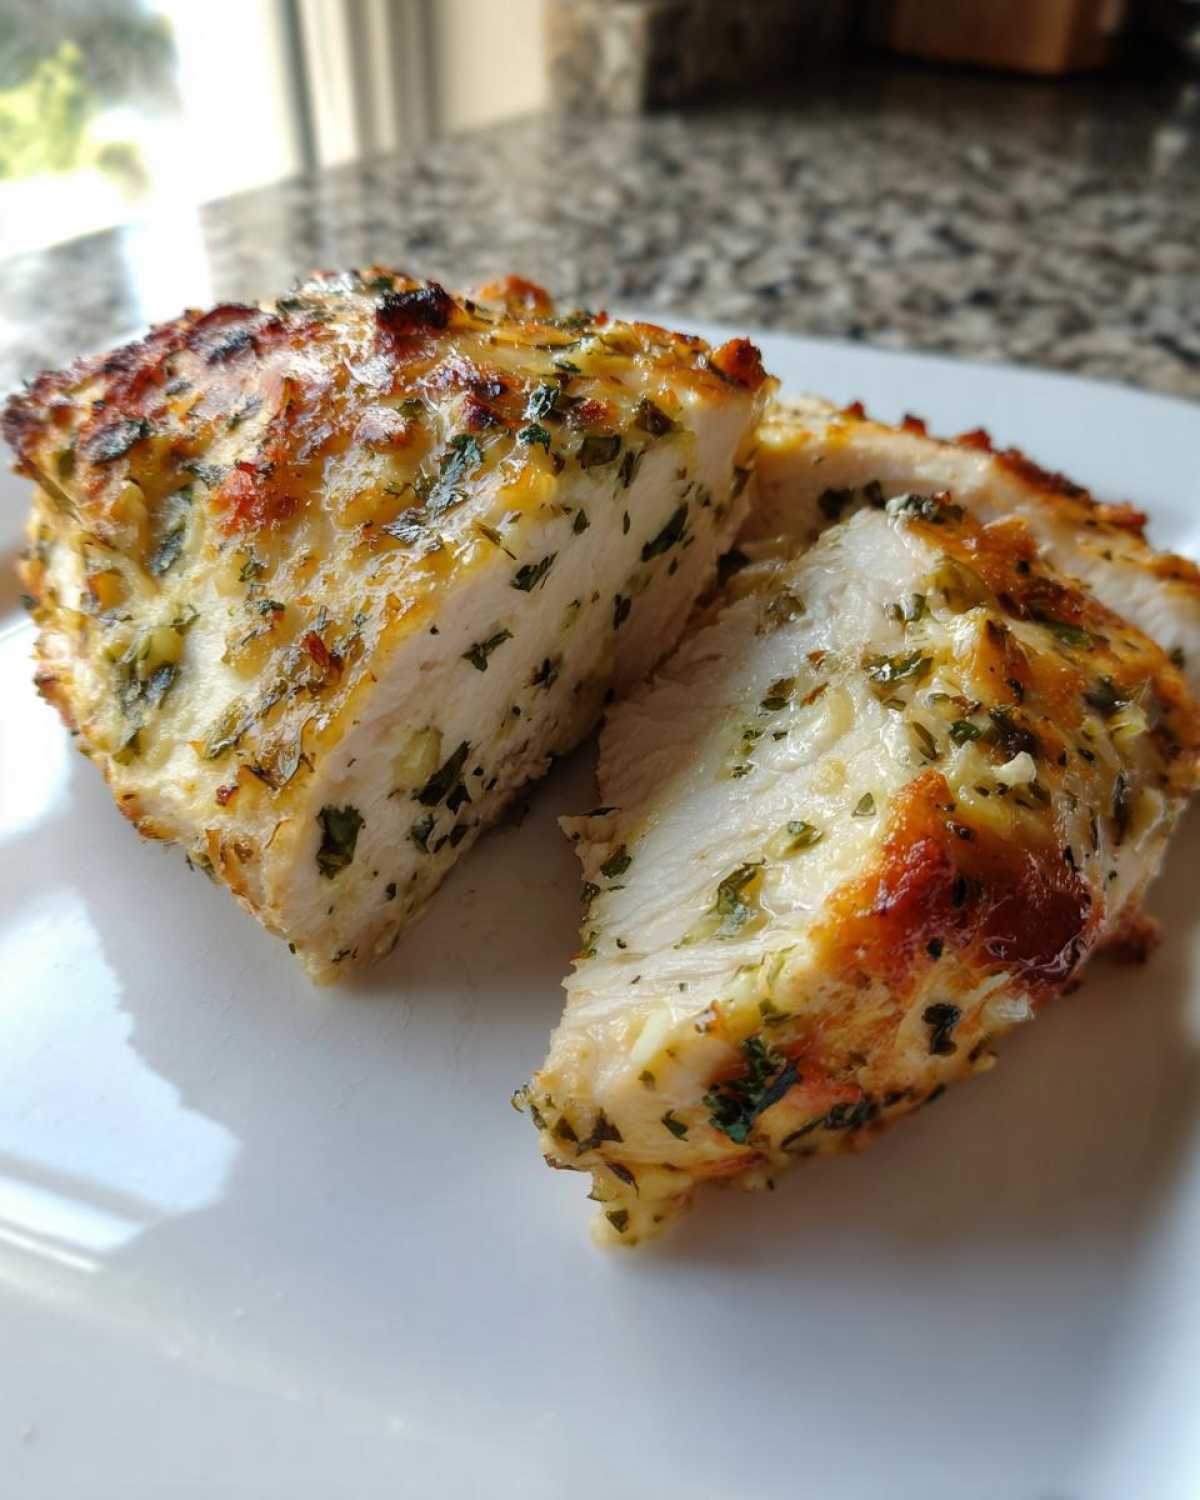
Storage and Reheating Instructions for Your Baked Chicken Breast
One of the best parts about making this **baked chicken breast** recipe is that it’s fantastic for leftovers, provided you store it correctly. Since this is my favorite recipe for meal prep, I’ve gotten pretty good at keeping that beautiful juiciness locked in even for later meals!
For the refrigerator, you want an airtight container. Seriously, don’t just wrap it loosely in foil and toss it in the fridge; that dries it out fast. Store the chicken whole (uncut) if you can, or in big chunks, packed tightly in a plastic container for up to four days. This garlic butter coating is great because the fat helps protect the meat a little bit as it chills.
If you need to freeze it for later, make sure you cool it completely first. Wrap each breast tightly in plastic wrap, then stick that wrapped breast into a freezer-safe zip-top bag. You can keep it frozen for about two months. Just be sure to thaw it slowly overnight in the fridge before reheating!
The Best Way to Reheat Your Moist Baked Chicken Hack
This is where people ruin all the hard work they did trying to achieve that moist baked chicken hack! Never, ever reheat chicken in the microwave uncovered on high heat. That’s a guaranteed way to cook it again, making it tough.
My favorite way to reheat leftover garlic butter chicken breast is in a skillet. Add just a tiny splash—maybe a teaspoon—of water or chicken broth to the bottom of a non-stick skillet, place the chicken on top, and cover it. Heat it gently over medium-low heat until it’s warmed through. That little bit of moisture creates steam, and the steam rehydrates the meat slightly, keeping it tender.
If you’re reheating a bigger batch for meal prep, the oven works well, but you have to be careful. Place the pieces in a baking dish with a tablespoon of water or broth, cover the whole dish tightly with foil, and heat at a low 300°F (150°C) until warmed. This low and slow steam bath prevents further drying out and preserves that wonderful tenderness we worked so hard for!
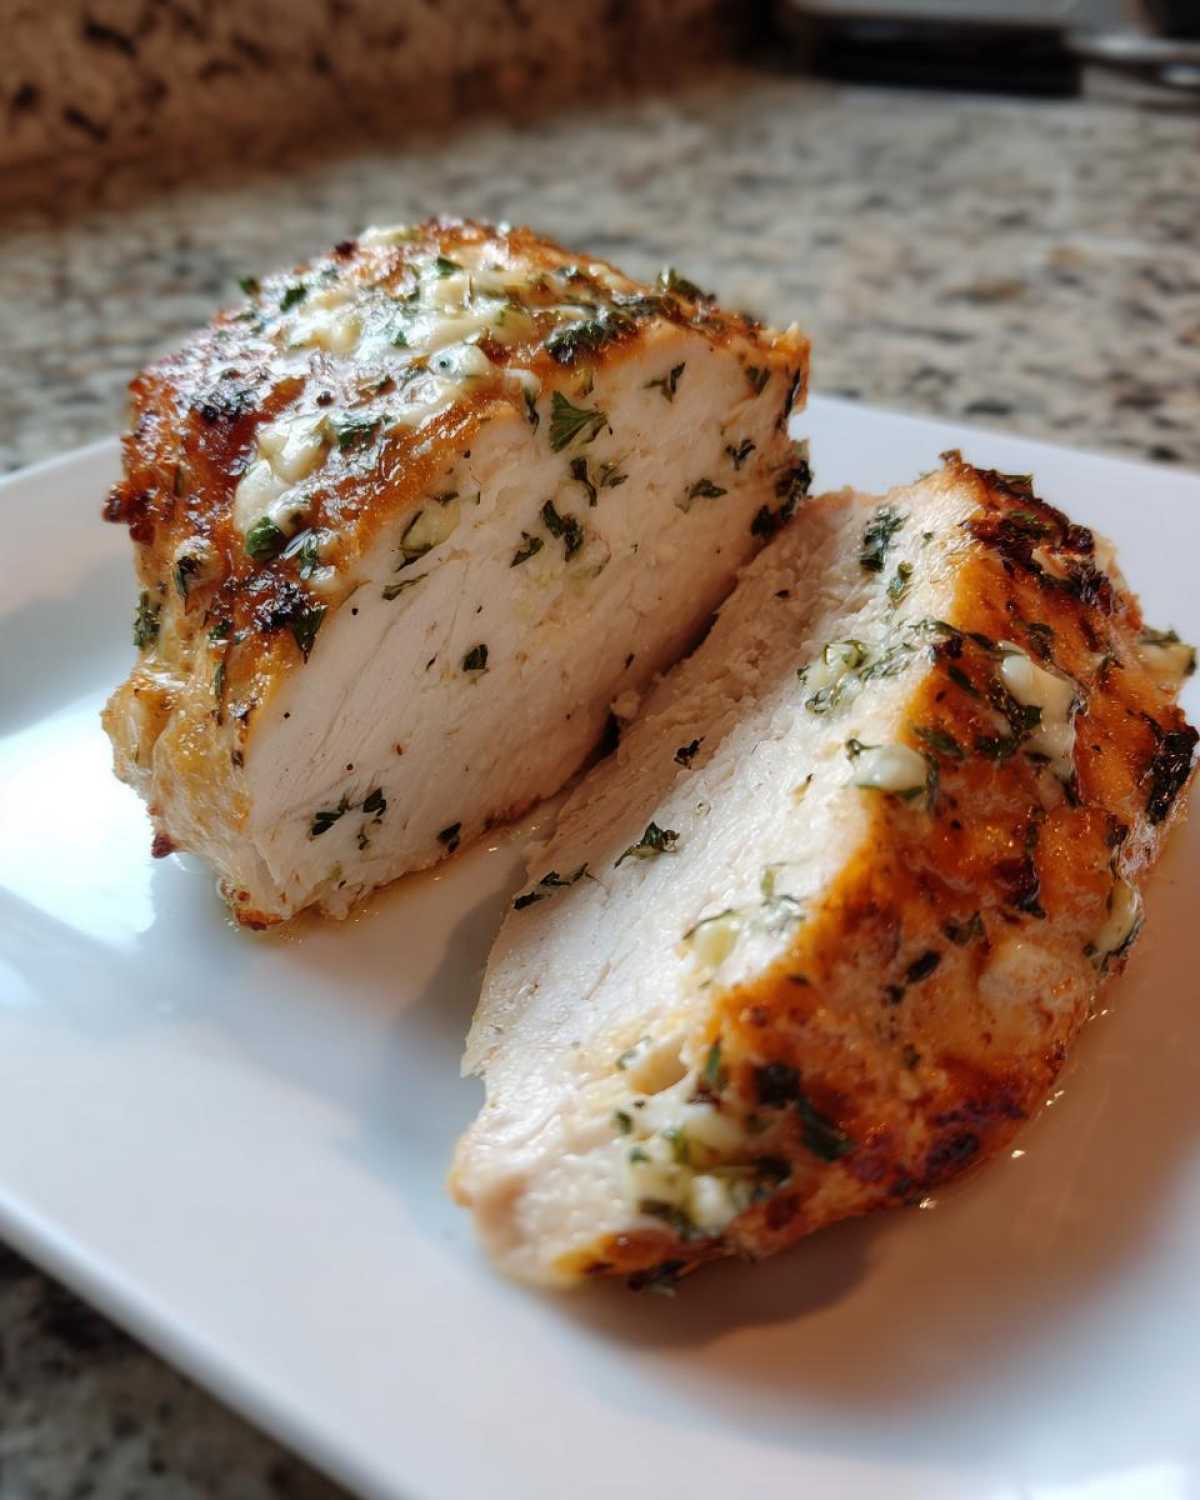
Frequently Asked Questions About This Oven Baked Chicken Breast Recipe
Can I skip the garlic butter and just use spices for a healthier meal?
You totally can, but you’ll miss out on the richness that helps keep the meat moist! If you need a healthier take, you can use a mix of olive oil sprayed on lightly instead of the butter, and really emphasize the salt and spices. But remember, fat equals moisture insurance! If you’re worried about sodium or want a lower-fat take, consider quickly brining the chicken first, as we talked about above, to add moisture the fat usually provides. It still comes out as a fantastic healthy baked chicken recipe even with the butter.
What internal temperature ensures I get a juicy baked chicken breast every time?
This is the most important question! The USDA recommends 165°F (74°C) for safety, and that’s what we aim for. But because this meat is so lean, if you wait until it hits 165°F *while it’s still in the oven*, it’s probably already overcooked once you take it out and let it rest. My personal secret for the most juicy baked chicken breast is to pull it when the instant-read thermometer hits 160°F (71°C). The carryover heat during the mandatory 5 to 10 minute rest period will bring it safely and perfectly to 165°F. Don’t skip that rest, or you’ll end up back at square one!
Can I use frozen chicken breasts with this quick chicken oven recipe?
Oh, please don’t try to bake chicken from frozen! It absolutely throws off the timing, and you’ll end up with one part that’s steaming and rubbery while the center struggles to catch up. If you need a fast meal, you have to thaw them first. The safest and fastest way to thaw is to place the sealed chicken breasts in a bowl of cold water and change the water every 30 minutes. This is still faster than you think, and it keeps the outside from starting to cook while the inside thaws. For a true 30 minute chicken dinner, you need to start with thawed chicken.
My chicken breasts are really thick—how do I adjust the time?
If you have truly massive chicken breasts (over 8 ounces each), you have two choices just like when we were talking about baking techniques! First, pound them to an even ½ to ¾ inch thickness; this is honestly the best route for predictable results. If you absolutely can’t pound them, you might need to add 5 to 8 minutes to the cook time, but you *must* check the temperature religiously with your thermometer. Don’t let the timer dictate the doneness; the thermometer is your guide for this simple baked chicken dinner.
Nutritional Estimates for Garlic Butter Chicken Breast
Hey, I know that while flavor and moisture are the main focus here—because trust me, dry chicken is a tragedy—some of you still need to track your macros, especially if this is going into your weekly rotation. I always want to be upfront about what’s in this **baked chicken breast**, so please remember that these numbers are just estimates based on the ingredients listed.
Since we are using real butter and a lean protein source like chicken breast, the ratios look pretty good for a healthy meal, though! If you are strictly watching sodium, that’s the number you’ll want to keep an eye on, but otherwise, this is a fantastic, high-protein, low-carb option. These estimates cover one serving, which is one whole chicken breast from our recipe.
Here is the breakdown:
- Serving Size: 1 breast
- Calories: 280
- Protein: 35g
- Fat: 14g (with 8g saturated fat from the butter)
- Carbohydrates: 1g
- Sugar: 1g
That’s a hefty dose of protein to keep you feeling full, especially if you’re looking for great baked chicken breast for meal prep! If you make adjustments, like using less butter or skipping the full amount of salt, your final numbers will vary, of course. Happy cooking!
Share Your Results with This Simple Chicken Dinner Idea
Well, that’s it friends! We’ve gone from raw chicken to what I promise is the most tender **baked chicken breast** you’ve made all year. Seriously, I put so much effort into finding the best, most foolproof oven baked chicken breast recipe, and I genuinely want to know if it worked for you!
Once you’ve rested your chicken and carved into that beautiful, juicy interior—don’t forget to take a picture!
I would absolutely love it if you took two minutes to leave a rating below. If you managed to get five stars on this **juicy baked chicken breast**, please let me know! A comment telling me how fast it was for your easy chicken breast dinner helps others see that they can master this too. Happy eating!
Print
Foolproof Juicy Garlic Butter Baked Chicken Breast
- Total Time: 35 min
- Yield: 4 servings
- Diet: Low Fat
Description
This recipe provides a simple method for baking chicken breasts in the oven to achieve a consistently moist and tender result using garlic butter seasoning.
Ingredients
- 4 boneless, skinless chicken breasts (about 6-8 oz each)
- 1 teaspoon salt
- 1/2 teaspoon black pepper
- 1/2 teaspoon paprika
- 1/4 teaspoon garlic powder
- 4 tablespoons unsalted butter, softened
- 2 cloves garlic, minced
- 1 tablespoon fresh parsley, chopped
Instructions
- Preheat your oven to 400 degrees Fahrenheit (200 degrees Celsius). Lightly grease a baking dish.
- Pat the chicken breasts completely dry with paper towels. This helps the seasoning adhere.
- In a small bowl, mix the softened butter, minced garlic, and chopped parsley until combined.
- Season both sides of the chicken breasts evenly with salt, pepper, and paprika.
- Place the seasoned chicken breasts in the prepared baking dish.
- Place about 1 tablespoon of the garlic butter mixture evenly over the top of each chicken breast.
- Bake for 20 to 25 minutes, or until an instant-read thermometer inserted into the thickest part registers 165 degrees Fahrenheit (74 degrees Celsius).
- Remove the chicken from the oven and let it rest on a cutting board for 5 to 10 minutes before slicing or serving. This resting period keeps the juices inside.
Notes
- For extra moisture, you can briefly soak the chicken breasts in a simple brine (1 cup water to 1 tablespoon salt) for 15 minutes before seasoning and baking. Pat them very dry afterward.
- Use an oven-safe meat thermometer to check the internal temperature accurately; do not rely only on time.
- If your chicken breasts are very thick, pound them slightly to an even thickness before seasoning for more uniform cooking.
- Prep Time: 10 min
- Cook Time: 25 min
- Category: Dinner
- Method: Baking
- Cuisine: American
Nutrition
- Serving Size: 1 breast
- Calories: 280
- Sugar: 1
- Sodium: 550
- Fat: 14
- Saturated Fat: 8
- Unsaturated Fat: 6
- Trans Fat: 0
- Carbohydrates: 1
- Fiber: 0
- Protein: 35
- Cholesterol: 110