
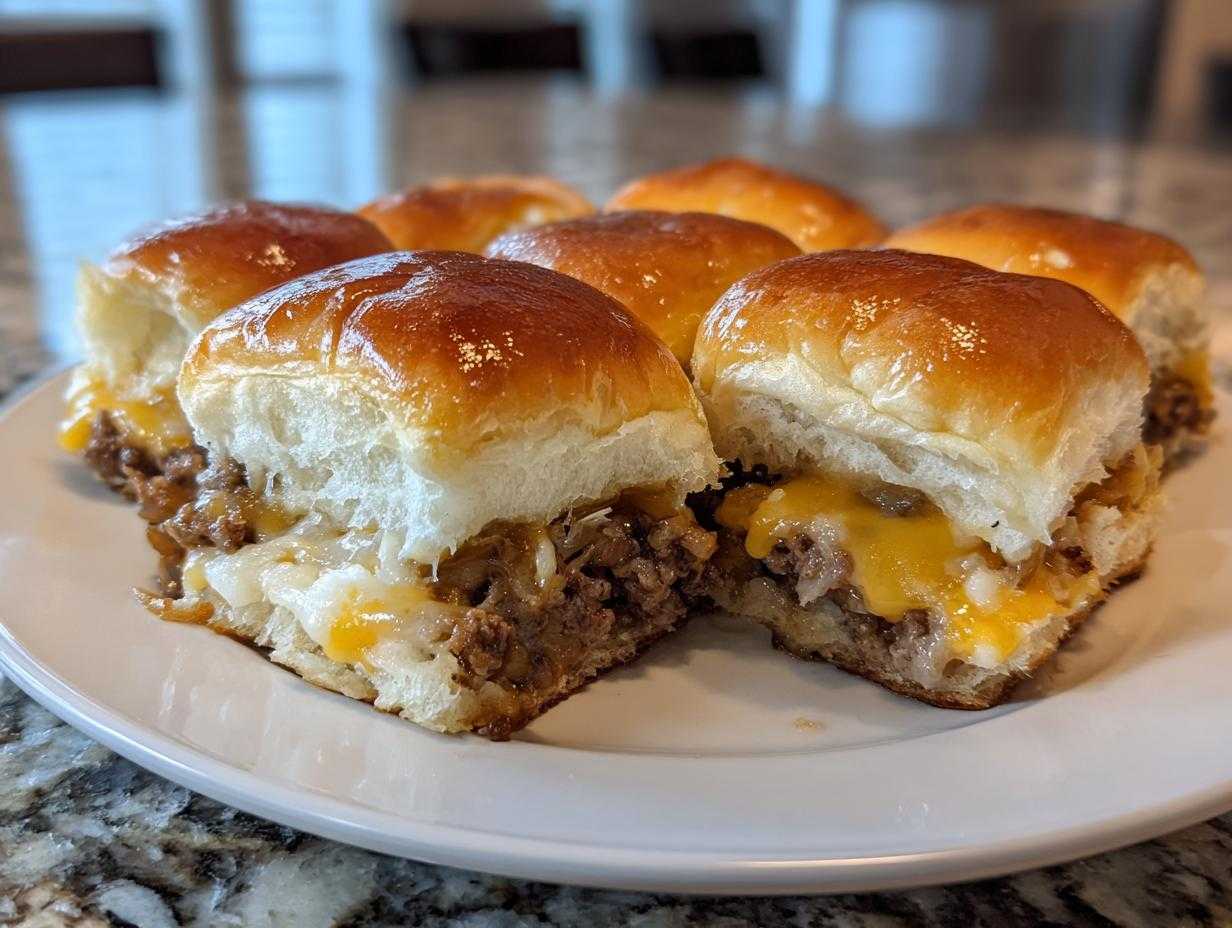
You know those nights, right? You blink, and suddenly it’s 6 PM, and someone—usually me—yells, “Feed us!” When that happens, I grab the ground beef hidden in the freezer because I always have a killer solution ready. Forget fussy single patties; my absolute favorite answer for satisfying everyone fast is these Sheet Pan Cheesy Ground Beef Sliders with Caramelized Onions. I’m not kidding, these things are legendary at game days and weeknight dinners alike. I rely on these kinds of simple ideas all the time when I need a win, which you can see in my category for quick and easy meals. Watching that cheese melt under the golden, buttery rolls is pure joy, and you barely dirty a pan! Trust me, once you try this super simple baked method, you’ll wonder how you ever managed without it.
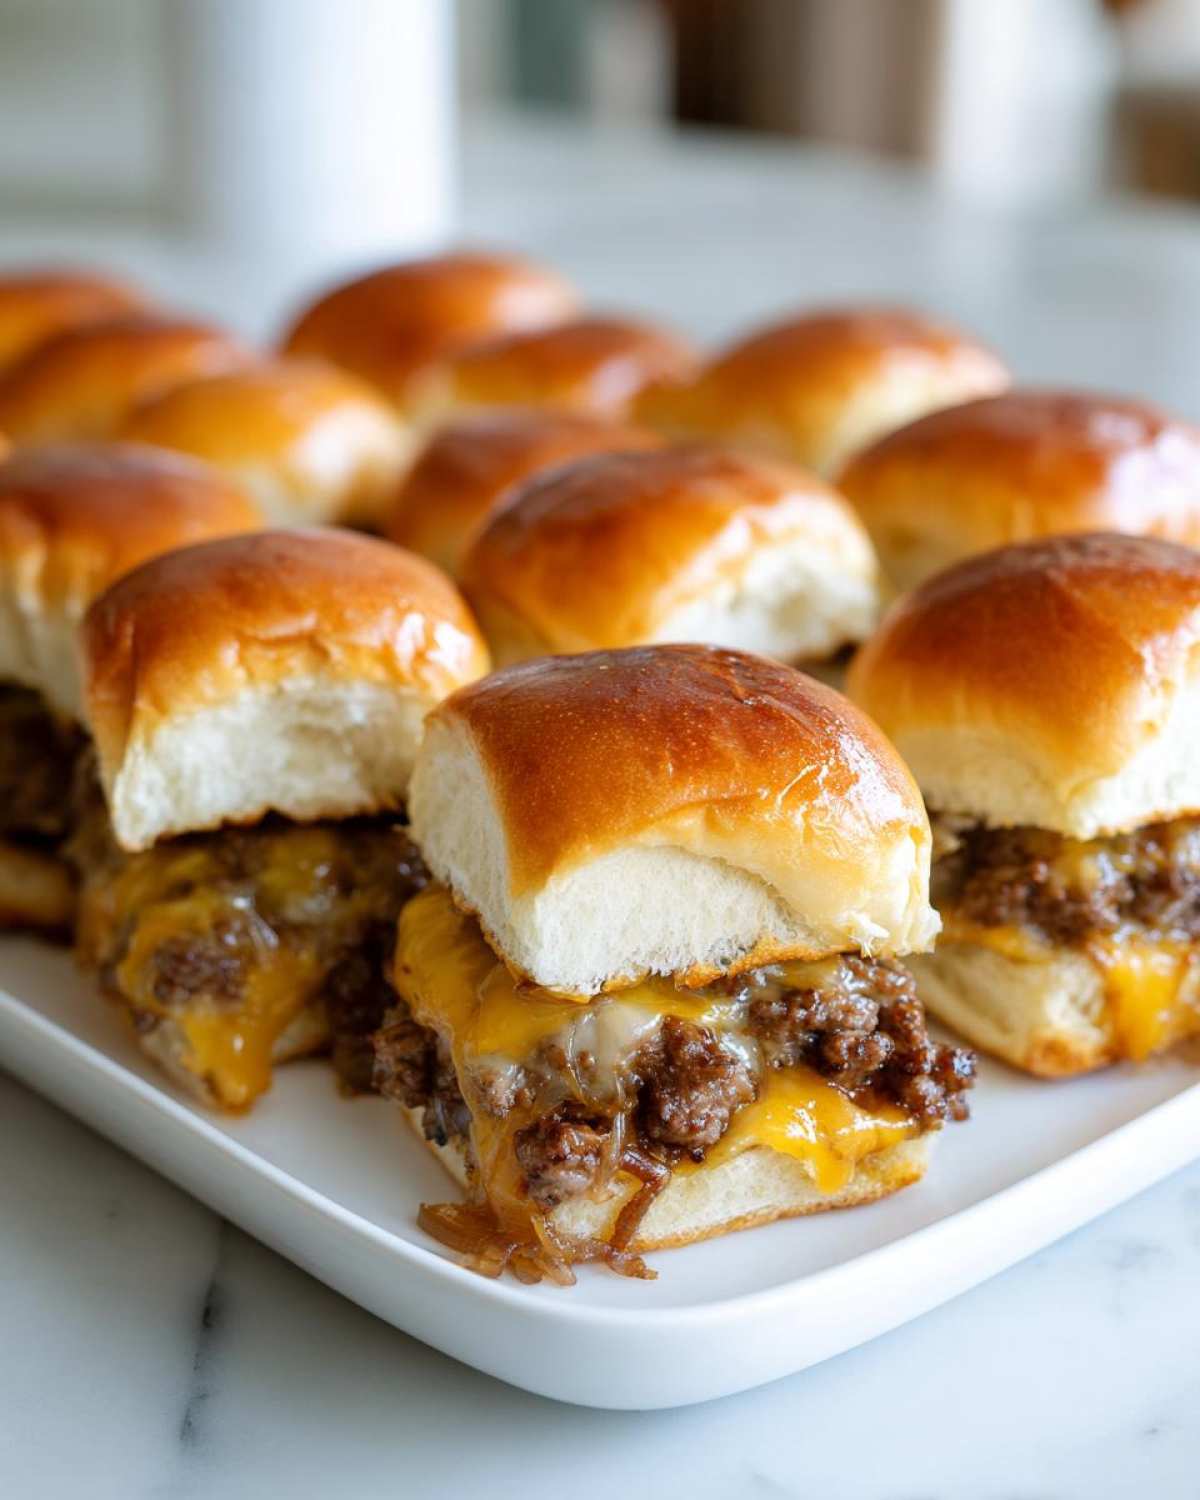
Why You Will Love These Cheesy Ground Beef Sliders
Honestly, I keep coming back to this recipe because it checks every single box I have when I’m aiming for maximum flavor payoff with minimum effort. Who needs fancy grilling equipment when you have an oven and a sheet pan?
- They bake all together! You mix the filling, pile it onto the connected buns, brush the tops, and pop the whole thing in the oven. It’s perfect for when you need easy appetizers.
- That caramelized onion magic! Slicing and slowly cooking those onions first adds a deep, sweet background flavor that elevates this way beyond a simple stovetop burger patty. It makes these true contenders for the best ground beef sliders.
- It uses Hawaiian rolls—you know the slightly sweet, soft ones? They get this incredible golden crunch on top from the butter glaze, but stay super soft underneath the meat and cheese.
- Clean up is a dream, seriously. Since everything cooks on one sheet pan (or in one dish), you’re not scrubbing five different skillets afterward.
- They are inherently family-friendly. Even my picky eater dives right into these because they’re miniature, cheesy, and totally customizable.
Gathering Ingredients for Sheet Pan Cheesy Ground Beef Sliders
Okay, let’s talk about what you need, because the beauty of this recipe is that the ingredient list is short and straightforward. You probably have most of this stuff waiting in your pantry right now! Seriously, this is what makes these a go-to when I need quick Hawaiian roll beef sliders on a weeknight.
You’ll grab 1.5 pounds of your favorite ground beef. I usually go for 85/15 because it gives you enough fat for flavor without leaving a giant grease slick on the pan, but use whatever you prefer!
Here is everything else you need to gather for the beef filling and the amazing topping:
- 1 large yellow onion, thinly sliced (We’re going to take our time with these, so don’t rush the slicing!)
- 1 tablespoon olive oil
- 1 teaspoon salt and 0.5 teaspoon black pepper (Basic but necessary!)
- 1 teaspoon garlic powder and 0.5 teaspoon onion powder (These are the backbone of the seasoning.)
- 12 slider buns—and listen, I highly recommend grabbing those sweet Hawaiian rolls. They soak up the butter topping so beautifully and give the final slider a perfect sweet/savory balance.
- 8 slices of cheddar cheese. Don’t skimp here; cheese is crucial!
- 2 tablespoons butter, melted
- 1 tablespoon Worcestershire sauce (This adds that essential savory ‘oomph’!)
Key Ingredient Notes and Substitutions
When it comes to making these work perfectly every time, a few small details really make a difference, building on that trust you build when you cook from scratch. Don’t worry if your cheese drawer isn’t stocked with cheddar, though!
If you aren’t a cheddar fan, or just want a different melt, American cheese works like a charm because it melts beautifully flat over the hot beef. Monterey Jack is another great choice if you want something a little milder. Just ensure you have 8 slices total, one for each slider.
Also, here’s a little secret from my test kitchen: When you mix your melted butter and Worcestershire sauce to brush over the tops, go ahead and whisk in one teaspoon of Dijon mustard if you have it. It doesn’t make the sliders taste overtly mustardy, but it deepens the savory flavor immensely before they bake. It’s a total game-changer for making these easy cheesy beef sliders!
Step-by-Step Guide: How to Make Cheesy Ground Beef Sliders
Alright, let’s get down to business! This is where we turn ingredients into the most delightful little ground beef slider recipes you’ve ever tried. Since we are baking them all at once, timing is key, but honestly, it’s so straightforward. You’re basically building seven-layer dip but in sandwich form, which is way more satisfying!
Caramelizing Onions and Cooking the Beef Filling
First things first: the onions need patience. Grab that big skillet and your tablespoon of olive oil. Toss in those thinly sliced onions and set the heat to medium. Now, walk away for a minute—I mean it! You need to cook these slowly for a good 15 to 20 minutes until they are soft, sweet, and nicely browned. Seriously, don’t rush them, that slow cook is what makes them taste like they took hours instead of minutes.
Once those onions are done, scoop them out and set them aside. Next up is the ground beef. Drop that pound-and-a-half into the same hot skillet. Break it up with a spoon, cooking until there’s absolutely zero pink left. The most important thing here is draining! Tip your skillet carefully and pour off all that extra grease. Nobody wants greasy sliders, right?
Okay, ground beef drained? Perfect. Now toss in your seasonings: the salt, pepper, garlic powder, and onion powder. Stir it all up! Then, fold those beautiful caramelized onions right back into the seasoned meat mixture. Give it one last stir—that’s your filling done!
Assembling and Brushing Your Cheesy Ground Beef Sliders
Time to build! Take your 12 slider buns and carefully slice them horizontally, keeping the tops and bottoms connected in one big block. Place the bottom halves snugly into your greased 9×13 dish. You want them touching so they support each other while baking.
Now comes the fun part. Take that seasoned mixture of beef and onions and spread it out evenly across all those bottom buns. Try to get a nice, solid layer on every single one. Next, lay a slice of cheddar right on top of the meat for each slider. If you’re short a bun or two, just make sure the meat and cheese reach the edges so you get coverage.
Cap it off with the top halves of the rolls. Before it goes anywhere near the oven, we need the secret weapon: the beautiful, savory wash! Whisk together that two tablespoons of melted butter with your tablespoon of Worcestershire sauce. Now, grab a clean pastry brush and generously paint this mixture all over the top of the entire slab of rolls. Don’t be shy; this is what makes the tops golden and crunchy. These truly become the easy cheesy beef sliders everyone raves about!
Baking and Resting the Final Cheesy Ground Beef Sliders
Preheat your oven to 375 degrees Fahrenheit! Once your sliders are assembled and brushed, slide that dish right into the preheated oven. They only need 12 to 15 minutes. You’re looking for two things: the cheese needs to be totally melted and gooey, and those top buns should have turned a lovely, light golden brown. If your oven runs hot, check at 12 minutes just in case!
When they come out, resist the urge to tear them apart immediately! This is my biggest tip for great baked sandwiches: let them rest for about five minutes. This short break allows the cheese to set up just a tiny bit and lets the interior moisture redistribute. After five minutes, take a big sharp knife and slice right between the rolls. Now you have 12 perfect, individually portioned Cheesy Ground Beef Sliders, ready for dipping or devouring whole! These are perfect for serving up as easy how to make ground beef sliders!
Tips for the Best Baked Cheeseburger Sliders
Even though this recipe is pretty much foolproof—I mean, who can mess up baked cheese and meat on a roll?—I’ve definitely learned a couple of little tricks over the years to make sure they come out absolutely spectacular every single time. We’re aiming for that perfect contrast: a slightly crisp, savory top and a warm, gooey inside. Nobody likes a soggy bottom, especially when you’re relying on something this quick to be your star player!
If you’re making these for a huge crowd, like for the Super Bowl, you might be tempted to pile the meat mixture too high. Resist that urge! If the meat layer is too thick, the middle sliders won’t cook through properly, and the cheese won’t melt evenly on the edges. Keep that meat layer generous but level—it’s all about symmetry in the pan to nail these baked cheeseburger sliders.
To combat sogginess—which is the real enemy of any baked sandwich—make sure you drain that beef really well after cooking. I usually blot it with a few paper towels right in the skillet just to wick up any lingering liquid before I mix in those onions. Also, if your 9×13 glass dish feels too shallow, using a sheet pan lined with parchment, like I mentioned earlier, gives the bottom buns a little more breathing room to toast gently instead of steaming against the hot glass.
Don’t skip the butter brush either! That brushing on top isn’t just for looks; it’s what creates that barrier that helps prevent the tops from drying out while the cheese melts underneath. It locks in the moisture while giving you that gorgeous, slightly savory crunch. If you see a recipe for these dinner sliders with ground beef that tells you to skip the topping, just walk away—it’s the best part!
Make-Ahead and Storage for Easy Cheesy Beef Sliders
My favorite part about this recipe, besides the incredible flavor, is how forgiving it is for planning ahead. If you’re hosting a party or just want to skip a step after a long workday, you totally can get these ready in advance! The notes mentioned that you can assemble these sliders a few hours ahead of time, and I lean into that all the time. It truly makes serving up these appetizer beef sliders for a crowd stress-free.
To prep ahead, just follow the assembly steps right up until the butter brushing. Put the meat and cheese on the bottom buns, place the tops on, and then cover the whole dish tightly with plastic wrap. You can tuck this covered dish right into your refrigerator for up to four hours. When you’re ready to bake, just pull it out, let it sit on the counter for about 15 minutes while the oven heats up, brush on that butter mixture, and bake as directed. I keep homemade food storage solutions in mind when planning meals, so check out my tips on making things ahead for later, too!
Now, what about leftovers? Because sometimes, somehow, we actually have leftovers! Store any remaining sliders in an airtight container in the fridge for up to three days. They are surprisingly good cold, but you definitely want them warm.
Reheating is where you have to be a little careful if you want to keep that soft bun texture. If you only have one or two to reheat, the microwave is fast, but it usually makes the bread a bit chewy. If you use the microwave, aim for about 30 seconds, then maybe 15 seconds more if needed. For the best result, use the oven! Wrap the leftovers loosely in foil and pop them back into a 325°F oven for about 10 minutes. That gentle heat melts the cheese back beautifully without drying out the meat or turning the buns into rubber. It’s worth the extra 10 minutes!
Serving Suggestions for Your Dinner Sliders with Ground Beef
These wonderful Cheesy Ground Beef Sliders are hearty enough to be a main meal, but sometimes even the best comfort food needs a buddy on the plate, right? Since the main event is savory, cheesy, and packed with caramelized onions, I always try to pair them with something bright, crunchy, or creamy to balance everything out. When I serve these up as main dinner sliders with ground beef, I keep the sides simple so the sliders themselves shine.
If you’re bringing these to a big gathering, you absolutely cannot go wrong with a classic salad. A crisp wedge salad with blue cheese dressing is fantastic—the cool crunch contrasts so nicely with the warm, soft buns.
But for a weeknight meal, my go-to is usually something potatoes based that I can make while the sliders are baking. I recently perfected this amazing recipe for steakhouse potato salad that has bacon and chives. It’s creamy but has enough acidity to cut through the richness of the beef and cheese. It makes the whole meal feel way more gourmet than it actually is, which is always my goal!
If you prefer something lighter, a simple cup of creamy tomato soup is an amazing partner for these savory baked sandwiches. Dunking a slider half into soup? Yes, please. Anything crisp, cool, or tangy seems to work wonderfully here. Just make sure you have plenty of napkins ready when you serve these up!
Frequently Asked Questions About Cheesy Ground Beef Sliders
I always get tons of questions when people try these for the first time, which is great because it means you’re excited to make them! Since these are some of my absolute favorite comfort eats, I’m happy to clear up any confusion. These Cheesy Ground Beef Sliders are pretty forgiving, but here are the top things folks always ask about!
Can I use a different type of ground meat in these sliders?
Oh, you totally can experiment! I designed this recipe around ground beef because the fat content works perfectly with the slow-cooked onions to create that rich flavor we love in a classic cheeseburger. If you use ground turkey, you might want to add a tiny bit more fat back in, maybe swap one tablespoon of the Worcestershire sauce for a splash of beef broth or even a touch of extra oil when cooking the meat, just so it doesn’t get too dry during the baking process. Sausage is interesting too, but it brings a lot of its own seasoning, so you’d want to cut back heavily on the garlic and onion powder listed in the main recipe. Stick with beef for the classic taste, but feel free to play if you’re feeling spunky!
What are the best buns besides Hawaiian rolls for these appetizer beef sliders?
The Hawaiian roll is my top pick because of that hint of sweetness that balances the savory spices, but they aren’t always available, right? For a great alternative when you are looking for the best mini cheeseburger buns recipe, you want something soft but sturdy. Look for standard sweet slider rolls or potato buns—those are excellent! They are soft enough to compress nicely but hold up well under the meat and cheese without disintegrating in the oven.
Here’s a quick tip when dealing with non-connected rolls: you have to buy them in a 12-pack tray and slice them open carefully while they are still linked together on the bottom piece. If you separate them *before* baking, the edges dry out way too fast, and you miss out on that amazing, buttery seal we create around the edges. If you need something even faster, these fall under my category for quick slider recipes, as long as you don’t caramelize the onions first!
How long can I prep these sliders before I need to bake them?
This is a lifesaver question for busy folks! As mentioned in the notes, you can assemble the entire dish—meat, cheese, tops on—a few hours ahead of time. Keep it covered tightly in the fridge. Just remember that when you go to bake them, they’ll need maybe 5 to 8 extra minutes in the oven since they are starting straight from the cold. If you assemble more than 4 hours in advance, I’d advise brushing the tops with the butter mixture right before they go into the oven, rather than brushing them hours before and letting them sit in the fridge, just to keep that topping super fresh!
Can I skip caramelizing the onions?
You *can*, but I really, truly advise against it! If you just sauté the onions on high heat until they turn translucent, they won’t deliver that deep, sweet, almost jammy flavor that balances the sharp cheddar and the beef. That 15-20 minute low-and-slow caramelization is what turns this from a standard cheeseburger into one of the very best ground beef slider recipes out there. It’s worth it, I promise! If you’re truly pressed for time, you could use jarred caramelized onions, but homemade is always better.
Estimated Nutrition for Cheesy Ground Beef Sliders
We all want to know what we’re putting into our bodies, even if it’s a cheat night indulgence! Since these Cheesy Ground Beef Sliders are made with ground beef and sit on sweet rolls, they are definitely a satisfying meal, maybe leaning toward comfort food rather than health food, but they still pack a protein punch!
Here is a general estimate for one slider, based on the ingredients listed. Keep in mind these numbers change quite a bit depending on the fat content of your beef and the brand of rolls you use. Always treat these as guidelines!
- Serving Size: 1 slider
- Calories: 350
- Protein: 22g (Great protein source here!)
- Fat: 18g
- Saturated Fat: 8g
- Carbohydrates: 25g
- Sugar: 6g
You can find some great ways to lighten up your sides in my healthy bites category, which pairs nicely with these hearty sliders!
Share Your Game Day Ground Beef Sliders Experience
I am so excited for you to try these! Seriously, once you see how easy it is to serve 12 people a hot, cheesy, comforting meal with just one pan, you’ll never look at weeknight cooking the same way again. These Cheesy Ground Beef Sliders are one of my go-to recipes for feeding a crowd during the big game, and I hope they become one for you, too!
When you make them up, please come back and leave a rating and a comment down below. Did you use potato rolls? Did you add bacon to the meat mixture? I absolutely love hearing how you tweak my favorites! If you snap a picture of your beautiful golden-topped sliders, tag me online; I adore seeing your cooking adventures. If you need to get in touch about the recipe, you can always use my contact page. Happy baking!
Estimated Nutrition for Cheesy Ground Beef Sliders
We all want to know what we’re putting into our bodies, even if it’s a cheat night indulgence! Since these sliders are made with ground beef and sit on sweet rolls, they are definitely a satisfying meal, maybe leaning toward comfort food rather than health food, but they still pack a protein punch!
Here is a general estimate for one slider, based on the ingredients listed. Keep in mind these numbers change quite a bit depending on the fat content of your beef and the brand of rolls you use. Always treat these as guidelines!
- Serving Size: 1 slider
- Calories: 350
- Protein: 22g (Great protein source here!)
- Fat: 18g
- Saturated Fat: 8g
- Carbohydrates: 25g
- Sugar: 6g
You can find some great ways to lighten up your sides in my healthy bites category, which pairs nicely with these hearty sliders!
Share Your Game Day Ground Beef Sliders Experience
I am so excited for you to try these! Seriously, once you see how easy it is to serve 12 people a hot, cheesy, comforting meal with just one pan, you’ll never look at weeknight cooking the same way again. These Cheesy Ground Beef Sliders are one of my go-to recipes for feeding a crowd during the big game, and I hope they become one for you, too!
When you make them up, please come back and leave a rating and a comment down below. Did you use potato rolls? Did you add bacon to the meat mixture? I absolutely love hearing how you tweak my favorites! If you snap a picture of your beautiful golden-topped sliders, tag me online; I adore seeing your cooking adventures. If you need to get in touch about the recipe, you can always use my contact page. Happy baking!
Print
Sheet Pan Cheesy Ground Beef Sliders with Caramelized Onions
- Total Time: 45 min
- Yield: 12 sliders
- Diet: Low Fat
Description
Make simple, cheesy ground beef sliders baked on a sheet pan with sweet caramelized onions.
Ingredients
- 1.5 lbs ground beef
- 1 large yellow onion, thinly sliced
- 1 tablespoon olive oil
- 1 teaspoon salt
- 0.5 teaspoon black pepper
- 1 teaspoon garlic powder
- 0.5 teaspoon onion powder
- 12 slider buns (Hawaiian rolls work well)
- 8 slices cheddar cheese
- 2 tablespoons butter, melted
- 1 tablespoon Worcestershire sauce
Instructions
- Preheat your oven to 375 degrees Fahrenheit. Lightly grease a 9×13 inch baking dish or line a sheet pan with parchment paper.
- Heat olive oil in a large skillet over medium heat. Add the sliced onion and cook slowly, stirring occasionally, for 15 to 20 minutes until soft and browned. Remove onions from the skillet and set aside.
- In the same skillet, cook the ground beef over medium heat, breaking it up as it cooks, until no pink remains. Drain off any excess grease.
- Stir the cooked beef with salt, pepper, garlic powder, and onion powder. Mix in the caramelized onions.
- Slice the slider buns horizontally, keeping the tops and bottoms in two connected pieces.
- Place the bottom halves of the buns in the prepared baking dish. Layer the cooked beef and onion mixture evenly over the bottom buns.
- Place one slice of cheddar cheese on top of the meat mixture for each slider.
- Place the top halves of the buns over the cheese.
- In a small bowl, mix the melted butter and Worcestershire sauce. Brush this mixture evenly over the tops of the slider buns.
- Bake for 12 to 15 minutes, or until the cheese is melted and the tops of the buns are lightly golden brown.
- Remove from the oven and let stand for 5 minutes before slicing and serving.
Notes
- You can substitute cheddar cheese with American or Monterey Jack cheese.
- For extra flavor, add a teaspoon of Dijon mustard to the melted butter mixture before brushing the tops.
- If you prefer, you can assemble these sliders a few hours ahead and keep them covered in the refrigerator before baking.
- Prep Time: 15 min
- Cook Time: 30 min
- Category: Dinner
- Method: Baking
- Cuisine: American
Nutrition
- Serving Size: 1 slider
- Calories: 350
- Sugar: 6
- Sodium: 550
- Fat: 18
- Saturated Fat: 8
- Unsaturated Fat: 10
- Trans Fat: 0.5
- Carbohydrates: 25
- Fiber: 1
- Protein: 22
- Cholesterol: 65

