
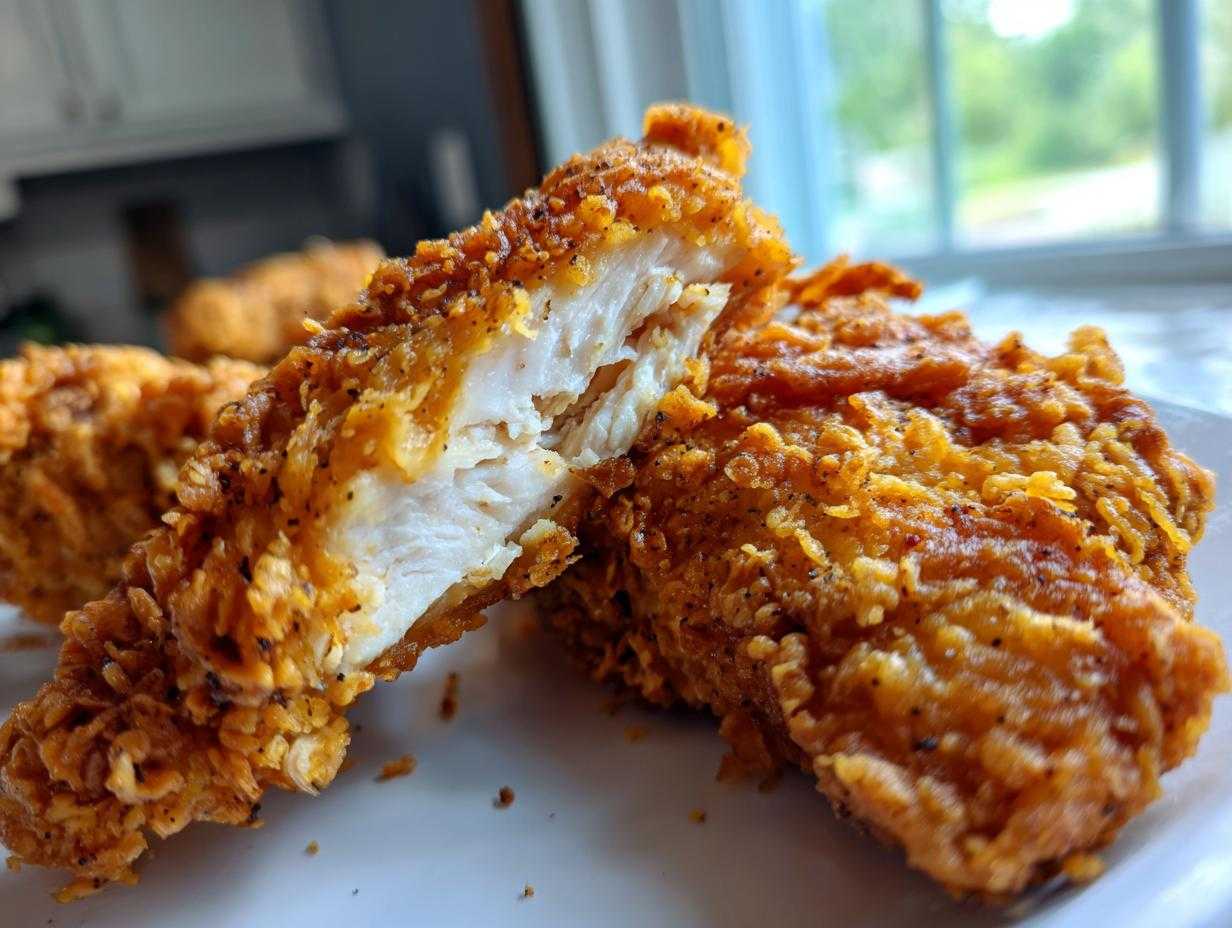
Oh, friends, let me tell you about satisfaction. There is NOTHING in this world better than biting into truly perfect homemade fried chicken. I’m talking about that deep, golden brown crust that makes that wonderful *crunch* sound, followed immediately by the juiciest meat you’ve ever tasted. That’s what we’re achieving today! This ultra-crispy, super-juicy Southern Fried Chicken recipe uses the classic buttermilk soak that my family swears by. As Content Creator here at 911Recipes, I’m always looking for ways to make Grandma’s recipes easier, and trust me, getting this level of crispiness without a complicated process is pure magic. Get ready, because this is the only recipe for fried chicken you’ll ever need!
Why This Buttermilk Southern Fried Chicken Recipe Works
When you want the best homemade fried chicken, you can’t skip the science! This recipe is superior because it tackles the biggest fried chicken issues head-on: dry meat and soggy crusts. I’ve tested this method countless times to make sure it delivers that classic Southern flavor while being foolproof. Say goodbye to bland, sad chicken!
- It guarantees moisture that lasts, making it perfect for an easy fried chicken dinner.
- The coating stays put, giving you that beautiful, craggy texture.
- The seasoning penetrates deep, delivering amazing savory flavor in every bite.
The Secret to Juicy and Crispy Chicken: Buttermilk Brining
The absolute core of this recipe, and why it beats simple soaking methods, is the Buttermilk Brined Chicken step. Buttermilk doesn’t just add flavor; the lactic acid tenderizes the muscle fibers beautifully. When the acidity works its magic overnight, the resulting chicken meat is unbelievably tender and moist. Plus, the thick, slightly tacky buttermilk bath is what makes the flour stick so well!
Building the Crunchy Chicken Coating for Maximum Crispiness
We aren’t messing around with the crust here! To guarantee a crunchy chicken coating that holds up, we rely on two things: cornstarch and the double-dip. Adding that cornstarch to the flour mix ups the crisp factor significantly. And for those moments when you want it extra intense? That quick second dip back into the buttermilk adds the extra glue needed for those delightful, uneven, crispy bits.
Gathering Ingredients for Perfect Fried Chicken
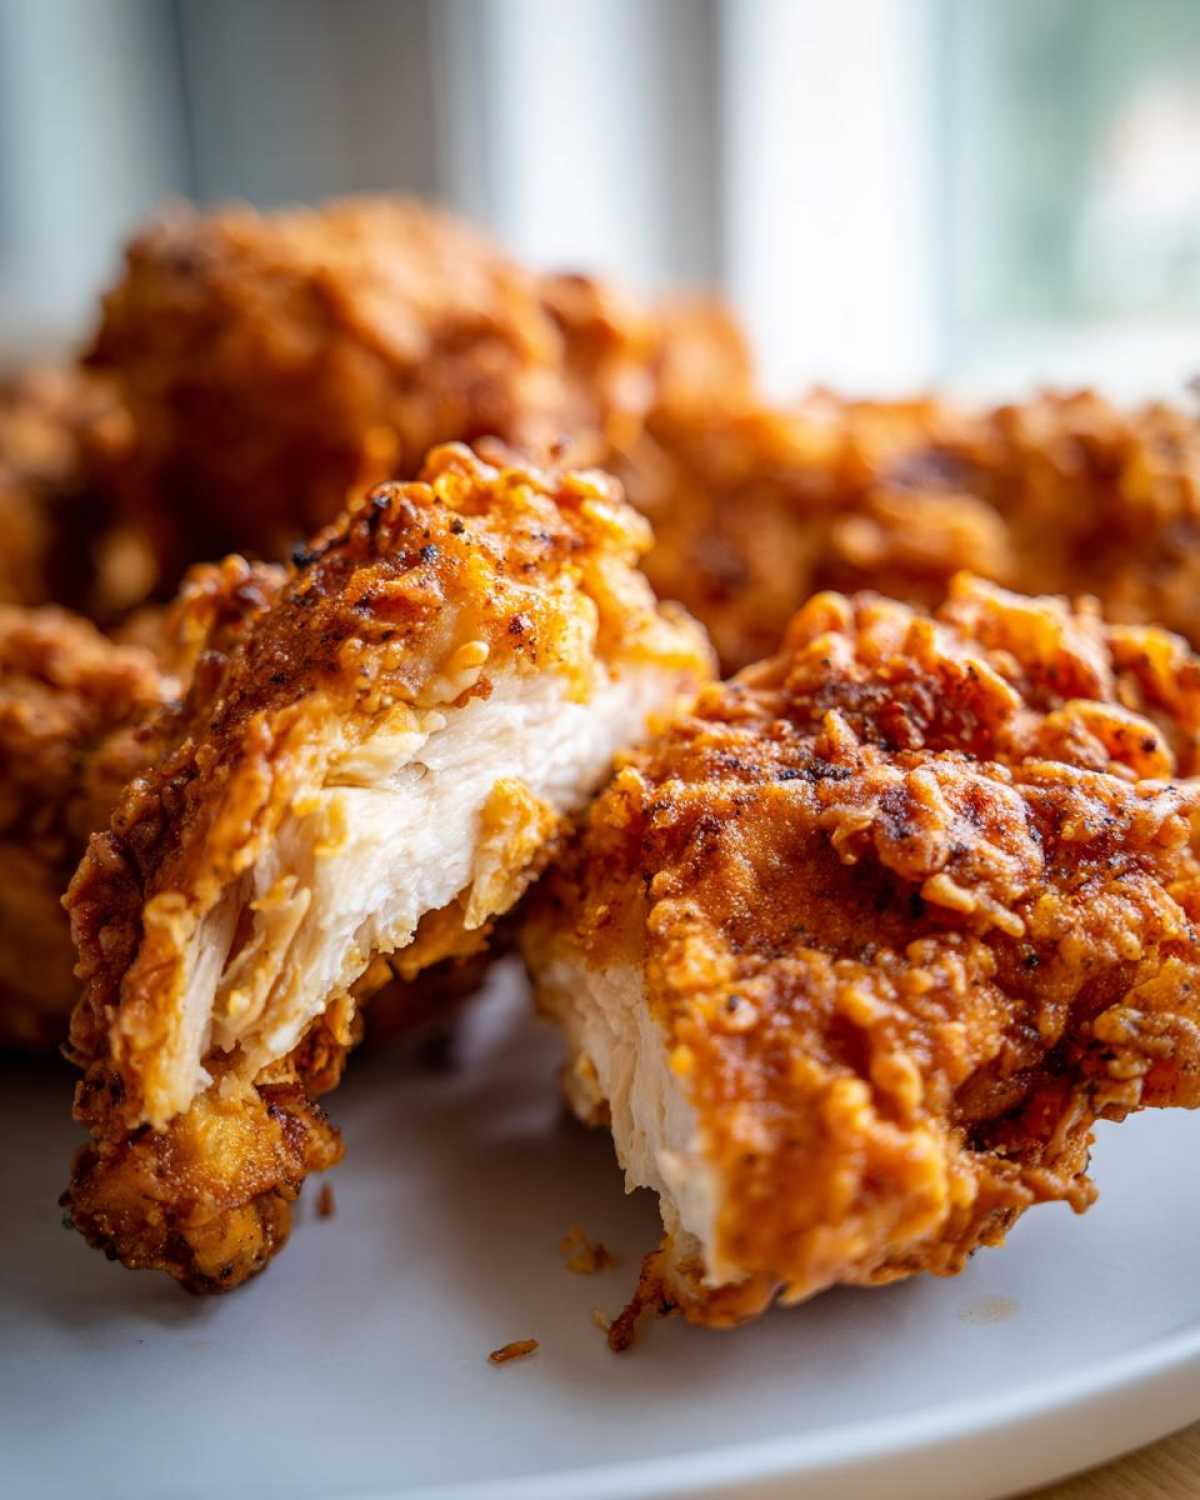
Now that we understand *why* this fried chicken works so well, let’s talk about what you need! Getting that golden, crunchy texture starts right here with the right measurements. Don’t eyeball this part, okay? Every ingredient plays a role in making sure your chicken is unbelievably juicy on the inside and beautifully coated on the outside. Don’t worry if you’ve never fried before; having these goodies ready makes the process smooth sailing. It’s worth grabbing quality ingredients, especially for the main event!
We usually use bone-in, skin-on pieces—the thighs and drumsticks are my absolute favorites for frying. Make sure you have about 4 pounds ready to go for a solid family meal.
For the Buttermilk Soak
This is where the tenderizing happens! You’ll need:
- 4 cups buttermilk (the good, thick stuff!)
- 2 tablespoons kosher salt
- 1 tablespoon black pepper
- 1 teaspoon cayenne pepper (only if you like a little happy heat)
For the Crispy Flour Dredge
Here’s where we lock in that amazing texture. See that cornstarch? That little addition is what separates basic flour dredge from the best homemade fried chicken coating. It adds that extra layer of shatter!
- 4 cups all-purpose flour
- 1/2 cup cornstarch (trust me on this one!)
- 2 tablespoons paprika
- 1 tablespoon garlic powder
- 1 tablespoon onion powder
For Frying
This is crucial for safety and success! You need enough oil to truly submerge the chicken, so plan for about 2 inches deep in your heaviest skillet. We recommend vegetable oil or shortening, or a blend of the two. If you’re curious about healthier methods, some folks try baking or air frying it, but for proper deep-fried chicken flavor, you need the deep oil bath. You can check out some alternatives for cooking your chicken here!
How To Make Fried Chicken: Step-by-Step Instructions
Okay, this is the main event! Following these steps exactly will give you that beautiful, signature exterior and guarantee you succeed in making the best homemade fried chicken. It seems like a lot of fuss, but trust me, each small action builds up to that perfect crunch. We’re going step-by-step so this fried chicken process feels totally manageable, not scary.
Step 1: Marinate the Chicken for Flavor
The very first thing you need to do is get that chicken into the spiced buttermilk. Cover it up tight and shove it in the fridge. You absolutely need a minimum of 4 hours for the buttermilk to work its tenderizing magic—I’m serious, don’t rush this! If you can swing it, letting it sit overnight means the meat soaks up all that salt and spice, resulting in the juiciest experience possible. It makes a huge difference!
Step 2: Prepare the Dredge and Double Dip for Extra Crispiness
While your chicken is chilling out, whisk together your flour and spice mix really well. Once the chicken is ready, pull a piece out, let the heavy buttermilk drip off (but don’t shake it dry!), and cover it completely in the flour. Now, here’s where you press! Really push that flour hard into the chicken to create those rocky, craggy bits we love.
If you want that *ultra-crispy* coating, this is your moment: dip that floured piece right back into the leftover buttermilk for just a quick second—like a dip, not a soak—and immediately toss it back into the flour. Press it down again! That second coating gives you that incredible texture that mimics classic Southern Fried Chicken.

Step 3: Rest the Coated Chicken
This might seem like a weird break in the action, but it’s vital! Lay your freshly coated chicken pieces on a wire rack over a tray. You need to let them rest at room temperature for about 20 minutes before they hit the hot oil. Why? This resting time lets that final layer of moisture from the buttermilk absorb into the flour mixture. If you skip this, trust me, your gorgeous coating will flake right off into the oil once it starts sizzling! You can see a fantastic visual breakdown of this technique here.
Step 4: Deep Fried Chicken at the Right Temperature
Time for the heat! Get your oil going until it hits exactly 325 degrees Fahrenheit. If you have a thermometer, use it—it is your best friend for deep fried chicken success. Add the chicken pieces carefully. Do not put too many in at once! Overcrowding the pan drops the oil temperature instantly, and that leads to greasy chicken instead of that perfect, golden brown chicken exterior. Fry for about 6 to 8 minutes on each side until they are deeply colored and perfectly cooked inside.

Expert Tips for Foolproof Fried Chicken Success
Listen, even with the best recipe, making amazing fried chicken can feel nerve-wracking. That’s why I want to share the little secrets that make this a truly foolproof fried chicken experience! You need to treat that oil temperature like it’s precious cargo.
I remember one time, years ago, I got distracted checking my phone while refilling the oil. I rushed it, dropped the chicken in when it was only lukewarm, and ended up with pale, greasy sponges instead of crunchy delights. Never again! That taught me temperature control is everything if you want that perfect golden brown chicken.
These little tips, straight from the notes my aunt kept, will help you nail that texture every single time. You can find an amazing guide to perfecting the Southern style that I used when practicing right here.
Oil Selection and Temperature Control for Golden Brown Chicken
For the very best results, I highly recommend a blend of shortening and vegetable oil. The shortening helps the crust get that fantastic, stable crispiness that stays crunchy even when you let it sit for a minute. If you go this route, you need to keep that temperature strictly between 315°F and 330°F while frying. If it dips too low, the chicken gets oily and heavy. If it creeps up past 330°F, you’ll burn the outside before that inside meat catches up!
Serving Suggestions for Your Savory Chicken Dinner Ideas
The star of the show is definitely this unbelievably juicy and crispy chicken, but let’s be honest, no Southern Fried Chicken is complete without its supporting cast! We’re talking about true comfort food classics here. When I serve this up, I always go for creamy mashed potatoes—the gravy is non-negotiable, you know? Or maybe some classic buttery green beans or sweet corn casserole.
These suggestions make for the ultimate savory chicken dinner ideas that taste just like Sunday dinner at Grandma’s. Want some inspiration for those sides? I found a few great pairings over at this link!
Storing Leftover Fried Chicken
Oh, the eternal struggle! Having leftovers of the best homemade fried chicken is amazing, but nobody wants soggy skin the next day. The moisture from the inside meat tends to steam the crust when it’s trapped, and that’s the enemy of crispiness!
The minute the chicken is cooked and has cooled down slightly (but is still warm), do not put it in a sealed plastic container. That traps all the residual heat and steam right against the crust. You want air circulation! Transfer any remaining pieces to a wide, shallow dish lined with a paper towel, and then loosely cover it with foil or plastic wrap. I mean *loosely*—just enough to keep dust out, but letting the humidity escape.

Reheating for Maximum Crunch
When you’re ready for round two, toss out the microwave! The microwave is basically a steam engine designed to turn crunchy coatings into sad, chewy blankets. My preferred method, hands down, is using the oven or, if you have one, an air fryer.
Oven Reheating Method
Pop your oven onto about 375 degrees Fahrenheit. Set up a wire rack on top of a baking sheet—just like we did when it was first cooking! Placing the chicken on the rack ensures air keeps flowing underneath. Bake for about 10 to 15 minutes, or until the chicken is piping hot throughout. You’ll be shocked how much of that original crunch comes right back!
Air Fryer Reheating Tip
If you want fast results, the air fryer is great, but you have to work in single layers. Set your air fryer to about 350 degrees Fahrenheit. It usually only takes 5 to 8 minutes, checking frequently. Use tongs to carefully flip the fried chicken halfway through so both sides crisp up evenly. This method is amazing for bringing back that golden brown exterior we worked so hard for!
Frequently Asked Questions About Crispy Fried Chicken Recipe
I get so many questions about this recipe because everyone wants that perfect result! It’s definitely worth checking these out to troubleshoot any worries you might have about making truly crispy fried chicken at home.
Can I bake or air fry this fried chicken recipe?
You totally can try to bake or air fry it, and you’ll end up with a decent meal! But honestly, you won’t capture that iconic, deep, shattering crunch that we worked so hard for with this Southern Fried Chicken recipe. Deep frying is what renders the fat off the skin and makes the coating lock on perfectly. Air frying is better for reheating leftovers, in my opinion, than for the initial cook.
What is the best oil to use for classic fried chicken?
You need a high smoke point oil, that much is true! I love using a blend of vegetable oil and shortening because the shortening helps stabilize that crust (as I mentioned before!). Peanut oil is also a fantastic, flavorful choice. Just make sure you have enough—we need at least two inches deep in the pan for even cooking!
How long should the chicken soak in buttermilk?
This is my number one defense against dry meat! You must marinate for a minimum of 4 hours. If you can manage it, letting the Buttermilk Brined Chicken sit in the fridge overnight is perfection. That extra 8 hours lets the acid really break down the fibers, ensuring you get that super juicy and crispy chicken texture! If you’d like to see some more tips on keeping that Southern flavor alive, check out this guide on Southern style!
Nutritional Estimates for This Fried Chicken
Now, I have to give you a big, warm disclaimer before we look at these numbers. Remember that we are making classic, decadent, fried chicken here—this isn’t a light salad! These figures are just my best guess based on the ingredients we used, serving one piece of chicken (we aimed for a thigh, which is a good average size). If you use giant breasts or skip the skin, your numbers will look different!
So, view these estimates as a guide rather than a strict fact sheet. When you’re diving into comfort food like this, sometimes you just have to enjoy the moment without worrying too much about the math. But for those of you who like to keep track, here is what we’re generally looking at for one serving of our ultra-crispy goodness:
- Serving Size: 1 piece (thigh)
- Calories: 450
- Fat: 28g (with about 8g of that being Saturated Fat)
- Carbohydrates: 18g
- Protein: 30g
- Sodium: 650mg (Remember, most of this comes from the brine!)
It’s packed with protein, which is great, but yes, it’s definitely on the higher side for sodium because that brine is essential for that flavor. When you make this savory chicken dinner, just know you’re eating a genuine piece of Southern comfort!
Share Your Ultra-Crispy Fried Chicken Creations
Okay, now it’s your turn! Making this amazing fried chicken is only half the fun; the other half is hearing about how it turned out at your place. Did you get that super crunchy crust? Was the chicken inside just falling apart tender? I truly hope you loved making and eating this comfort food chicken recipe as much as I love sharing it with you.
Please, please, please come back here and leave the recipe a five-star rating if it gave you that perfect juicy and crispy chicken experience you were looking for. Your feedback really helps other home cooks trust our methods here at 911Recipes. And if you snapped a picture of that beautiful golden skin, I want to see it!
Don’t forget to connect with us officially, too! We share tons of behind-the-scenes tips and sometimes even sneak peeks at what we’re testing next over on Pinterest. You can follow us right there to stay updated on all our quick and easy meals!
Honestly, seeing your amazing results—whether you made chicken thighs fried recipe pieces or full bird cuts—makes all my testing worth it. If you’re looking for more incredibly delicious ways to tackle chicken dinners, check out some other great inspiration over at this site. Happy cooking, friend, and thank you for pulling up a chair at my table!
Print
Ultra-Crispy Buttermilk Southern Fried Chicken
- Total Time: 4 hours 55 min
- Yield: 4 servings
- Diet: None
Description
Achieve the best homemade fried chicken that is golden, crunchy, and incredibly juicy inside using a classic buttermilk soak. This is your foolproof recipe for Southern comfort food.
Ingredients
- 4 lbs bone-in, skin-on chicken pieces (thighs, drumsticks, breasts)
- 4 cups buttermilk
- 2 tablespoons kosher salt
- 1 tablespoon black pepper
- 1 teaspoon cayenne pepper (optional, for a kick)
- 4 cups all-purpose flour
- 1/2 cup cornstarch (for extra crispiness)
- 2 tablespoons paprika
- 1 tablespoon garlic powder
- 1 tablespoon onion powder
- Vegetable oil or shortening, for frying (enough to reach 2 inches deep)
Instructions
- In a large bowl, combine the buttermilk, kosher salt, black pepper, and cayenne pepper. Add the chicken pieces, ensuring they are fully submerged. Cover and refrigerate for at least 4 hours, or preferably overnight, for the juiciest results.
- In a separate shallow dish, whisk together the flour, cornstarch, paprika, garlic powder, and onion powder. This is your dredge mixture.
- Remove the chicken from the buttermilk, letting excess drip off, but do not rinse.
- Dredge each piece of chicken thoroughly in the flour mixture, pressing the coating firmly onto the chicken to create a thick, craggy crust.
- For an ultra-crispy coating (double dip method): Dip the floured chicken back into the remaining buttermilk for just a second, then immediately return it to the flour mixture and press again to build a second layer of crust.
- Place the coated chicken pieces on a wire rack set over a baking sheet. Let them rest at room temperature for 20 minutes; this helps the coating adhere during frying.
- Heat the oil or shortening in a large, heavy-bottomed skillet or Dutch oven to 325 degrees Fahrenheit. You need about 2 inches of oil.
- Carefully place the chicken pieces into the hot oil, ensuring you do not overcrowd the pan. Work in batches.
- Fry the chicken for about 6 to 8 minutes per side, turning carefully with tongs, until deep golden brown and the internal temperature reaches 165 degrees Fahrenheit. Thicker pieces may require slightly longer cooking times.
- Remove the cooked chicken and place it on a clean wire rack set over paper towels to drain excess oil.
- Serve your best homemade fried chicken immediately as an easy dinner or comfort food staple.
Notes
- For the crispiest coating, use a mixture of half vegetable oil and half shortening for frying.
- Maintain the oil temperature strictly between 315°F and 330°F while frying; if the oil is too cool, the chicken will be greasy, and if too hot, the crust will burn before the inside cooks.
- If you are cooking larger pieces like breasts, you may need to finish them in a 300 degree Fahrenheit oven for 10 minutes after frying to guarantee they are cooked through.
- Prep Time: 30 min
- Cook Time: 25 min
- Category: Dinner
- Method: Deep Frying
- Cuisine: Southern American
Nutrition
- Serving Size: 1 piece (thigh)
- Calories: 450
- Sugar: 3
- Sodium: 650
- Fat: 28
- Saturated Fat: 8
- Unsaturated Fat: 20
- Trans Fat: 0.5
- Carbohydrates: 18
- Fiber: 1
- Protein: 30
- Cholesterol: 110

