

Oh, there is nothing quite like the smell of fresh bread filling your kitchen, is there? It just instantly makes everything feel cozy and right. But let’s be real, sometimes whipping up a perfect, fluffy loaf feels like too much work after a long day. That’s why, here at 911Recipes—where we believe heartfelt cooking should always be *easy* cooking—I am so excited to share my secret for a savory bake. We’re talking about the ultimate Italian herb and cheese bread that practically makes itself! Trust me, this is the ultimate cheat code for a spectacular, cheesy dinner bread using your bread machine. It’s a staple in our family now because it tastes like you spent hours, but it’s truly beginner-friendly.
Why This Italian Herb and Cheese Bread is Your New Bread Machine Favorite
If you’re looking for truly easy bread machine recipes that smell incredible, stop looking! This savory loaf is my absolute go-to because the machine does all the heavy lifting. You get that beautiful, deeply flavored parmesan herb bread without ever having to knead or worry about oven temperatures. It’s versatile, too—it’s perfect sliced thick for a great sandwich loaf or just torn off the counter while dinner is warming up.
Perfect for the Beginner Bread Machine User
Seriously, if your bread machine is collecting dust, this Italian herb and cheese bread is the perfect way to break it in! It’s designed for the beginner bread machine user. We use the trusty Basic/White cycle, which is standard on almost every model. You just layer the wet, then the dry, and the machine takes care of the rest until the crucial moment for the add-ins.
The Best Cheesy Dinner Bread Texture
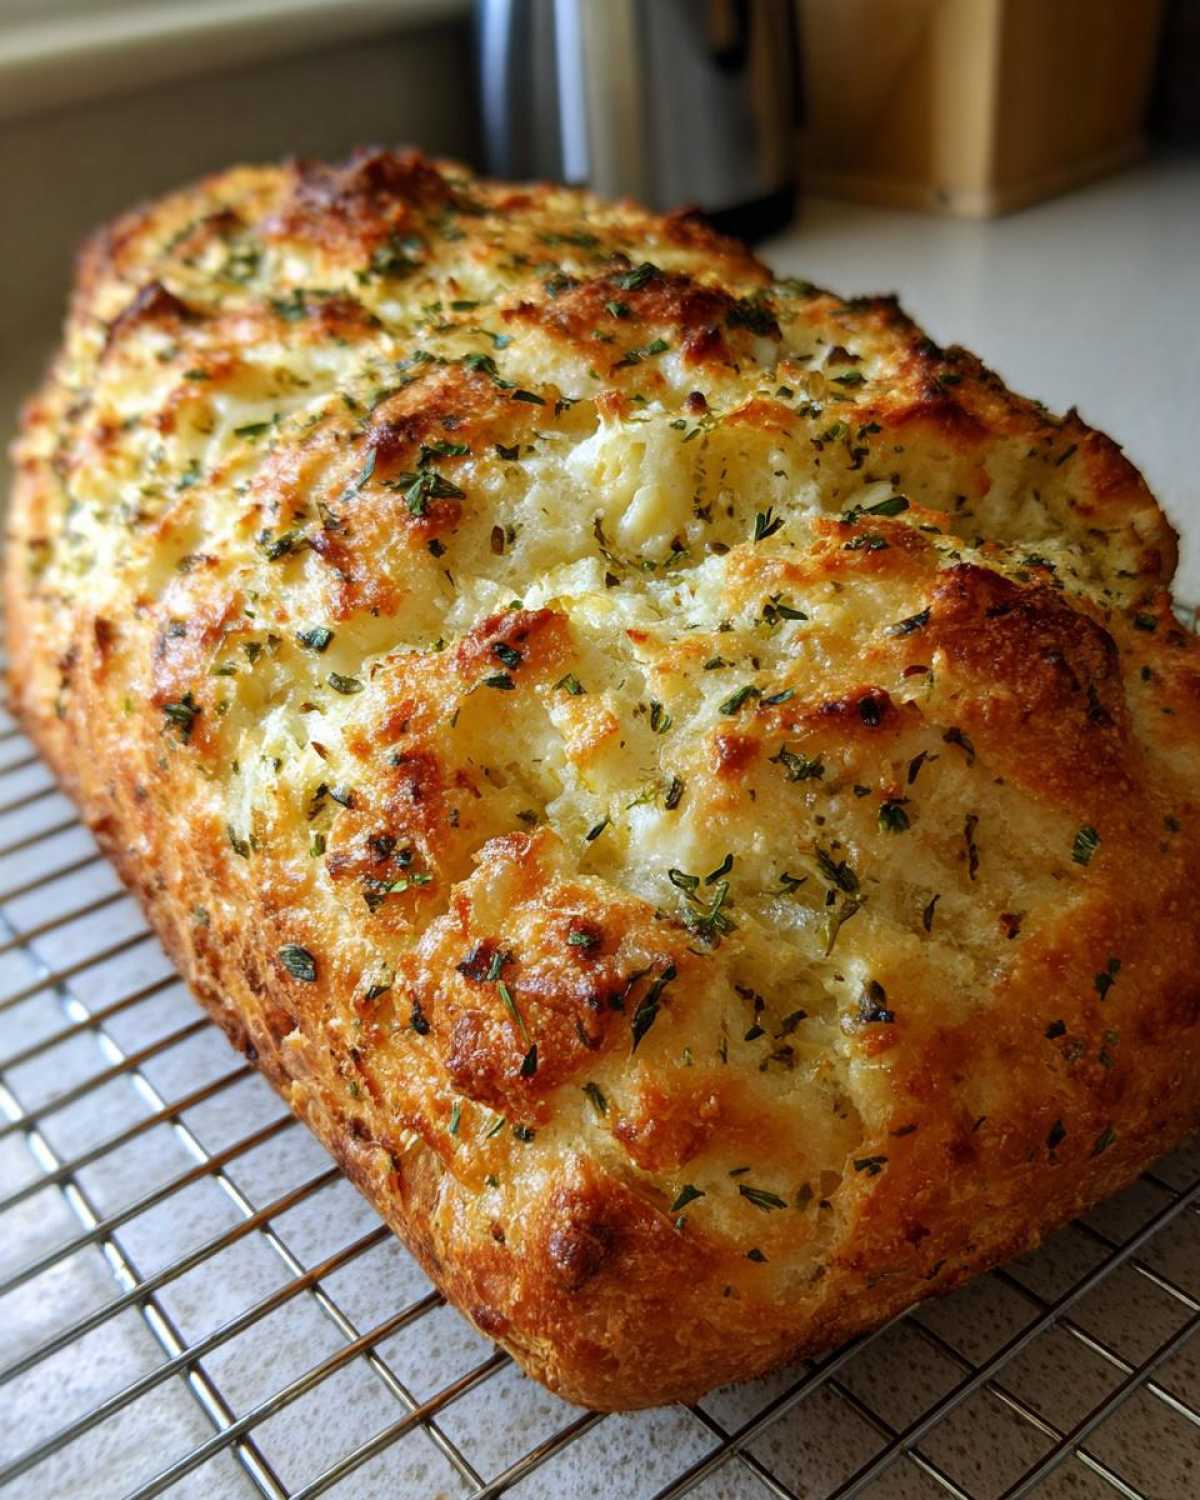
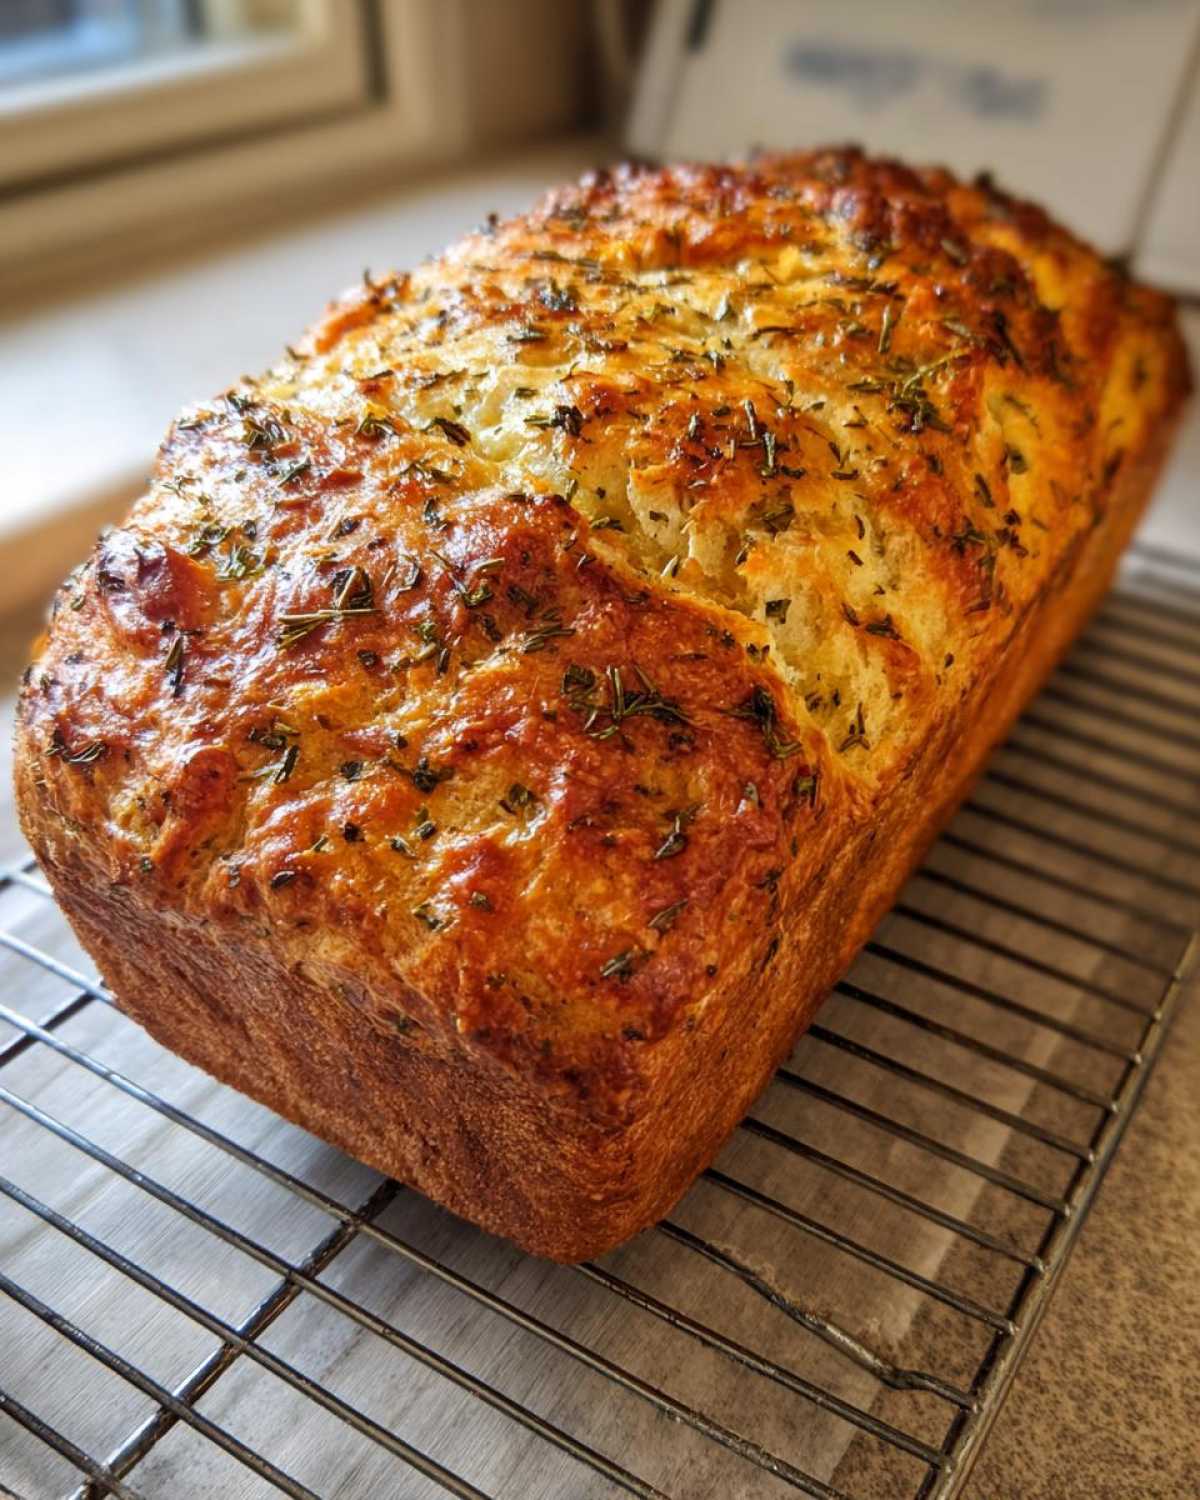
What I love most is the final product. This isn’t one of those airy white loaves; no way! It comes out sturdy enough to handle robust sandwiches, but the inside stays incredibly soft and wonderfully cheesy. That little bit of olive oil keeps the crumb tender, making it the best cheesy dinner bread imaginable. Just trust me, let it cool completely before you try to slice it!
Gathering Ingredients for Your Italian Herb and Cheese Bread
Okay, getting ready to bake is half the fun, right? Before you even press ‘start’ on your machine, we need to make sure we have everything gathered. See, for this savory loaf, the order you put things in the pan matters a ton, so preparation is key. Don’t worry, this list is short and sweet, and because it’s a bread machine recipe, we don’t need a ton of fussy prep work!
Liquid and Base Components
Let’s start with the wet stuff first, just like the manual says! You’ll need one cup of water, but listen closely: it has to be warm, running about 105 to 115 degrees Fahrenheit. Not too hot, or you’ll kill the yeast! Then, just two tablespoons of good olive oil to keep everything moist.
Flour, Yeast, and Dry Flavorings for Italian Herb and Cheese Bread
For the dry side, grab three cups of bread flour—that high protein really helps it turn into a great sandwich loaf later. Then, add just a tablespoon of sugar (that’s the yeast’s snack!) and one teaspoon of salt. For the flavor bomb, toss in one tablespoon of your favorite dried Italian seasoning blend, and don’t forget that teaspoon of garlic powder. Oh, and keep that yeast nearby for the next step!
The Cheese Selection: Parmesan Herb Bread Mix-ins
This is where the magic really happens for our parmesan herb bread! You absolutely need to have the cheese shredded. We use half a cup of shredded Parmesan and half a cup of shredded Mozzarella. If you buy the blocks and shred them yourself? Even better on the flavor, trust me!

Step-by-Step Instructions for Your Bread Machine Herb Bread
Alright, buckle up, because this part is almost embarrassingly easy! Remember how we laid out our ingredients perfectly? Now we just layer them in the pan in the order your specific machine likes them best. I swear, following this loading sequence is the secret handshake for perfect bread machine herb bread.
Loading the Pan: Liquid First
First things first, pour in that warm water—remember, 105 to 115 degrees, nice and cozy—and then the two tablespoons of olive oil. Always put the liquids in the pan before anything else, that’s rule number one for nearly every machine out there. It protects the paddle and gets everything moving right when it starts mixing.
Adding Dry Ingredients and Yeast Placement
Next, gently dust in the bread flour, and then carefully sprinkle the sugar and salt on top of that. Now, here’s a key move: use a spoon to create a little divot or ‘well’ right in the middle of the flour mound. Drop your yeast right into that little dip. You want to make sure that yeast stays dry and doesn’t touch the water or oil yet—that’s how we keep it happy!
Setting the Cycle and Timing the Add-ins for Italian Cheese Bread
Time to close the lid and set the cycle. You want the Basic or White Bread setting, with a light or medium crust chosen. Let the machine run through its initial kneading phase. It will mix everything up, and then it will beep at you before the big rise starts—that’s the signal! Open the lid quickly, sprinkle all those gorgeous dried Italian seasoning, garlic powder, Parmesan, and Mozzarella evenly over the dough surface. Close it up fast so the warmth doesn’t escape! Patience through that rise is worth it.

If your machine is one of those sneaky ones that doesn’t beep before the main rise time, don’t panic! Just wait until the machine is nearing the end of its kneading period—usually around the 15-minute mark—and pop the cheese and herbs in then. It works out almost every time!
Finishing and Cooling the Loaf
Once the cycle finishes, you’ll hear a lovely little chime! Carefully take the pan out—it’ll be hot!—and flip that beautiful Italian cheese bread out onto a wire rack immediately. You absolutely must let this loaf cool completely before you try to slice it. If you cut it too soon, it will get gummy and mess up that perfect sandwich loaf texture we worked so hard for!
Expert Tips for Perfect Italian Herb and Cheese Bread
Even with an automated process, a few little tricks can take this Italian herb and cheese bread from good to absolutely unforgettable. Since we’re dedicated to making things taste like you spent the whole day in the kitchen, these little insights are what make this recipe shine. Don’t skip these, they really matter!
The Secret to Flavorful Parmesan Herb Bread
I seriously cannot stress this enough when we’re talking about parmesan herb bread: please, please use the block of Parmesan cheese and grate it fresh. The pre-shredded stuff is coated in anti-caking agents, which stops it from melting beautifully into the dough. When you shred it yourself, you get that rich, slightly oily melt that permeates the entire loaf. It just tastes better, period. It’s one of those small steps that makes a huge flavor difference!
Troubleshooting: When Your Bread Machine Doesn’t Pause
Now, I mentioned this briefly before, but let’s dive deeper into the troubleshooting for the add-ins. If your machine is old-school or just doesn’t have a designated pause beep before the main rising cycle starts—maybe it just dives right into the kneading, then the rest—don’t hold your cheese hostage! You need to listen for that machine’s pattern. Usually, you can sneak the herbs and cheese in during the last 8 to 10 minutes of the *final kneading* cycle. The dough needs to be well-developed but still relatively soft when you toss those flavors in. It gives the machine just enough time to incorporate everything before the dough sets for the final rise.
Serving Suggestions for Your Cheesy Dinner Bread
Honestly, this cheesy dinner bread is so flavorful on its own, you hardly need anything else! But I love serving thick, warm slices alongside a big bowl of soup—especially tomato or minestrone. It’s perfect for soaking up those last delicious drops.
If you’re making a big spread, this savory loaf is fantastic cut into cubes and served alongside a simple zesty Italian pasta salad for picnics or backyard BBQs. Because it holds up so well, it makes a truly sturdy base for an open-faced melt if you warm up the slices with a little extra butter!
Storage and Keeping Your Italian Herb and Cheese Bread Fresh
The best part about this recipe is that it’s sturdy! It’s not one of those loaves that gets sad and dry the second you look away. To keep that gorgeous, herbaceous flavor going strong for future meals, you want to store your leftover italian herb and cheese bread in an airtight container right on the counter.
Seriously, no need to put it in the fridge! Keeping it at room temperature is key, and it stays perfectly delicious like this for up to three days. If you want to revive it after a day or two, just pop a slice in the toaster or warm it in the oven for a few minutes. That melts that cheese right back inside!
Frequently Asked Questions About Bread Machine Herb Bread
I get so many questions when people first start using their machines! It’s a different kind of baking, for sure. Since this savory loaf relies a bit on the machine’s internal timing, folks often have questions about customizing it or getting the exact result they want. No worries at all, that’s what family recipes are for—figuring out the tweaks that work best for *you*!
Can I use regular active dry yeast instead of bread machine yeast?
If you’re out of the special ‘bread machine’ yeast, don’t stress! You can absolutely use standard active dry yeast or instant yeast. The difference is mostly about convenience; bread machine yeast is already pre-activated for the machine’s specific rising temperatures and timing. If you use regular active dry, just make sure it smells fresh and active. You might see a slightly different rise height compared to specific bread machine yeast, but the flavor of our italian herb and cheese bread will be fantastic either way. Just don’t let it touch the liquid until the last possible second, like we did when loading the pan!
How can I make this more of a rosemary oregano bread?
That’s a fun idea! If you love that classic Italian flavor profile that really highlights rosemary and oregano, you can easily adjust the seasoning blend. The recipe calls for one tablespoon of the general Italian seasoning mix. To lean into that piney brightness, swap out the whole tablespoon for just one teaspoon of dried oregano and two teaspoons of dried rosemary. That gives you the same amount of herb power, but with a much stronger, more focused flavor that really shines through that cheesy dough!
What is the best cycle setting for this Italian herb and cheese bread?
For this particular recipe, we stick to the most reliable setting: the **Basic/White Bread cycle**. This setting is designed for standard yeast doughs and gives us the precise kneading time we need before we add our cheese. I always suggest choosing a **Light or Medium crust setting**. If you go Dark, you risk burning those salty cheeses like the Parmesan on the outside while the interior is still getting perfectly baked. Stick to Basic/White; it’s our reliable workhorse here!
Estimated Nutritional Data for This Savory Loaf
Whenever I share a recipe, I know folks are curious about what’s going into their home cooking, which is wonderful! When we make this hearty italian herb and cheese bread in the machine, it yields a loaf that’s satisfying but still reasonable for serving alongside our favorite pasta dishes. Here’s a little breakdown based on the ingredients listed above.
Please remember, because we aren’t food scientists here at 911Recipes, these numbers are just rough estimates! The exact brand of flour you use, or if you opt for full-fat versus part-skim cheese, can change things slightly.
- Serving Size: 1 slice
- Calories: 180
- Total Fat: 5g (with 2g Sat. Fat)
- Carbohydrates: 28g
- Protein: 6g
- Sugar: 1g
- Sodium: 280mg
See? A great balance for a savory side bread! It has enough substance to make a satisfying snack without worrying that you’re overloading on sugar—that’s the beauty of homemade versions of comfort food, I tell ya.
Share Your Homemade Italian Herb and Cheese Bread Success
That’s it! You’ve done it. You’ve baked a beautiful, savory, cheesy loaf right there in your bread machine, and I hope your kitchen smells absolutely heavenly right now. Here at 911Recipes, we don’t just share recipes; we build a kitchen family, and hearing about your successes is the best reward for all our hard work.
I would absolutely *love* to hear how your Italian herb and cheese bread turned out! Did you use the pause feature successfully? Were you able to get those beautiful slices for your sandwiches? Please take a moment to leave a rating or a quick comment right below this section. Hearing what worked for your specific bread machine gives so much confidence to others reading this!
And if you snapped a picture of that golden-brown top loaded high with Parmesan and herbs? Oh, please come say hello over on our Pinterest page and share it with us! Seeing our recipes come alive in your kitchens is exactly why Clara started this site. Happy baking, and thank you so much for pulling up a chair at our table today!
Print
Easy Italian Herb and Cheese Bread Machine Loaf
- Total Time: 3 hr 40 min
- Yield: 1 loaf
- Diet: Vegetarian
Description
Make a delicious, savory Italian herb and cheese bread right in your bread machine. This recipe is perfect for beginners and yields a wonderful loaf for sandwiches or serving with dinner.
Ingredients
- 1 cup water (warm, about 105-115°F)
- 2 tablespoons olive oil
- 3 cups bread flour
- 1 tablespoon granulated sugar
- 1 teaspoon salt
- 1 1/2 teaspoons active dry yeast
- 1 tablespoon dried Italian seasoning blend
- 1 teaspoon garlic powder
- 1/2 cup shredded Parmesan cheese
- 1/2 cup shredded mozzarella cheese
Instructions
- Add the warm water and olive oil to the bread machine pan in the order recommended by your machine’s manual.
- Add the bread flour, sugar, and salt to the pan. Create a small well in the center of the flour.
- Place the yeast into the well you created in the flour. Do not let the yeast touch the liquid yet.
- Select the Basic/White Bread cycle on your machine. Choose a light or medium crust setting.
- Allow the machine to complete the initial mixing and kneading phase (usually about 15-20 minutes).
- When the machine pauses for the first time before the main rising cycle begins (this is often indicated by a beep), open the lid carefully.
- Evenly sprinkle the dried Italian seasoning, garlic powder, Parmesan cheese, and mozzarella cheese over the dough surface.
- Close the lid quickly and allow the bread machine to continue through the rest of the cycle.
- Once the cycle is complete, carefully remove the bread pan and turn the loaf out onto a wire rack.
- Allow the Italian cheese bread to cool completely before slicing for the best sandwich loaf texture.
Notes
- For the best flavor, use freshly grated Parmesan cheese instead of pre-shredded.
- If your bread machine does not have a pause feature, you can add the herbs and cheese during the last 10 minutes of the kneading cycle. Check your specific machine’s instructions.
- Store leftover cheesy dinner bread in an airtight container at room temperature for up to 3 days.
- Prep Time: 10 min
- Cook Time: 3 hr 30 min
- Category: Baking
- Method: Bread Machine
- Cuisine: Italian
Nutrition
- Serving Size: 1 slice
- Calories: 180
- Sugar: 1
- Sodium: 280
- Fat: 5
- Saturated Fat: 2
- Unsaturated Fat: 3
- Trans Fat: 0
- Carbohydrates: 28
- Fiber: 1
- Protein: 6
- Cholesterol: 8

