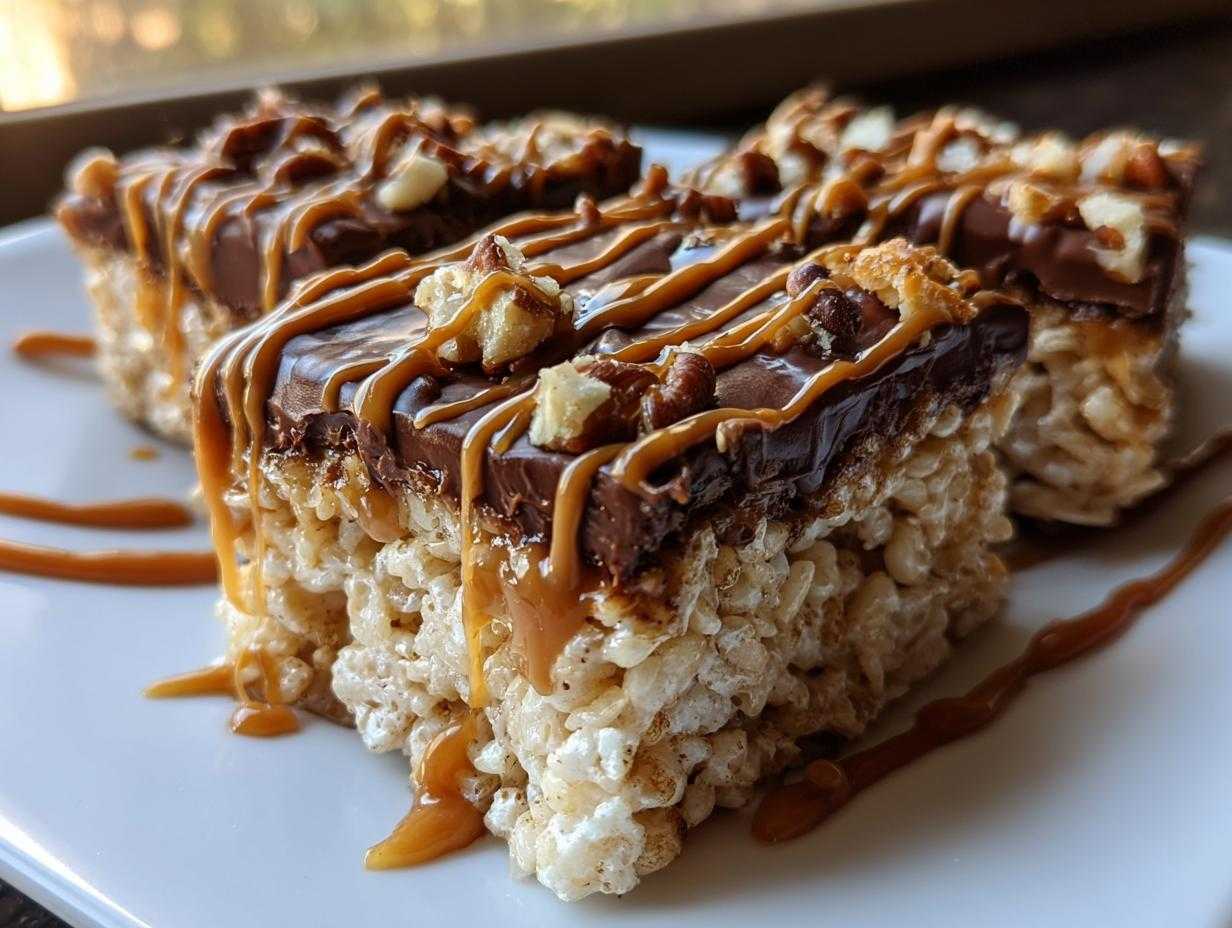
Oh my gosh, forget everything you think you know about boring cereal squares! If you love that decadent hit of a homemade candy bar but need something that comes together faster than brewing a pot of coffee, you are in the right place. I am obsessed with these **Caramel Turtle Rice Krispie Treats** because they take the classic chewy goodness and crank the indulgence factor up to eleven. We’re talking crispy rice bound up in sticky marshmallow goo, then layered with melted chocolate, creamy caramel swirls, and crunchy toasted pecans. Trust me, this flavor explosion is my go-to when I need a seriously satisfying, no-bake dessert that always impresses everyone who tries one.
Why You Will Crave These Caramel Turtle Rice Krispie Treats
Seriously, these aren’t just cereal treats; they are an experience! If you’ve ever felt like your regular Rice Krispies were missing that *oomph*, this recipe is the answer you’ve been looking for. I keep these in an airtight container because they vanish too fast around my house.
- They are the definition of **Gooey Marshmallow Dessert**. We use extra butter and specific caramel techniques to make sure they stay soft and chewy for days—no hard, crumbly edges here!
- The flavor profile is pure indulgence. You get the sweet marshmallow, the slight salinity from the pecans, rich chocolate, and that deep, buttery caramel that makes you close your eyes when you take a bite.
- We call these **No Bake Turtle Treats** for a reason! Assembly takes minutes. You just melt, stir, and press. No need to preheat the oven, which is perfect for those hot summer afternoons or when you need a last-minute dessert.
- They are perfect for slicing and serving because that chocolate-caramel topping sets up beautiful presentation-wise. You can even chop up extra candy pieces to stick on top! If you enjoy playing with mix-ins, you absolutely have to check out my S’mores Rice Krispie Treats recipe next time.
Essential Ingredients for Perfect Caramel Turtle Rice Krispie Treats
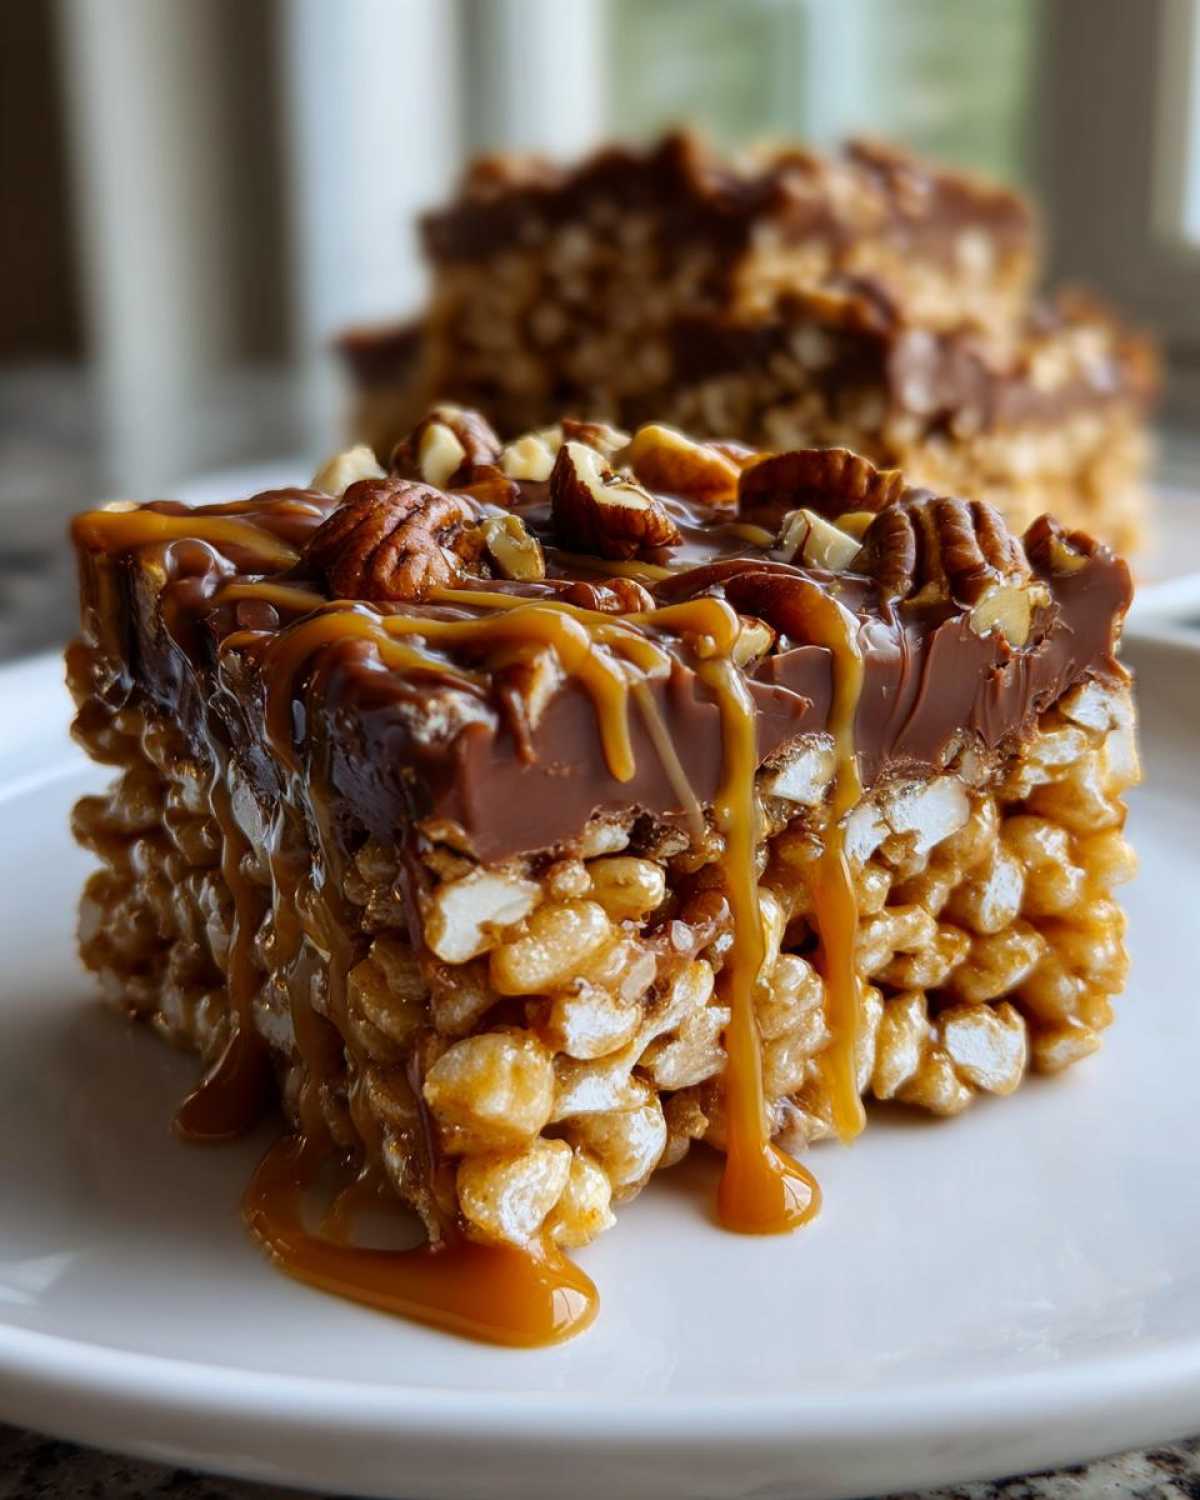
When you’re making something this decadent, quality really matters, especially with the caramel! I learned this the hard way when I tried using a cheap, artificially flavored sauce once—it just wasn’t the same. For these **Caramel Turtle Rice Krispie Treats**, we need the essentials for that perfect balance of chewy, sweet, and salty.
You’ll need:
- 6 Cups of Rice Krispies cereal (make sure it’s fresh!)
- One full 10-ounce bag of marshmallows (trust me, don’t use stale ones!)
- 3 tablespoons of good, unsalted butter—no substitutes here, please!
- 1 Cup of rich caramel sauce, and you’ll divide this up, so have your measuring cup ready.
- 1 Cup of semi-sweet chocolate chips.
- 1 Cup of finely chopped pecans.
- And, if you can find them, about 1/2 cup of actual chopped turtle candies!
Ingredient Notes and Substitution Guide
Okay, let’s talk about making these your own. The caramel sauce is the star here, so grab the thickest, best-tasting one you can find—it makes all the difference!
If you’re worried about the nuts, don’t be! Grandma always said if you can’t use pecans, switch them out for toasted sunflower seeds or even crispy pretzels for a salty crunch instead. If you need these completely nut-free, just skip the pecans and the chopped turtle candies. Remember the recipe note: you can substitute those out with 1/2 cup extra chocolate chips and 1/2 cup of extra caramel bits folded into the cereal base.
My biggest piece of advice for chewiness: always use the freshest marshmallows you can find. Old marshmallows melt funny and end up making your **Chewy Cereal Squares** too firm. If the bag is a little hard, that means you need to toss them!
How to Make Decadent Caramel Turtle Rice Krispie Treats Step-by-Step
Okay, buckle up! This is where all the magic happens. I always keep my ingredients lined up because timing is everything when dealing with hot marshmallows. You need to move quickly but gently once that cereal goes in, or you risk crushing the air out of those beautiful cereal pieces, which leads to sad, hard bars. We break this down into two easy parts: building the chewy base and then piling that incredible topping on!
Preparing the Base for Your Caramel Turtle Rice Krispie Treats
First things first, grab that 9×13 inch pan right away. I swear by lining mine with parchment paper—just let the edges hang over like little handles! That way, once they set up, you can lift the entire thing out cleanly. That’s way easier than trying to scoop them out later.
Next, get a large saucepan ready over low heat. Melt your butter until it’s just liquid. Keep that heat low, seriously low! Add the marshmallows and stir constantly until they are totally smooth and glossy. The second they look perfect, yank that pan right off the burner. We don’t want tough treats, and direct heat makes marshmallows tough!
Now, stir in half of your measured caramel sauce—that’s 1/2 cup—right into the hot marshmallow goo until it swirls in beautifully. Quickly fold in your cereal, the chopped pecans, and those decadent turtle candies if you are using them. You only want to mix this until you see no more dry streaks of cereal. Seriously, stop mixing the second it’s coated. Gently press this mixture into your prepared pan using wax paper or lightly buttered hands. Push down evenly, but don’t compact it like a brick!
Creating the Ultimate Caramel Chocolate Topping for Caramel Turtle Rice Krispie Treats
This topping is what truly sends these over the top. In a separate microwave-safe bowl, combine your chocolate chips and the remaining 1/2 cup of caramel sauce. Microwave them in short bursts—30 seconds at a time—stirring really well in between each burst. This prevents the chocolate from seizing up on you. Keep going until it’s perfectly smooth and shiny. If you want tips on managing melted toppings, you should check out my guide on caramelized topping techniques!
Pour that heavenly chocolate-caramel mixture right over your pressed cereal base. Use an offset spatula to spread it quickly to the edges. Don’t wrestle with it; just encourage it to cover the whole surface.
For the final flourish, grab that last drizzle of caramel sauce and lightly drizzle it back and forth across the top. It looks so professional, and it tastes even better! Now, resist the urge to mess with them. Let these **Gourmet Cereal Treats** sit undisturbed at room temperature for about an hour until they are completely set before you slice them up.
Tips for Achieving the Best Texture in Your Caramel Turtle Rice Krispie Treats
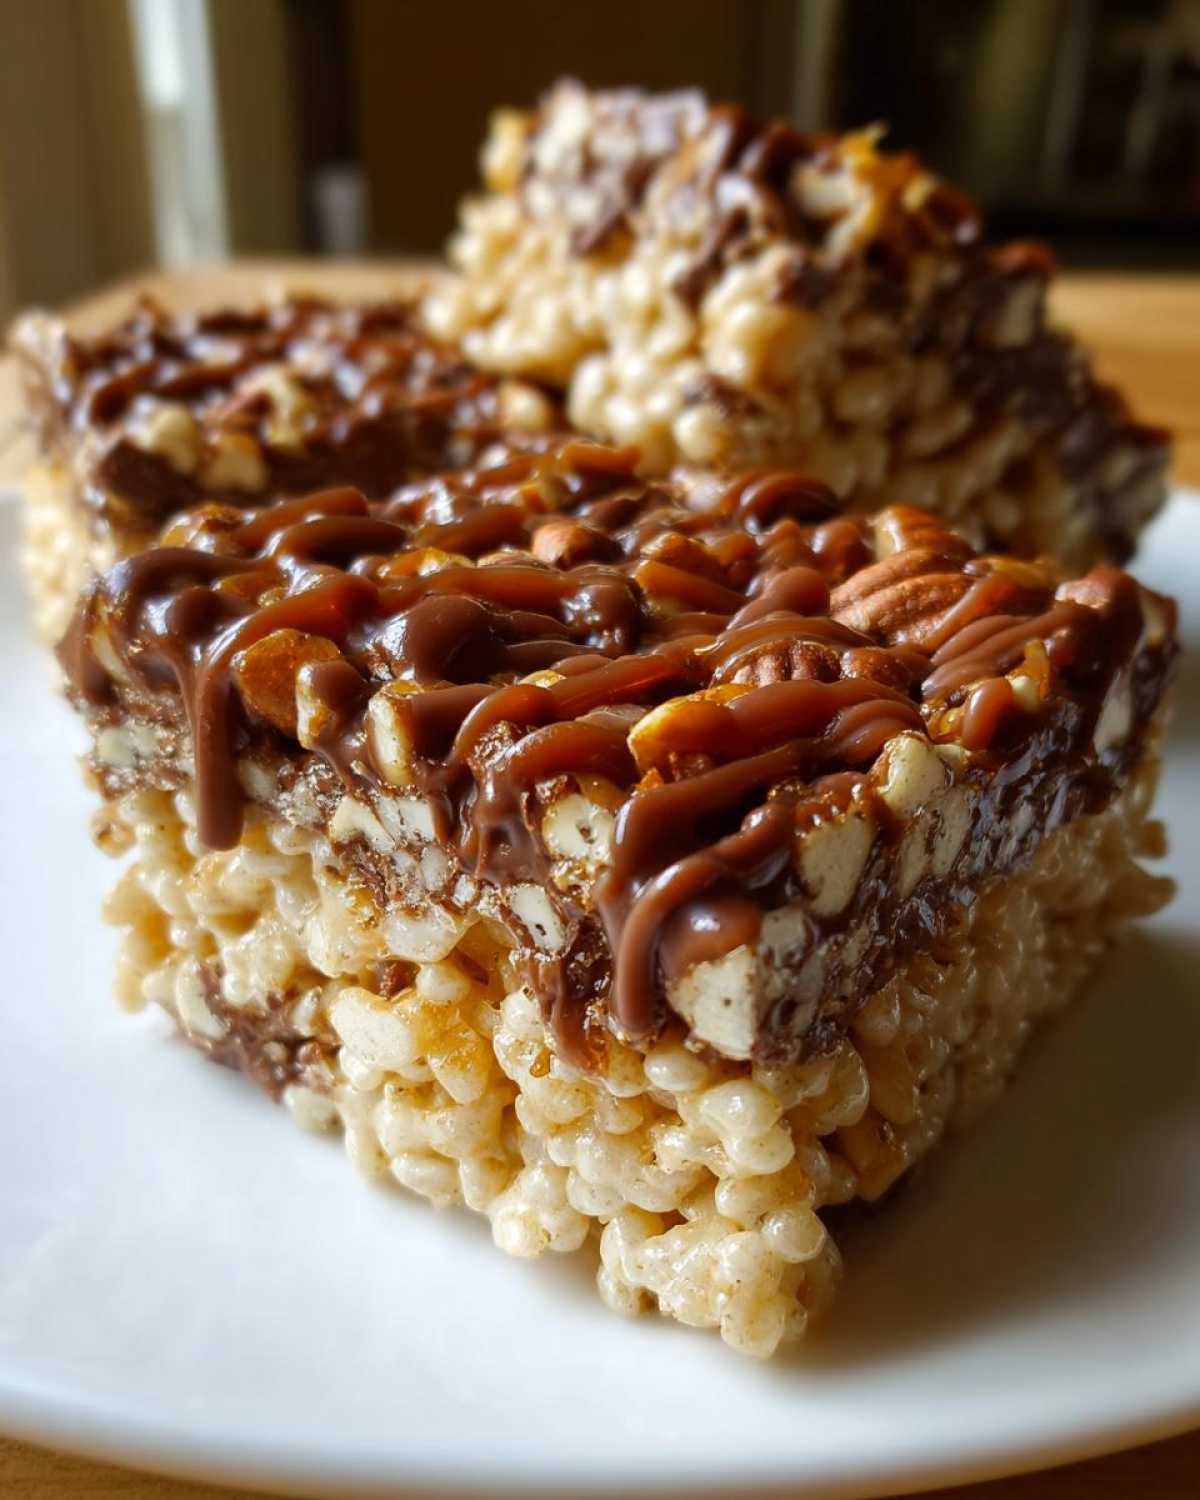
Texture, texture, texture! That’s what separates a merely good Rice Krispie bar from a *life-changing* one. We are aiming for wonderfully soft and gooey—the kind that pulls apart gently instead of snapping like a brick. If your treats always seem to end up too hard, I have a few tricks up my sleeve that I’ve picked up over the years.
First, I mentioned it before, but it bears repeating: buy good, fresh marshmallows! If they feel hard in the bag, they will bake into hard treats. The trick to keeping these **Chewy Cereal Squares** soft isn’t just in the recipe, it’s having excellent starting materials. Make sure they are fully melted into the butter and that first swirl of caramel before you even think about adding the cereal. You need that marshmallow binder to be perfectly liquid.
When you fold everything together—the cereal, the pecans, the chocolate—be gentle! This is crucial. Think of it like tossing a delicate salad. If you stir too aggressively, you crush the air bubbles we created when melting the marshmallows, which results in a dense, hard square. Just use a rubber spatula and fold until you see the ingredients evenly distributed. Don’t look for perfection; just stop when you can’t see white marshmallow anymore.
Another thing that helped me level up my texture game was how I handled the warm mixture before setting. I often use slightly less cereal than some recipes call for because I prioritize the gooey factor. You’ll see in the instructions that I didn’t tell you to pack it down hard. Just press it enough so it stays together in the pan. If you press too much, you squeeze out the air!
Finally, for those beautiful, clean squares that look amazing on a platter, chilling is your best friend, even though they are a no-bake treat. After they have sat at room temperature for that initial hour to set the topping, pop the whole pan into the fridge for about 30 minutes. This firms up the chocolate and caramel layer just enough so you get those sharp edges when you cut them. It’s perfect if you’re looking for that professional look on your serving tray, or if you just want to avoid sticky kitchen chaos! For more tips on keeping things soft, I always refer back to how I treat my cookies, which you can see in my guide on making cookies soft and chewy.
Variations on Classic Caramel Turtle Rice Krispie Treats
Once you master the perfect chewy base, the fun officially begins! These **Caramel Turtle Rice Krispie Treats** are amazing as they are, but sometimes you just need to switch things up based on what candy stash you have lying around. This recipe is practically begging for you to get creative and turn it into your own version of **Gourmet Cereal Treats**.
Here are a few ways I like to twist this recipe when I’m making a big batch:
- Nut Swap: If you’re tired of pecans, try substituting them with roasted, salted cashews! Cashews give a slightly sweeter, buttery crunch that pairs beautifully with caramel. Or, if you want a different texture altogether, throw in some toasted coconut flakes—it tastes almost tropical!
- Chocolate Switcheroo: Semi-sweet is my baseline because it cuts the sweetness of the caramel, but sometimes I go full dark mode. Using high-quality dark chocolate chips (maybe 65% cacao) really deepens that candy bar flavor. For a real treat, try mixing 1/2 cup of semi-sweet with 1/2 cup of white chocolate chips in the topping; it looks gorgeous when drizzled!
- The Salty Finish: This is my secret weapon for making any dessert instantly better. Right after you pour that final drizzle of caramel on top—before it sets—sprinkle a tiny pinch of flaky sea salt flakes over the entire surface. It’s barely noticeable, but that little burst of salt against the sweet caramel and chocolate? Chef’s kiss! It really elevates these to be worthy of your holiday baking spreads, kind of like how I approach my Holiday Chex Mix.
Honestly, you can mix and match anything that sounds good. That’s the beauty of these simple bar recipes—they are so forgiving!
Storage and Reheating Instructions for Caramel Turtle Rice Krispie Treats
Because these **Caramel Turtle Rice Krispie Treats** are so gooey and rich, how you store them matters a ton for keeping that perfect texture. If you manage to have leftovers—which I doubt, but one can hope!—you need to treat them right.
The absolute best place for storing these bars is airtight, at room temperature. I usually use a large, shallow container with a tight-fitting lid. You want to prevent air from getting in, because air is the enemy of chewiness! I often lay a piece of parchment paper between layers if I need to stack them, just to make sure that yummy chocolate topping doesn’t stick to the one above it.
This is important: Try to avoid putting them in the refrigerator unless you absolutely have to because you’re expecting a really hot kitchen. When these **Homemade Rice Krispie Bars** get cold, the marshmallow base tends to firm up way too much. They become much harder than the wonderfully chewy texture we worked so hard to achieve!
If you do refrigerate them for a few hours to help that topping set quickly, make sure you pull them out about 30 to 45 minutes before you plan on serving them. Letting them come back up near room temperature lets the butter and caramel soften up just enough so you get that satisfying, soft pull when you bite in. They are definitely best eaten within the first two days, but honestly, sealed up tight, they usually last fine for four or five days!
Serving Suggestions for Your Ultimate Caramel Dessert Bars
Whew! After all that effort mixing in caramel and chocolate, you deserve a moment to admire these gorgeous bars before you dive in. These **Ultimate Caramel Dessert Bars** are seriously rich, so you don’t want to pair them with another heavy, syrupy dessert. They kind of demand to be the star of the show!
When I serve these, especially after a big dinner, I like to keep the accompaniments light to balance out all that gooey goodness. A simple tall glass of cold milk is unbeatable—it’s nostalgic and cuts right through the chocolate richness. Or, if you’re having these as an afternoon treat, a strong, freshly brewed cup of coffee is amazing.
But my favorite trick to make these feel fancy (and just slightly healthier, haha!) is serving them with fresh fruit, believe it or not. A small handful of bright raspberries or sliced strawberries on the plate adds a little acidity and tartness. That fresh fruit flavor really pops against the deep sweetness of the caramel and pecans. It makes the whole plate look beautiful, too, especially if you dust the plate lightly with powdered sugar!
If you’re serving them at a party, especially around the holidays, I sometimes bake a simple, lightly sweet cake the day before, like a classic coffee cake, just to have something slightly more subtle on the dessert table. If you need a fantastic recipe for that, you should definitely look at my take on a sour cream coffee cake!
However you plate them up, make sure you cut generous squares because everyone is going to want a big piece of this **Caramel Turtle Rice Krispie Treats** goodness!
Frequently Asked Questions About Caramel Turtle Rice Krispie Treats
I know you’ve got questions because I certainly did when I first started tinkering with this recipe to make it perfect! It’s one thing to follow steps, and another to understand *why* those steps work so well, especially when we’re layering in things like caramel and pecans.
Here are the top things people ask me about creating the best **Caramel Turtle Rice Krispie Treats**!
Can I make Caramel Turtle Rice Krispie Treats without nuts?
Absolutely! You totally can make these without nuts, and they will still be incredible. If you need to skip the pecans entirely, just leave them out. You’ll still get all that amazing gooeyness and chocolate from the topping and the caramel swirls.
If you miss the crunch (and I totally get that!), try substituting the pecans with something else crunchy like toasted sesame seeds, crispy rice cereal (just use an extra cup of your main cereal), or maybe even some crushed pretzels folded in with the cereal. You could even check out my guide on making satisfying no-bake bars for other crunch ideas if you have allergies to worry about!
How long do these Homemade Rice Krispie Bars stay fresh?
Because we are using a good amount of butter and fresh marshmallows, these **Homemade Rice Krispie Bars** are wonderful because they stay soft longer than the basic recipe! If you store them correctly in an airtight container at cool room temperature, they are perfectly soft and chewy for at least 3 to 4 days. If they somehow last longer than that, they are usually still fine, but they might start to get just a *tiny* bit firmer on the edges.
Remember what I said about the fridge—only use it if you must! Keeping them sealed helps keep the air out, which is the real secret to long-lasting chewiness.
What makes these Quick Dessert Ideas No Oven so gooey?
This is my favorite part to explain because it’s all about moisture management! What makes these **Quick Dessert Ideas No Oven** so unbelievably gooey comes down to two main things, and it’s not just the marshmallows.
First, we incorporate liquid caramel sauce *before* we even add the cereal. That sticky caramel melts right into the marshmallow base, adding extra moisture and thickness that plain marshmallow can’t provide alone. Secondly, we don’t cook the marshmallows for too long, and we keep the heat low. Overcooking the marshmallow pulls out the moisture content, making them tough when they cool. By melting gently and folding in that extra caramel, we ensure that the entire binding agent stays incredibly soft, stretchy, and luxurious!
It’s that extra layer of liquid sweetness mixed right into the binder that guarantees you get that perfect pull every single time.
Share Your Experience Making These Caramel Turtle Rice Krispie Treats
Phew! Now you have everything you need to create the ultimate, over-the-top, totally decadent **Caramel Turtle Rice Krispie Treats** right in your own kitchen. Seriously, I am so excited for you to try these bars. They are messy, they are sweet, and they require zero baking, which is my favorite kind of recipe!
Once you take that first bite of gooey marshmallow mixed with the salty crunch of pecans and that rich caramel swirl, I want to hear all about it! Did you end up drizzling extra chocolate? Did you manage to save any for leftovers?
Please come back here and leave a comment letting me know how they turned out. Rate the recipe for me—I always love seeing what you think! And if you snap a picture of those gorgeous, layered squares, tag me on social media so I can see your beautiful handiwork. We bakers have to stick together and show off our best **Sweet and Salty Cereal Bars** creations!
Happy baking, or should I say, happy melting! Enjoy every single chewy, chocolate-covered bite!
Print
Decadent Caramel Turtle Rice Krispie Treats
- Total Time: 80 min
- Yield: 18 bars
- Diet: Vegetarian
Description
Make chewy Rice Krispie Treats mixed with caramel, chocolate, and pecans for a rich, no-bake dessert bar.
Ingredients
- 6 cups Rice Krispies cereal
- 1 (10 ounce) package marshmallows
- 3 tablespoons unsalted butter
- 1 cup caramel sauce, divided
- 1 cup semi-sweet chocolate chips
- 1 cup chopped pecans
- 1/2 cup turtle candies, roughly chopped (optional)
Instructions
- Lightly grease a 9×13 inch baking pan or line it with parchment paper, leaving an overhang for easy removal.
- In a large saucepan over low heat, melt the butter.
- Add the marshmallows to the melted butter. Stir constantly until the marshmallows are completely melted and smooth. Remove the pan from the heat.
- Stir in 1/2 cup of the caramel sauce until it is fully incorporated into the marshmallow mixture.
- Quickly fold in the Rice Krispies cereal until it is evenly coated.
- Gently fold in the chopped pecans and the chopped turtle candies, if using. Do not overmix.
- Press the mixture evenly into the prepared pan. Use wax paper or lightly buttered hands to prevent sticking.
- In a microwave-safe bowl, combine the chocolate chips and the remaining 1/2 cup of caramel sauce. Microwave in 30-second intervals, stirring between each, until smooth.
- Pour the chocolate-caramel mixture over the cereal base. Spread evenly.
- Drizzle the remaining caramel sauce lightly over the top layer for extra visual appeal.
- Allow the treats to set completely at room temperature for at least 1 hour before cutting into squares.
Notes
- For extra chewiness, use fresh marshmallows.
- If you do not have pre-made turtle candies, use 1/2 cup chocolate chips, 1/2 cup caramel bits, and 1/2 cup chopped pecans mixed into the cereal base.
- To get clean cuts, chill the finished bars in the refrigerator for 30 minutes before slicing.
- Prep Time: 15 min
- Cook Time: 5 min
- Category: Dessert
- Method: No Bake
- Cuisine: American
Nutrition
- Serving Size: 1 bar
- Calories: 250
- Sugar: 25
- Sodium: 110
- Fat: 12
- Saturated Fat: 6
- Unsaturated Fat: 6
- Trans Fat: 0
- Carbohydrates: 35
- Fiber: 1
- Protein: 3
- Cholesterol: 15