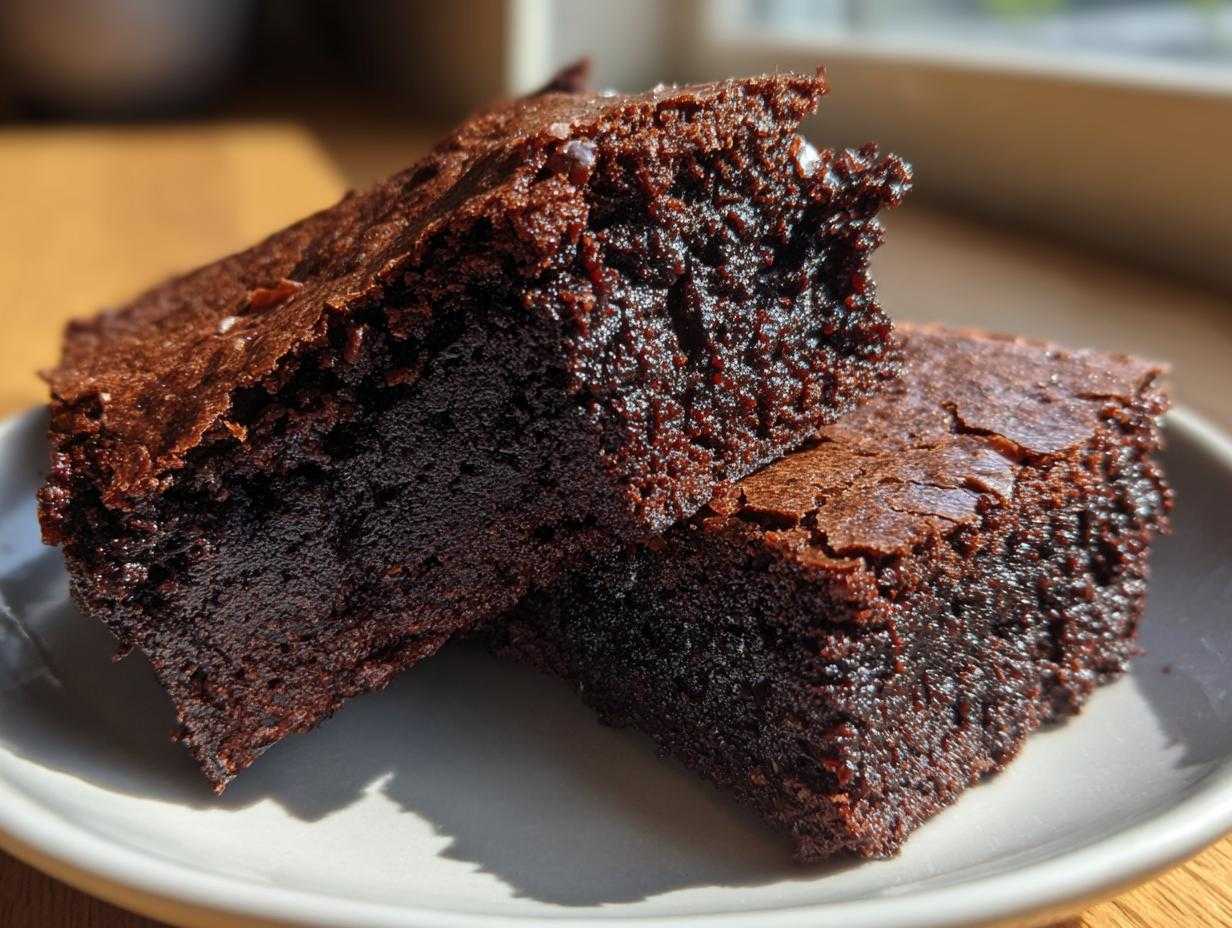
Okay, let’s talk about the Great Brownie Wars. You know the one—do you go for the cakey, lighter side, or are you diving headfirst into pure, dense fudge? Honestly, for years, I felt like I had to choose! I couldn’t find that magical spot where the edges snapped just right, giving you that perfect satisfying chew, but the center melted like chocolate silk in your mouth.
Well, friend, stop looking! After what felt like a decade of testing batters that either baked up too dry or crumbled into goo when sliced, I finally cracked the code. This isn’t just *a* recipe; this is the **Easy Chewy Brownies Recipe Fudgy Brownies** setup. It uses just the basic stuff you already have sitting in your pantry, and trust me, I spent my entire twenties tweaking the sugar and cocoa ratio to nail this dual-texture promise. You’re going to be so proud of these results!
Why This Is Your New Favorite Easy Chewy Brownies Recipe Fudgy Brownies
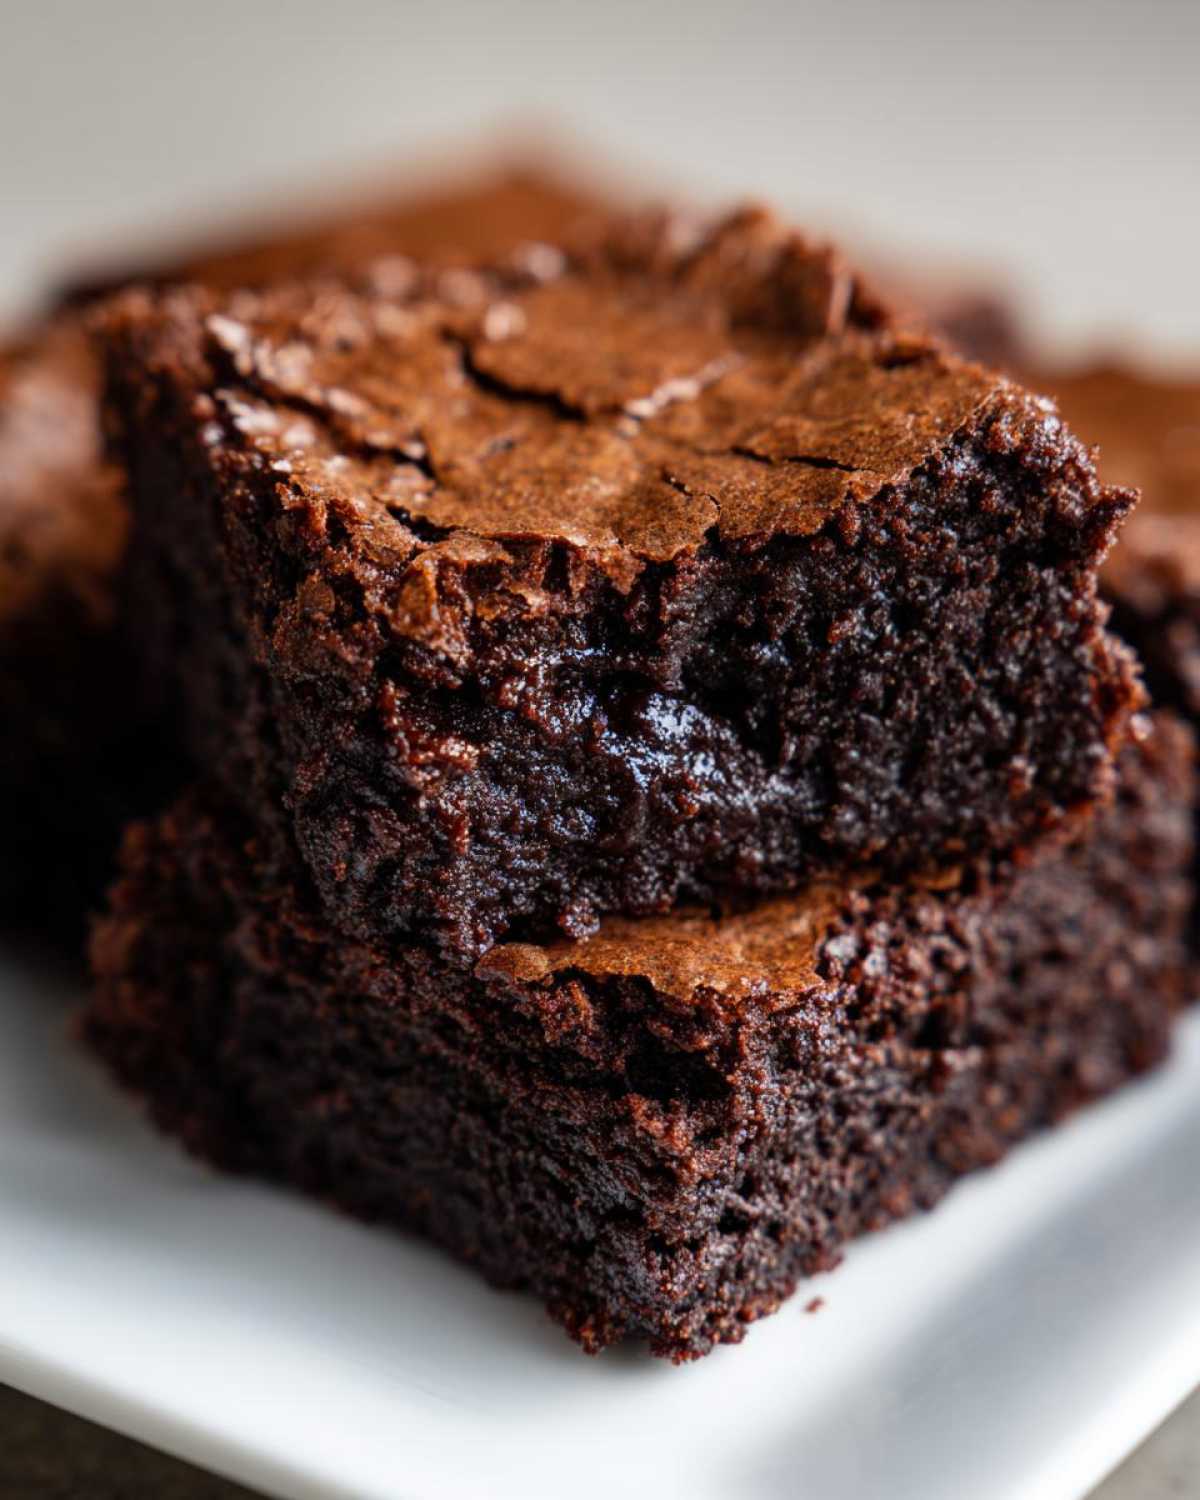
I know, I know, everyone claims they have the best brownie recipe, but hear me out. This one delivers on the promise without any weird grocery runs or complicated steps. We’re talking quick dessert magic here. You won’t need a fancy mixer—just a bowl and your arm power! This is truly a simple brownie recipe that feels gourmet.
What makes these brownies different? It’s all about respecting the fat and sugar ratios, which gives us those incredible results:
- They come together in about ten minutes of actual work. Seriously fast!
- You get those sought-after chewy edges that make you hold your breath before the first bite, followed by a center that is deeply moist and dense brownies perfection.
- Everything starts with basic pantry ingredients—no specialty chocolate bars needed to get that rich, dark flavor.
Achieving the Perfect Texture Balance
So, how do we get both chewiness and fudge? The secret is twofold, and it’s non-negotiable! First, we use a higher ratio of sugar to flour. That sugar melts down beautifully during baking to create that signature chewy structure. Second, we don’t use much flour at all! Limited flour means less structure development, which keeps the center intensely fudgy rather than cakey. It’s the best of both worlds, trust me. You can check out my thoughts on other rich chocolate recipes over at fudgy triple chocolate brownies if you’re feeling extra indulgent!
Essential Ingredients for Easy Chewy Brownies Recipe Fudgy Brownies
I love this part because it shows you just how simple this whole operation is. Seriously, when I say this is a brownie recipe using basic pantry ingredients, I mean it. You likely have everything needed right now! We aren’t messing around with complicated folding techniques or bizarre extracts here. We just need the right balance of fat, sugar, and chocolate flavor to nail that decadent texture we’re chasing. This list makes a generous 16 squares, which is just the right amount for a neighborhood bake sale or a very happy family!
Here is what you need to gather up:
- 1 cup (2 sticks) unsalted butter, melted
- 2 cups granulated sugar
- 4 large eggs
- 1 teaspoon vanilla extract
- 3/4 cup unsweetened cocoa powder
- 1 cup all-purpose flour
- 1/2 teaspoon salt
- 1 cup semi-sweet chocolate chips (optional, but highly recommended!)
Ingredient Notes and Substitutions
Okay, let’s talk about those ingredients because they matter for that guaranteed fudgy texture brownies finish. First off, the butter must be melted. Don’t try softening it; we need that liquid fat straight into the sugar to start building the base for our fudgy center. Also, use unsweetened cocoa powder—the good quality stuff makes a difference in deepness of flavor, turning these into rich dark chocolate brownies! For the flour, resist any urge to substitute with almond or coconut flour unless you’re looking for a completely different recipe; the all-purpose flour is essential for the chew.
If you want to try my trick for next-level flavor, use a scant 3/4 cup of flour instead of the full cup. It’s a small adjustment, but it nudges the texture firmly into fudgy territory! You can see how I handle ingredients similarly when making my favorite peanut butter cookies; it’s all about ratios!
How to Prepare Your Easy Chewy Brownies Recipe Fudgy Brownies Instructions
Alright, this is where we turn simple ingredients into treasure! Because this is such an easy dessert recipe for beginners, the real expertise comes from paying attention during the mixing stage. We’re moving fast, but we’re not rushing the quality. My goal here is to give you the best chewy brownies instructions so you never have a sad, crumbly batch again. Get your oven ready, because this whole process moves from bowl to oven in under ten minutes!
Prepping the Pan and Oven
First things first: set your oven bright and early to 350°F (175°C). This might sound like a small thing, but an oven that isn’t fully preheated messes with the initial bake, and we don’t want that, especially when aiming for fudginess! Now, for my biggest non-negotiable tip for any classic chocolate brownies from scratch: parchment paper sling. Cut a sheet big enough so that it lines the bottom of your 9×13 pan and sticks up over two opposite sides like handles. You don’t want to struggle digging these out later!
Mixing Wet and Dry Components for Easy Chewy Brownies Recipe Fudgy Brownies
We are keeping this mostly a one bowl brownie recipe, which is awesome! Start with the melted butter and sugar in your big bowl. Whisk them together really well—I mean, whisk it like you mean it for about a minute until it looks uniform. When I make these, I find that vigorous hand-whisking at this stage creates that thin, shiny layer on top we all crave later! Then, toss in the eggs one at a time, mixing after each one, followed by the vanilla. Now, in a separate, smaller bowl, just whisk your dry things: cocoa powder, flour, and salt. Add the dry mixture to the wet mixture gradually. The rule here is critical: Mix until *just* combined. Stop as soon as you can’t see streaks of flour anymore. Overmixing is how you get tough brownies, and we want chewy and *moist*!
Baking Time and Testing for Perfect Texture
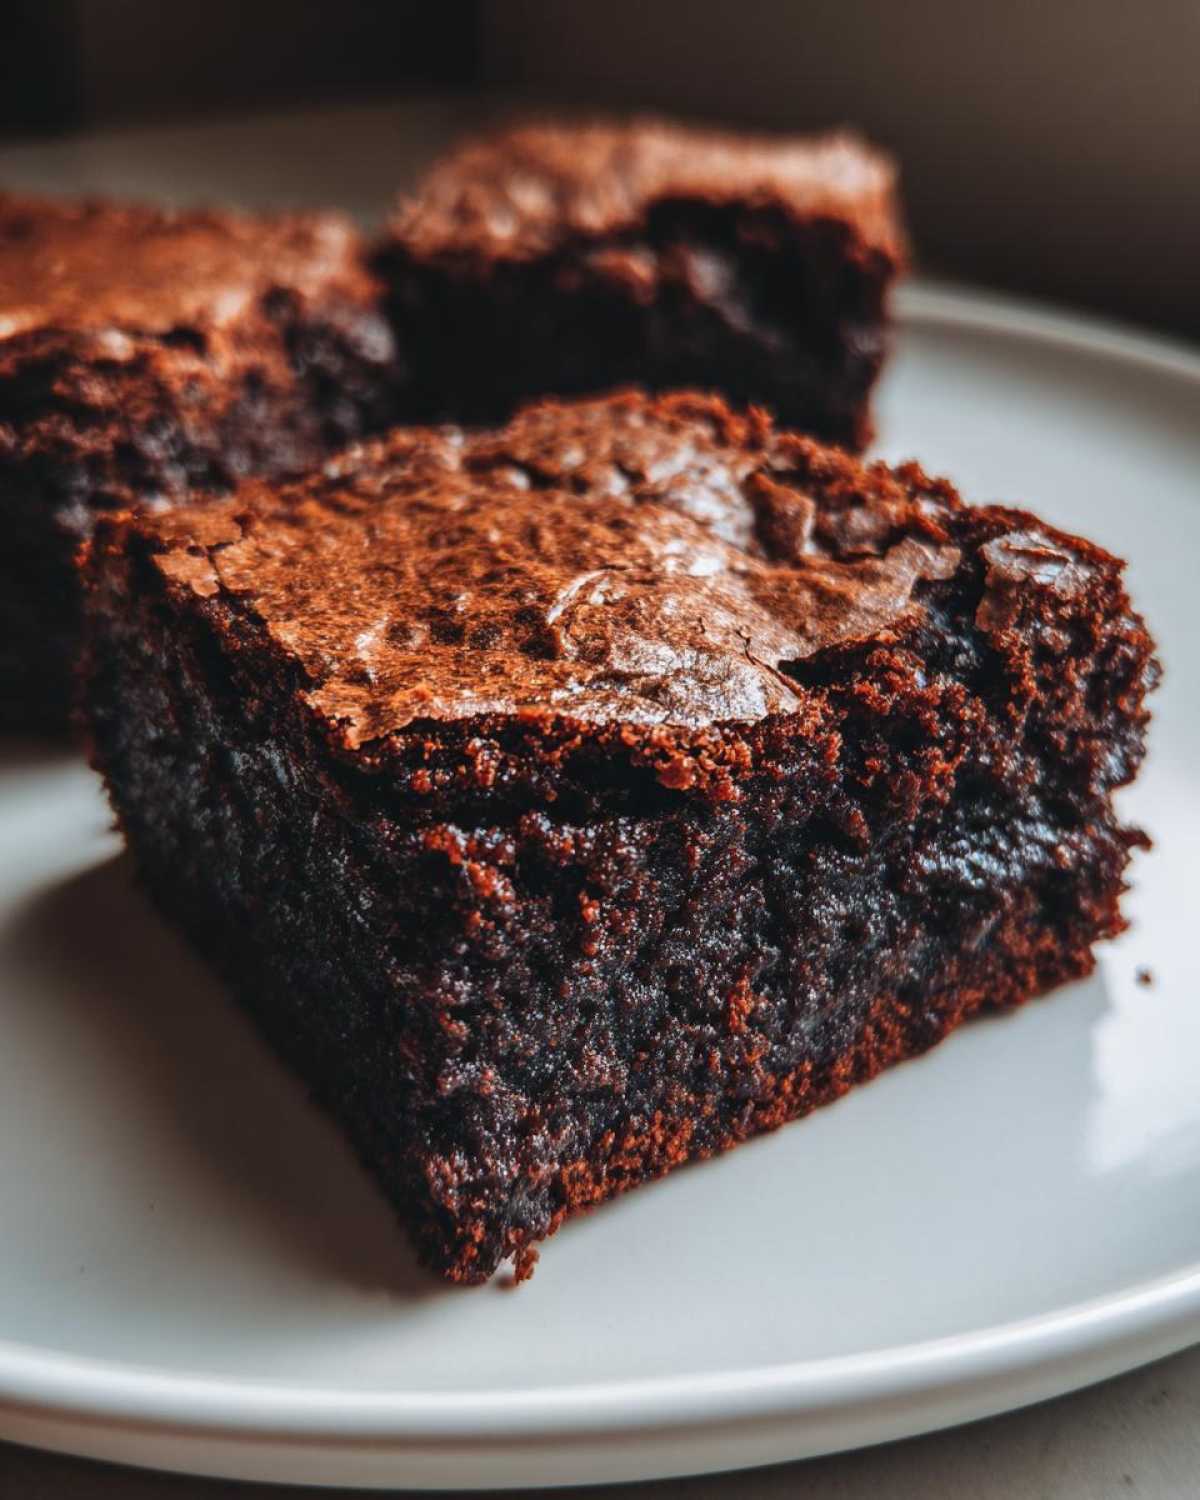
Spread that beautiful, thick batter into your prepared pan—use a spatula to smooth the top evenly. Now, we bake for 25 to 30 minutes. This is the heart of the quick fudgy brownie baking phase! We are aiming for underdone, not overdone. Don’t rush the cooling phase later, but right now in the oven, watch carefully. When you test it, forget the toothpick coming out clean. For these, you want the toothpick inserted near the middle to come out with some moist, thick crumbs sticking to it—not wet batter, but definite evidence that the center is still gooey. That’s how you guarantee the no-fail chewy brownie technique!
After they come out, you can always find a few extra tips for baking perfection over here at no-bake protein bars, as the cooling principles actually cross over!
Tips for Guaranteed Fudgy Texture Brownies Success
You asked for fudgy, and I’m giving you the cheat codes for that dense, slow-melt texture. The biggest tip, which I also touched on when testing for doneness, is avoiding the urge to bake them until they’re perfectly firm. That’s the cakey route! For guaranteed fudgy texture brownies, you need to pull them when they seem just slightly too soft in the center. They firm up a lot when they cool off! Also, consider skipping the optional chocolate chips and adding an extra half cup of chopped dark chocolate directly into the batter instead. The smaller, irregular chips melt into pockets of pure fudge, enhancing that no-fail chewy brownie technique immensely.
Another thing I swear by when making these moist and dense brownies is chilling them if you possibly can. If you let the pan sit on the counter for an hour, they firm up nicely. But if you wrap them tight and pop them in the fridge for two hours? Wow. They become ridiculously chewy and slice like actual fudge squares. You can check out my take on soft chewy cookies for more texture secrets!
Storage and Reheating Instructions for Your Easy Chewy Brownies Recipe Fudgy Brownies
Keeping these incredible brownies fresh is easy, thankfully! Since they have that good fat content from the melted butter, they stay delicious for days if you keep them sealed up tight. I always use an airtight container—plastic or glass works fine—and store them right on the counter at room temperature. Don’t worry about the fridge unless your kitchen is ridiculously hot; refrigeration can actually dry out baked goods faster, and we want to preserve that moisture!
If you happen to make a giant batch (which you should!), they freeze like a dream. Cut them into squares first, then lay them out on a baking sheet lined with parchment paper to freeze solid for about an hour. Once they are individual frozen bricks, transfer them to a freezer-safe bag. They last beautifully for up to three months! When you want one, just let it thaw on the counter for about 20 minutes, or microwave it for 10 seconds for an instant warm, gooey treat. If you are looking for other good-for-freezing recipes, my honey bran muffins are excellent keepers!
Serving Suggestions for Homemade Decadent Brownies
These brownies are so incredibly rich on their own that they almost don’t need anything else, but where’s the fun in that? If you are serving them warm, right out of that cooling phase, a small scoop of vanilla bean ice cream is mandatory. The hot chocolate meets the cold cream—it’s heaven! For something a little lighter, a dusting of powdered sugar goes a long way and looks so professional, even if this is you making your first batch of homemade decadent brownies.
On the other hand, if you’re cutting them cold for a lunchbox treat, try spreading a thin layer of rich peanut butter on top before cutting. It adds a salty counterpoint that is just fantastic! Or, if you’re feeling extra fancy, you can whip up a quick ganache—that involves heating heavy cream and pouring it over chopped chocolate—and drizzle that over the top while they are still slightly warm. If you’re looking for other simple treats that wow the crowd, check out my tips for easy berry cobbler!
Frequently Asked Questions About This Easy Chewy Brownies Recipe Fudgy Brownies
Can I use melted butter in this simple brownie recipe?
Yes, absolutely! Melted butter is the secret weapon for achieving a truly fudgy texture here. When you whisk the melted butter directly into the sugar before adding the eggs, it starts to emulsify the mixture almost instantly. This liquid fat incorporation is what keeps the final product moist and dense, unlike recipes that call for creaming softened butter, which incorporates more air and leads to a lighter, cake-like texture.
How do I get that shiny, crackly top on my brownies?
That glassy top is the sign of a **guaranteed fudgy texture brownies** success! It happens when the sugar fully dissolves in the melted fat (the warm butter) during the initial mixing stage. When you mix the butter and sugar well, the water content evaporates during baking, leaving behind that thin, crisp sugar shell. As I mentioned in the instructions, whisk that butter and sugar mixture vigorously right after melting the butter!
Can I skip the mixer for this recipe?
You certainly can skip the electric mixer! This recipe was designed to be adaptable, which is why it keeps landing on my list of easy dessert recipes for beginners. As long as you are strong-armed enough to whisk that butter and sugar mixture until it looks pale and happy, and then are careful not to overmix the flour in later—you are golden. This is one of those great no mixer required brownies recipes that still delivers amazing results!
If you’ve navigated the mixing stage successfully, you should be checking out my thoughts on storing delicate baked goods, like my tips for Italian herb and cheese bread, to keep your squares fresh!
Estimated Nutritional Data for Classic Chocolate Brownies From Scratch
I always try to give you guys a ballpark idea of what you’re digging into when you make one of my recipes. Remember that these numbers are estimates based on using the ingredients listed for a standard batch of classic chocolate brownies from scratch, and they can change wildly depending on what brand of cocoa or chocolate chips you use! We want you to enjoy these rich squares, but it’s always good to have the numbers handy. I always say, baking is an exact science until you start swapping out the good quality chocolate for that dollar-store brand!
Here is the rough breakdown per square:
- Serving Size: 1 square
- Calories: 250
- Sugar: 28g
- Sodium: 100mg
- Fat: 14g
- Saturated Fat: 9g
- Unsaturated Fat: 5g
- Trans Fat: 0g
- Carbohydrates: 30g
- Fiber: 1g
- Protein: 3g
- Cholesterol: 55mg
Please keep in mind that these estimations are calculated carefully, but for exact dieting needs, you should always verify with premium tracking software. I try to be as precise as possible, just like when I figure out the nutrition for my creamy old-fashioned rice pudding recipe; baking data requires some guesswork unless you weigh every single ingredient perfectly!
Share Your Perfect Texture Brownies Experience
Now that you have the secrets to the most outrageously easy and perfectly textured batch of brownies—seriously, tell me if these aren’t the best **Easy Chewy Brownies Recipe Fudgy Brownies** you’ve ever made!—I want to hear all about it!
Did you manage to get that gorgeous crackly top? Did you cut them after an hour of cooling or did you sneak one while they were still warm and gooey? Drop a rating for the recipe below (I’m hoping for five stars for this one!) and leave me a comment detailing your experience. Knowing that you are enjoying these **homemade decadent brownies** makes all my testing worth it. Happy baking, friends!
Don’t forget to browse the rest of the site for more amazing, low-effort recipes—I’ve got a whole section dedicated to easy dessert recipes for beginners!
Tips for Guaranteed Fudgy Texture Brownies Success
You asked for fudgy, and I’m giving you the cheat codes for that dense, slow-melt texture. The biggest tip, which I also touched on when testing for doneness, is avoiding the urge to bake them until they’re perfectly firm. That’s the cakey route! For guaranteed fudgy texture brownies, you need to pull them when they seem just slightly too soft in the center. They firm up a lot when they cool off! Also, consider skipping the optional chocolate chips and adding an extra half cup of chopped dark chocolate directly into the batter instead. The smaller, irregular chips melt into pockets of pure fudge, enhancing that no-fail chewy brownie technique immensely.
Another thing I swear by when making these moist and dense brownies is chilling them if you possibly can. If you let the pan sit on the counter for an hour, they firm up nicely. But if you wrap them tight and pop them in the fridge for two hours? Wow. They become ridiculously chewy and slice like actual fudge squares. You can check out my take on soft chewy cookies for more texture secrets!
Storage and Reheating Instructions for Your Easy Chewy Brownies Recipe Fudgy Brownies
Keeping these incredible brownies fresh is easy, thankfully! Since they have that good fat content from the melted butter, they stay delicious for days if you keep them sealed up tight. I always use an airtight container—plastic or glass works fine—and store them right on the counter at room temperature. Don’t worry about the fridge unless your kitchen is ridiculously hot; refrigeration can actually dry out baked goods faster, and we want to preserve that moisture!
If you happen to make a giant batch (which you should!), they freeze like a dream. Cut them into squares first, then lay them out on a baking sheet lined with parchment paper to freeze solid for about an hour. Once they are individual frozen bricks, transfer them to a freezer-safe bag. They last beautifully for up to three months! When you want one, just let it thaw on the counter for about 20 minutes, or microwave it for 10 seconds for an instant warm, gooey treat. If you are looking for other good-for-freezing recipes, my honey bran muffins are excellent keepers!
Serving Suggestions for Homemade Decadent Brownies
These brownies are so incredibly rich on their own that they almost don’t need anything else, but where’s the fun in that? If you are serving them warm, right out of that cooling phase, a small scoop of vanilla bean ice cream is mandatory. The hot chocolate meets the cold cream—it’s heaven! For something a little lighter, a dusting of powdered sugar goes a long way and looks so professional, even if this is you making your first batch of homemade decadent brownies.
On the other hand, if you’re cutting them cold for a lunchbox treat, try spreading a thin layer of rich peanut butter on top before cutting. It adds a salty counterpoint that is just fantastic! Or, if you’re feeling extra fancy, you can whip up a quick ganache—that involves heating heavy cream and pouring it over chopped chocolate—and drizzle that over the top while they are still slightly warm. If you’re looking for other simple treats that wow the crowd, check out my tips for easy berry cobbler!
Frequently Asked Questions About This Easy Chewy Brownies Recipe Fudgy Brownies
I get so many questions once people start making these, and that’s a good sign, right? It means you are serious about getting the texture just perfect! I tried to make this the ultimate guide on how to make perfect texture brownies, but I totally get it—sometimes you need a quick answer for a specific snag. Here are the ones that pop up the most when folks start their quick fudgy brownie baking adventure!
Can I use melted butter in this simple brownie recipe?
Oh, you absolutely must use melted butter here! Seriously, this is the number one trick for getting that gooey, dense, fudgy texture. When you melt the butter and whisk it straight into the sugar before adding the eggs, you are setting up the base perfectly for a fudgy brownie. If you try to cream softened butter like you would for a cake, you bring in too much air, and boom—cakey brownies! We don’t want that sad substitution here; melted butter is key to a fudgy result.
How do I get that shiny, crackly top on my brownies?
Ah, the coveted crackly top! It’s pure magic, but it’s actually science. This happens when you completely dissolve the sugar into the melted butter during that initial whisking step. When the mixture is hot and super smooth, the sugar rises to the surface during baking and creates that thin, glossy shell. Just make sure you don’t overmix once you add the flour, because that develops gluten and ruins the delicate crackle before it even sets. That shiny top confirms you’ve nailed the classic chocolate brownies from scratch look!
Can I skip the mixer for this recipe?
Yes, yes, a thousand times yes! I designed this recipe specifically to be fuss-free, which is why it’s one of my most popular choices for easy dessert recipes for beginners. You genuinely do not need an electric mixer. All the mixing specified in the instructions—whisking the butter and sugar, then gently incorporating the dry stuff—can be done perfectly well with just a good sturdy whisk or a wooden spoon. That confirms we’re sticking to the no mixer required brownies promise!
If you’ve navigated the mixing stage successfully, you should be checking out my thoughts on storing delicate baked goods, like my tips for Italian herb and cheese bread, to keep your squares fresh!
Estimated Nutritional Data for Classic Chocolate Brownies From Scratch
I always try to give you guys a ballpark idea of what you’re digging into when you make one of my recipes. Remember that these numbers are estimates based on using the ingredients listed for a standard batch of classic chocolate brownies from scratch, and they can change wildly depending on what brand of cocoa or chocolate chips you use! We want you to enjoy these rich squares, but it’s always good to have the numbers handy. I always say, baking is an exact science until you start swapping out the good quality chocolate for that dollar-store brand!
Here is the rough breakdown per square:
- Serving Size: 1 square
- Calories: 250
- Sugar: 28g
- Sodium: 100mg
- Fat: 14g
- Saturated Fat: 9g
- Unsaturated Fat: 5g
- Trans Fat: 0g
- Carbohydrates: 30g
- Fiber: 1g
- Protein: 3g
- Cholesterol: 55mg
Please keep in mind that these estimations are calculated carefully, but for exact dieting needs, you should always verify with premium tracking software. I try to be as precise as possible, just like when I figure out the nutrition for my creamy old-fashioned rice pudding recipe; baking data requires some guesswork unless you weigh every single ingredient perfectly!
Share Your Perfect Texture Brownies Experience
Now that you have the secrets to the most outrageously easy and perfectly textured batch of brownies—seriously, tell me if these aren’t the best **Easy Chewy Brownies Recipe Fudgy Brownies** you’ve ever made!—I want to hear all about it!
Did you manage to get that gorgeous crackly top? Did you cut them after an hour of cooling or did you sneak one while they were still warm and gooey? Drop a rating for the recipe below (I’m hoping for five stars for this one!) and leave me a comment detailing your experience. Knowing that you are enjoying these **homemade decadent brownies** makes all my testing worth it. Happy baking, friends!
Don’t forget to browse the rest of the site for more amazing, low-effort recipes—I’ve got a whole section dedicated to easy dessert recipes for beginners!
Tips for Guaranteed Fudgy Texture Brownies Success
You asked for fudgy, and I’m giving you the cheat codes for that dense, slow-melt texture. The biggest tip, which I also touched on when testing for doneness, is avoiding the urge to bake them until they’re perfectly firm. That’s the cakey route! For guaranteed fudgy texture brownies, you need to pull them when they seem just slightly too soft in the center. They firm up a lot when they cool off! Also, consider skipping the optional chocolate chips and adding an extra half cup of chopped dark chocolate directly into the batter instead. The smaller, irregular chips melt into pockets of pure fudge, enhancing that no-fail chewy brownie technique immensely.
Another thing I swear by when making these moist and dense brownies is chilling them if you possibly can. If you let the pan sit on the counter for an hour, they firm up nicely. But if you wrap them tight and pop them in the fridge for two hours? Wow. They become ridiculously chewy and slice like actual fudge squares. You can check out my take on soft chewy cookies for more texture secrets!
Storage and Reheating Instructions for Your Easy Chewy Brownies Recipe Fudgy Brownies
Keeping these incredible brownies fresh is easy, thankfully! Since they have that good fat content from the melted butter, they stay delicious for days if you keep them sealed up tight. I always use an airtight container—plastic or glass works fine—and store them right on the counter at room temperature. Don’t worry about the fridge unless your kitchen is ridiculously hot; refrigeration can actually dry out baked goods faster, and we want to preserve that moisture!
If you happen to make a giant batch (which you should!), they freeze like a dream. Cut them into squares first, then lay them out on a baking sheet lined with parchment paper to freeze solid for about an hour. Once they are individual frozen bricks, transfer them to a freezer-safe bag. They last beautifully for up to three months! When you want one, just let it thaw on the counter for about 20 minutes, or microwave it for 10 seconds for an instant warm, gooey treat. If you are looking for other good-for-freezing recipes, my honey bran muffins are excellent keepers!
Serving Suggestions for Homemade Decadent Brownies
These brownies are so incredibly rich on their own that they almost don’t need anything else, but where’s the fun in that? If you are serving them warm, right out of that cooling phase, a small scoop of vanilla bean ice cream is mandatory. The hot chocolate meets the cold cream—it’s heaven! For something a little lighter, a dusting of powdered sugar goes a long way and looks so professional, even if this is you making your first batch of homemade decadent brownies.
On the other hand, if you’re cutting them cold for a lunchbox treat, try spreading a thin layer of rich peanut butter on top before cutting. It adds a salty counterpoint that is just fantastic! Or, if you’re feeling extra fancy, you can whip up a quick ganache—that involves heating heavy cream and pouring it over chopped chocolate—and drizzle that over the top while they are still slightly warm. If you’re looking for other simple treats that wow the crowd, check out my tips for easy berry cobbler!
Frequently Asked Questions About This Easy Chewy Brownies Recipe Fudgy Brownies
I get so many questions once people start making these, and that’s a good sign, right? It means you are serious about getting the texture just perfect! I tried to make this the ultimate guide on how to make perfect texture brownies, but I totally get it—sometimes you need a quick answer for a specific snag. Here are the ones that pop up the most when folks start their quick fudgy brownie baking adventure!
Can I use melted butter in this simple brownie recipe?
Oh, you absolutely must use melted butter here! Seriously, this is the number one trick for getting that gooey, dense, fudgy texture. When you melt the butter and whisk it straight into the sugar before adding the eggs, you are setting up the base perfectly for a fudgy brownie. If you try to cream softened butter like you would for a cake, you bring in too much air, and boom—cakey brownies! We don’t want that sad substitution here; melted butter is key to a fudgy result.
How do I get that shiny, crackly top on my brownies?
Ah, the coveted crackly top! It’s pure magic, but it’s actually science. This happens when you completely dissolve the sugar into the melted butter during that initial whisking step. When the mixture is hot and super smooth, the sugar rises to the surface during baking and creates that thin, glossy shell. Just make sure you don’t overmix once you add the flour, because that develops gluten and ruins the delicate crackle before it even sets. That shiny top confirms you’ve nailed the classic chocolate brownies from scratch look!
Can I skip the mixer for this recipe?
Yes, yes, a thousand times yes! I designed this recipe specifically to be fuss-free, which is why it’s one of my most popular choices for easy dessert recipes for beginners. You genuinely do not need an electric mixer. All the mixing specified in the instructions—whisking the butter and sugar, then gently incorporating the dry stuff—can be done perfectly well with just a good sturdy whisk or a wooden spoon. That confirms we’re sticking to the no mixer required brownies promise!
If you’ve navigated the mixing stage successfully, you should be checking out my thoughts on storing delicate baked goods, like my tips for Italian herb and cheese bread, to keep your squares fresh!
Estimated Nutritional Data for Classic Chocolate Brownies From Scratch
I always try to give you guys a ballpark idea of what you’re digging into when you make one of my recipes. Remember that these numbers are estimates based on using the ingredients listed for a standard batch of classic chocolate brownies from scratch, and they can change wildly depending on what brand of cocoa or chocolate chips you use! We want you to enjoy these rich squares, but it’s always good to have the numbers handy. I always say, baking is an exact science until you start swapping out the good quality chocolate for that dollar-store brand!
Here is the rough breakdown per square:
- Serving Size: 1 square
- Calories: 250
- Sugar: 28g
- Sodium: 100mg
- Fat: 14g
- Saturated Fat: 9g
- Unsaturated Fat: 5g
- Trans Fat: 0g
- Carbohydrates: 30g
- Fiber: 1g
- Protein: 3g
- Cholesterol: 55mg
Please keep in mind that these estimations are calculated carefully, but for exact dieting needs, you should always verify with premium tracking software. I try to be as precise as possible, just like when I figure out the nutrition for my creamy old-fashioned rice pudding recipe; baking data requires some guesswork unless you weigh every single ingredient perfectly!
Share Your Perfect Texture Brownies Experience
Now that you have the secrets to the most outrageously easy and perfectly textured batch of brownies—seriously, tell me if these aren’t the best **Easy Chewy Brownies Recipe Fudgy Brownies** you’ve ever made!—I want to hear all about it!
Did you manage to get that gorgeous crackly top? Did you cut them after an hour of cooling or did you sneak one while they were still warm and gooey? Drop a rating for the recipe below (I’m hoping for five stars for this one!) and leave me a comment detailing your experience. Knowing that you are enjoying these **homemade decadent brownies** makes all my testing worth it. Happy baking, friends!
Don’t forget to browse the rest of the site for more amazing, low-effort recipes—I’ve got a whole section dedicated to easy dessert recipes for beginners!
Print
Easy Chewy Fudgy Brownies
- Total Time: 40 min
- Yield: 16 squares
- Diet: Vegetarian
Description
Follow these simple instructions to make rich, dense brownies with a perfect balance of chewy edges and fudgy centers using basic pantry ingredients.
Ingredients
- 1 cup (2 sticks) unsalted butter, melted
- 2 cups granulated sugar
- 4 large eggs
- 1 teaspoon vanilla extract
- 3/4 cup unsweetened cocoa powder
- 1 cup all-purpose flour
- 1/2 teaspoon salt
- 1 cup semi-sweet chocolate chips (optional)
Instructions
- Preheat your oven to 350°F (175°C). Line a 9×13 inch baking pan with parchment paper, leaving an overhang on the sides for easy removal.
- In a large bowl, whisk the melted butter and sugar together until fully combined.
- Add the eggs one at a time, mixing well after each addition. Stir in the vanilla extract.
- In a separate bowl, whisk together the cocoa powder, flour, and salt.
- Gradually add the dry ingredients to the wet ingredients. Mix until just combined; do not overmix.
- If using, gently fold in the chocolate chips.
- Spread the batter evenly into the prepared baking pan.
- Bake for 25 to 30 minutes. A toothpick inserted near the center should come out with moist crumbs attached, not wet batter.
- Let the brownies cool completely in the pan on a wire rack before lifting them out using the parchment overhang and cutting them into squares.
Notes
- For extra fudginess, use slightly less flour.
- Do not overbake; this is the key to a chewy texture.
- Cooling completely before cutting prevents crumbling.
- Prep Time: 10 min
- Cook Time: 30 min
- Category: Dessert
- Method: Baking
- Cuisine: American
Nutrition
- Serving Size: 1 square
- Calories: 250
- Sugar: 28g
- Sodium: 100mg
- Fat: 14g
- Saturated Fat: 9g
- Unsaturated Fat: 5g
- Trans Fat: 0g
- Carbohydrates: 30g
- Fiber: 1g
- Protein: 3g
- Cholesterol: 55mg