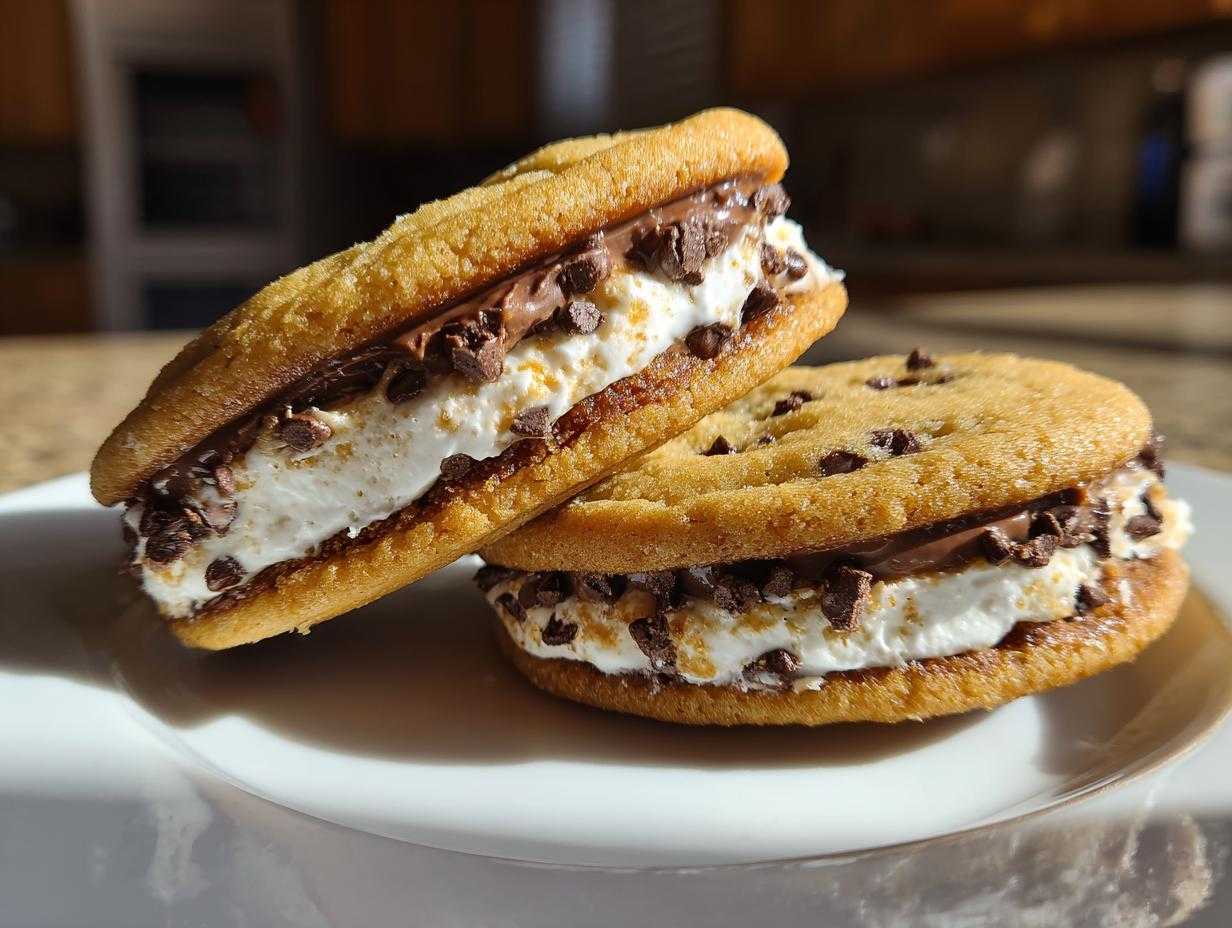
Oh my gosh, do you ever get that powerful, non-negotiable craving for a real Italian cannoli with that perfectly crisp shell? Me too! But let’s be honest, deep-frying shells on a Tuesday night just isn’t happening for me, and I bet it isn’t for you either. That’s why I perfected these amazing cannoli cookies. Forget the tricky shells—I’ve taken that dreamy, sweet, slightly citrusy ricotta filling and sandwiched it between two soft, buttery baked cookies. Seriously, these deliver all the flavor punch of Sicily in a much quicker, easier, cookie format. You won’t believe how authentic they taste!

Why You Will Love Making These Cannoli Cookies
Honestly, this recipe is a winner every single time I pull it out for a crowd. They are so simple, and people go absolutely nuts for the creamy center!
- They are super fast to put together—definitely one of my favorite easy Italian sweets when I need a last-minute treat.
- You get that incredible, authentic flavor profile without any deep-frying drama.
- The contrast between the soft cookie and the cool, creamy filling cookies texture is just divine.
- These are fabulous for making ahead, which is a huge bonus when you’re gearing up for holidays or parties!
Essential Ingredients for Perfect Cannoli Cookies
You know how sometimes a recipe just calls for basic things, but the technique makes all the difference? Well, we need good building blocks for these beauties, and I’m laying them all out so you can’t miss a thing. The biggest secret here doesn’t actually live in the dough; it lives in the filling prep. Trust me on this one: you absolutely *must* drain your ricotta!
If you use ricotta straight from the container, your filling will turn into soup faster than you can say “Buon Appetito.” I usually let mine sit in a coffee filter-lined sieve over a bowl in the fridge for at least two hours, sometimes even overnight. That little bit of extra effort ensures you get that thick, luxurious texture we all dream about in Italian sweets. For the dough, don’t skip the almond extract—that’s what really whispers “Italian bakery” to your tastebuds!
For the Soft Cookie Base
- 1 cup (2 sticks) unsalted butter, softened
- 1 cup granulated sugar
- 2 large eggs
- 1 teaspoon vanilla extract
- 1 teaspoon almond extract
- 3 cups all-purpose flour
- 1 teaspoon baking powder
- 1/2 teaspoon salt
- 1/2 cup mini chocolate chips (for cookie dough)
For the Creamy Ricotta Filling
- 1 cup whole milk ricotta cheese, drained well
- 1/2 cup powdered sugar
- 1/4 teaspoon cinnamon
- 1/4 cup mini chocolate chips (for filling)
- Optional: Chopped pistachios for garnish
Step-by-Step Guide to Making Your Cannoli Cookies
Okay, let’s roll up those sleeves! This process looks like a lot of parts, but honestly, it moves really quickly once you get going. We’re making the cookie part first, letting them chill out, and whipping up the filling while they cool down. It’s simple baking magic, I promise!
Preparing the Cookie Dough for Your Cannoli Cookies
First things first: get that oven humming at 350°F (175°C). Now, grab your stand mixer or a big bowl and cream that softened butter with the sugar until it looks pale and fluffy. Beat in your eggs one at a time—don’t rush this! Follow that with the vanilla and almond extracts. Next, slowly introduce the dry ingredients (flour, baking powder, salt). Mix until it *just* comes together, and then gently fold in those half-cup chocolate chips. You’re aiming for a soft dough that holds its shape, kind of like a great soft baked cookie dough.
Baking and Cooling the Cookie Shells
Line up your baking sheets with parchment paper—we don’t want sticking drama! Drop rounded tablespoons of dough onto the sheets, leaving a couple of inches between them so they have room to spread a little. Bake them for about 10 to 12 minutes. You’re looking for edges that are just turning a lovely light gold. Here’s the critical part: let them cool completely right there on the baking sheet for about 10 minutes before moving them to a wire rack. If you try to move them too soon, they will definitely crack or smoosh, and we need nice, sturdy shells for that creamy filling!
Creating the Authentic Ricotta Filling for Cannoli Cookies
While those cookies are cooling off, we make the star of the show! Take your super-drained ricotta cheese—remember that step? Add the powdered sugar, that little dash of cinnamon for warmth, and the remaining quarter cup of chocolate chips. Mix it all up until it’s perfectly smooth and creamy. Don’t over-mix, but make sure there are no lumps of unmixed sugar left. Give it a quick taste; if you want it sweeter, add a little more powdered sugar, but usually, this is spot on!
Assembling Your Delicious Cannoli Cookies
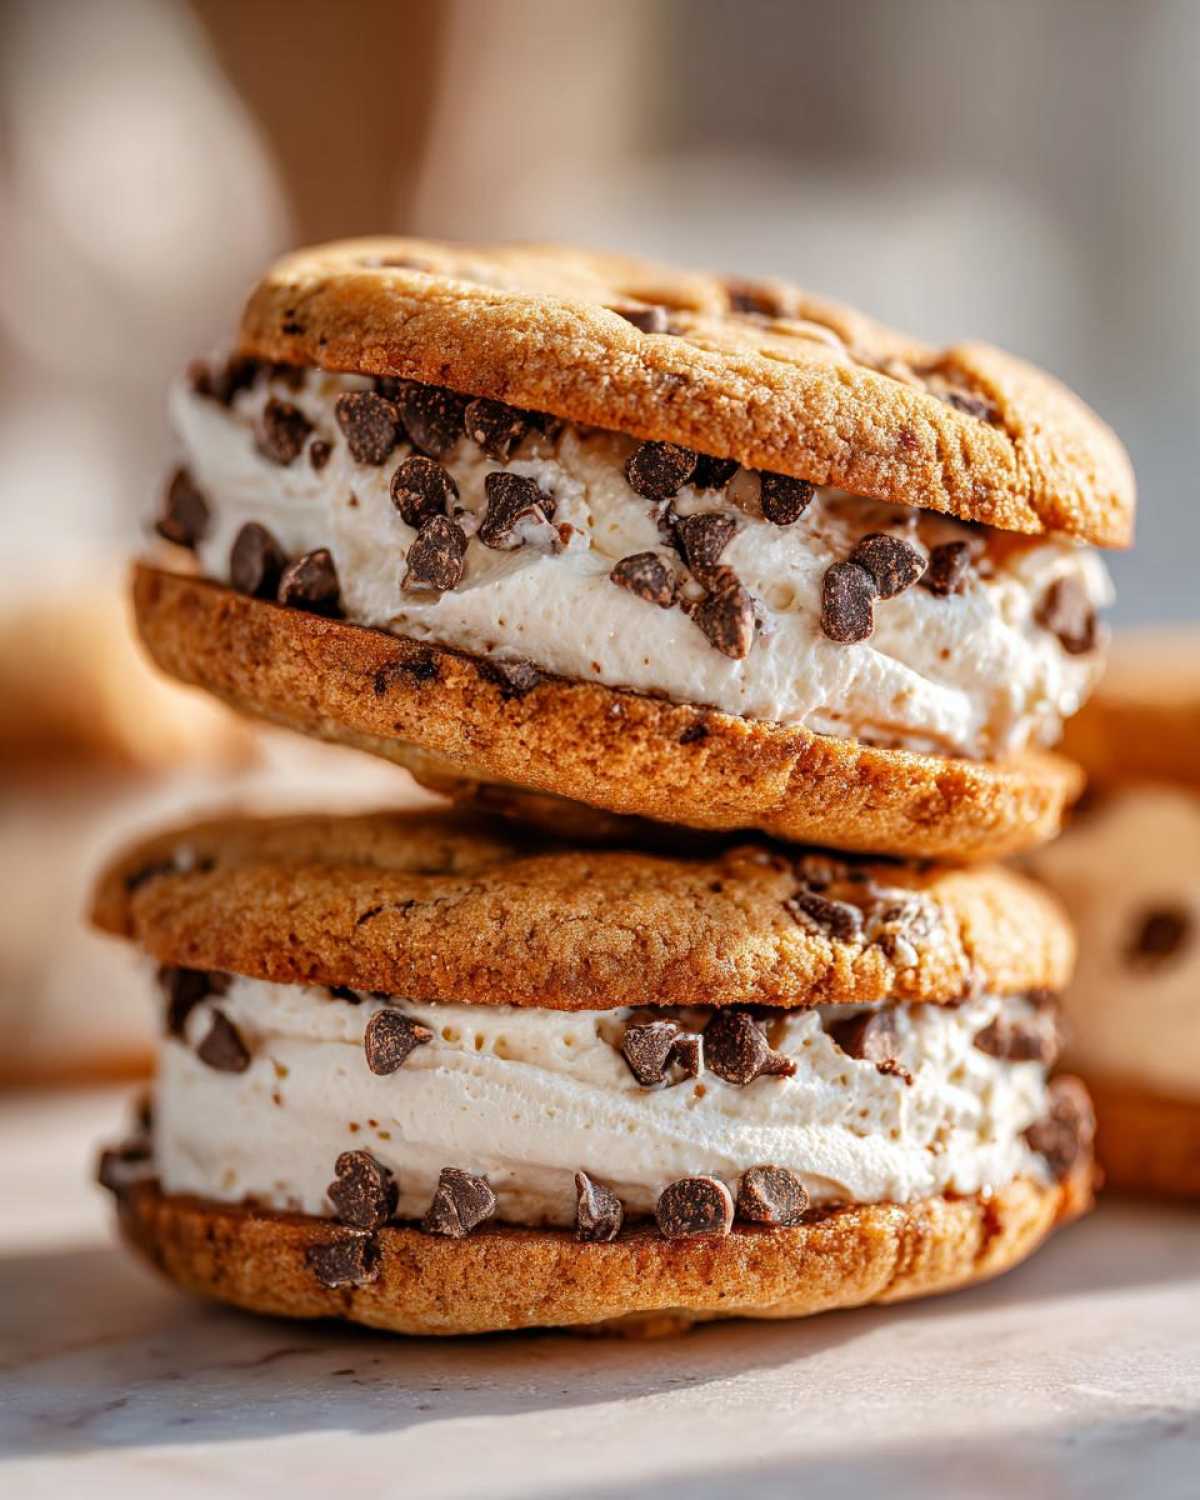
Once those cookies look and feel totally cool, it’s time to play sandwich artist! You have two choices here: you can scoop the filling on the flat side of one cookie and gently top it with another, or, for a real bakery look, fit a star tip onto a piping bag and fill them up. Pipe a generous swirl of that amazing ricotta filling onto one flat side, and then nestle the other cookie on top. If you want that authentic Sicilian touch, just roll the edges of the filling in some chopped pistachios. They look gorgeous!

Expert Tips for the Best Cannoli Cookies
I’ve made this recipe so many times now it’s second nature, but a few little secrets really separate a good batch of cannoli cookies from an unbelievable one. These little bits of advice make sure you nail that perfect contrast between the soft cookie and the luscious filling every single time. Seriously, don’t skip practicing these!
The Secret to Non-Weeping Ricotta Filling
I know I sound like a broken record, but I have to stress this again: moisture control is everything in Italian cookie recipes! If you skip draining the ricotta cheese, you are asking for trouble. We want that filling thick enough to stand tall when you sandwich the cookies, right? That means draining it for a solid two hours, minimum. I usually use cheesecloth draped over a bowl, but thick layers of paper towels work in a pinch. Press gently to help the whey separate. This ensures your creamy filling stays creamy, not sloshy.
Achieving the Right Cookie Texture
Remember how we talked about creaming the butter and sugar so carefully? That sets up the structure, but overmixing the flour is the fastest way to flatten that structure! Once you start adding the flour mixture, just mix on the lowest speed until you see the last white streaks disappear. Stop right there! If you continue mixing once the flour is incorporated, you’re developing gluten, and that turns your beautiful soft cookie into something tough and crumbly. We are aiming for that gorgeous texture described in soft baked cookies, not a chewy powerhouse!
Variations on Classic Cannoli Cookies
Part of the fun of baking at home is making a recipe your very own, right? While I absolutely adore these classic cannoli cookies just as written, they are just begging to be customized! You can play around with the dough mixture to bring out new layers of flavor that honor that beautiful Sicilian dessert inspired baking heritage. Who says we have to stick to just chocolate?
Flavor Twists for Your Cannoli Cookies
The easiest place to experiment is right in that soft cookie dough. If you want a brighter, sunnier flavor profile, try grating a full teaspoon of fresh orange zest right into the butter and sugar mixture when you’re creaming them together. It wakes everything up! The orange zest plays so nicely off the almond flavor we added to the filling.
Another simple switch is upgrading your chips. Instead of the mini chocolate chips in the dough, try swapping them out for finely chopped milk or dark chocolate—you get real melted pockets of chocolate goodness! And of course, we have to talk nuts. If you love them in the filling, try adding toasted, finely chopped almonds to the cookie dough as well. If you’re really looking to impress, check out my guide on Pistachio dessert recipes for tips on roasting nuts perfectly to use as filling garnish instead of just pistachios!
Serving Suggestions for Your Italian Cookie Recipes
Now that you’ve pulled off these incredible cannoli cookies, the real question is: what do you serve them with? Since these are so rich and satisfying, they don’t need much fuss, which is why they are such an easy win for any dessert spread or party buffet. They look so elegant, too, especially if you used that piping bag method!
For an afternoon event or a big holiday gathering, I always set these out right next to a big pot of really good coffee—espresso, if I’m feeling fancy! The slight bitterness of the coffee cuts through the sweetness of the filling perfectly. They are a fantastic addition to any collection of Italian cookie recipes you might be preparing.
If you’re serving these after a big dinner, they pair beautifully with a digestif. A small glass of chilled limoncello is the absolute classic choice; that bright lemon flavor dances wonderfully with the vanilla and almond notes in the filling. If you are doing a dessert board, make sure to scatter a few extra chopped pistachios around the platter for color—it just elevates the whole presentation immediately!

Storage and Make Ahead Tips for Cannoli Cookies
Listen, I get it—sometimes you just can’t make everything on the day you want to serve it. The good news here is that these are fantastic for planning ahead, which means less stress right before your party! When it comes to these cannoli cookies, timing is everything, and cooling your approach to storage can save you a lot of hassle later on.
The key difference in storage is whether you keep the cookies and the filling separate or assemble them into sandwiches right away. If you assemble them immediately, they sit beautifully for about 24 hours on the counter, but after that, the moisture from that glorious ricotta filling starts to soften the cookie shells a bit too much for my liking. We want that soft cookie texture, not mush!
The best way to prep these ahead of time is to treat the two parts independently. You can totally get a jump start on this by making the cookie dough first. I wrap mine up tight and stick it in the fridge; it keeps perfectly for up to two days. When you’re ready to bake, let it sit on the counter for about 15 minutes to warm up just enough so you can scoop it easily. If you’re looking for long-term prep, that dough freezes like a dream too! You can follow my tips for make ahead cookies, just make sure you label the bag clearly.
For the filling, you can mix that creamy ricotta up a day in advance. Keep it sealed tight in the fridge. Just give it a quick stir right before you plan to assemble your cookies. Remember, because the filling is dairy-based, keeping it chilled is really important for food safety and texture!
So, for best results, bake the cookies one day, make the filling later that day or the next morning, and then assemble them just a few hours before you plan to serve. That way, your shells stay just softly tender, and the filling is perfectly chilled and creamy!
Frequently Asked Questions About Cannoli Cookies
Here are a few things folks ask me when they first decide to try making these cannoli cookies. It’s all about making sure your texture is perfect, because when you nail the texture, you’ve nailed the whole Italian dessert experience!
Can I use mascarpone instead of ricotta in these cannoli cookies?
Oh, that’s a good question! Mascarpone is such a luxurious cheese. You absolutely *can* substitute it—it will give you a noticeably richer, denser filling because mascarpone has a higher fat content than standard ricotta. Since it’s naturally thicker, you might find you need to skip a little bit of the powdered sugar, or add just a tiny splash of milk or heavy cream to loosen it up. It won’t taste exactly like a traditional cannoli filling, which relies on the slight whey taste of ricotta, but it will be wonderfully decadent!
How do I prevent the cookie shells from getting soggy?
This is the eternal struggle with any filled cookie! If you know you’re not going to eat all of your sandwich cookies right away (which is tough, I know!), don’t assemble them until the very last minute. Keep the shells stored in an airtight container on the counter and the filling in the fridge separately.
If you absolutely need them assembled a few hours ahead of time, here’s a little trick I picked up: melt about two ounces of white chocolate chips. Once the cookies are totally cool, take a small spoon and lightly swipe a very thin layer across the cut side of one cookie shell. Let that chocolate harden for about five minutes—it creates a barrier that stops the moisture from seeping into the cookie. Then, pipe your filling on top of the chocolate barrier and sandwich it together. It works like a charm!
Are these considered quick dessert ideas?
I would definitely put these in the ‘quick-ish’ category! If you look at the cookbook time, the active prep time is fantastic; we’re looking at maybe 30 minutes to make the dough and whip up the filling, and only 12 minutes in the oven. That’s under 40 minutes of active time, making them a genuine quick dessert idea! However, you do have to factor in the crucial time needed for the cookies to cool completely before you can assemble them, and you really should drain that ricotta. So, while the mixing moves fast, plan for about an hour and a half total if you let things cool naturally.
Nutritional Information Estimate
Everyone always asks about the nutrition when I post pictures of these tasty treats, which is smart! Because we are using real butter and a decent amount of sugar to get that perfect soft cookie texture, they are definitely an indulgence. But hey, enjoying a delicious treat now and then is what life is all about, right?
Here are the general estimates for one finished cannoli cookies sandwich based on the recipe measurements we used. Please remember that these numbers are just a rough guide. If you use low-fat ricotta, or add more pecans or pistachios, those values are going to shift around a little bit!
- Serving Size: 1 cookie sandwich
- Calories: 250
- Sugar: 20g
- Sodium: 120mg
- Fat: 14g
- Saturated Fat: 8g
- Unsaturated Fat: 6g
- Trans Fat: 0g
- Carbohydrates: 30g
- Fiber: 1g
- Protein: 4g
- Cholesterol: 55mg
I always treat these figures as a starting point. Since this is homemade baking inspired by classic Italian cookie recipes, you have total control over what goes in! If you use whole milk ricotta like I suggest, you get a richer flavor, but it means a slightly higher fat count. That’s a worthwhile trade-off for the creamy texture in my book!
Share Your Homemade Cannoli Cookies Creations
I truly hope you had as much fun making these cannoli cookies as I do every time I whip up a fresh batch! Baking is so much more fun when we can share the results, right? I get such a kick out of seeing your creations pop up online.
When you try these out—whether you stuck strictly to the recipe or added your own bright twist of orange zest—I would absolutely love it if you came back here and left a star rating. Five stars means I get to keep making these amazing recipes for you!
Also, if you snap a photo of your perfectly piped, pistachio-dusted sandwiches, tag me on social media! I love seeing how you style your treats for parties or holidays. It makes the whole process feel like a big gathering. Don’t be shy; let me know what you thought of that creamy ricotta filling!
Print
Ultimate Easy Cannoli Cookies with Creamy Ricotta Filling
- Total Time: 37 min
- Yield: 20 cookies
- Diet: Vegetarian
Description
Make these simple cookies that capture the flavor of classic cannoli, featuring a soft cookie base and a sweet, creamy ricotta filling mixed with chocolate chips.
Ingredients
- 1 cup (2 sticks) unsalted butter, softened
- 1 cup granulated sugar
- 2 large eggs
- 1 teaspoon vanilla extract
- 1 teaspoon almond extract
- 3 cups all-purpose flour
- 1 teaspoon baking powder
- 1/2 teaspoon salt
- 1/2 cup mini chocolate chips (for cookie dough)
- 1 cup whole milk ricotta cheese, drained well
- 1/2 cup powdered sugar (for filling)
- 1/4 teaspoon cinnamon
- 1/4 cup mini chocolate chips (for filling)
- Optional: Chopped pistachios for garnish
Instructions
- Preheat your oven to 350°F (175°C). Line baking sheets with parchment paper.
- In a large bowl, cream together the softened butter and granulated sugar until light and fluffy.
- Beat in the eggs one at a time, then mix in the vanilla and almond extracts.
- In a separate bowl, whisk together the flour, baking powder, and salt. Gradually add the dry ingredients to the wet ingredients, mixing until just combined.
- Fold in the 1/2 cup of mini chocolate chips.
- Drop rounded tablespoons of dough onto the prepared baking sheets, spacing them about 2 inches apart.
- Bake for 10 to 12 minutes, or until the edges are lightly golden. Let the cookies cool completely on the baking sheet before moving them.
- While the cookies cool, prepare the filling. In a medium bowl, combine the well-drained ricotta cheese, powdered sugar, cinnamon, and the remaining 1/4 cup of mini chocolate chips. Mix until smooth.
- Once the cookies are completely cool, use a small knife or piping bag fitted with a star tip to pipe or spread a generous amount of the ricotta filling onto the flat side of one cookie. Top with a second cookie to create a sandwich.
- If desired, press the edges of the filling into chopped pistachios before serving.
Notes
- Drain the ricotta cheese for at least 2 hours, pressing out excess liquid with a paper towel or cheesecloth. This prevents a runny filling.
- You can make the cookie dough up to two days ahead and store it, covered, in the refrigerator.
- For a more authentic look, dust the finished cookies lightly with powdered sugar.
- Prep Time: 25 min
- Cook Time: 12 min
- Category: Dessert
- Method: Baking
- Cuisine: Italian
Nutrition
- Serving Size: 1 cookie sandwich
- Calories: 250
- Sugar: 20
- Sodium: 120
- Fat: 14
- Saturated Fat: 8
- Unsaturated Fat: 6
- Trans Fat: 0
- Carbohydrates: 30
- Fiber: 1
- Protein: 4
- Cholesterol: 55