

Hey there! Come on in and pull up a chair. Life gets pretty crazy, right? Between work, family, and just trying to keep up, sometimes you need a little something easy and comforting to grab and go. That’s where these Chewy Homemade Granola Bars come in. I remember when Clara, the heart behind 911Recipes, was first dreaming up this site. She kept talking about needing simple, delicious things you could make even when you felt like you had zero time. These chewy granola bars are exactly that. They’re packed with good stuff and have that perfect texture that just makes you happy. Forget those expensive store-bought ones. Making Chewy Homemade Granola Bars yourself is so much better and easier than you think! Today, I’m going to show you just how simple it is to whip up a batch of these.
Why You’ll Love These Chewy Homemade Granola Bars
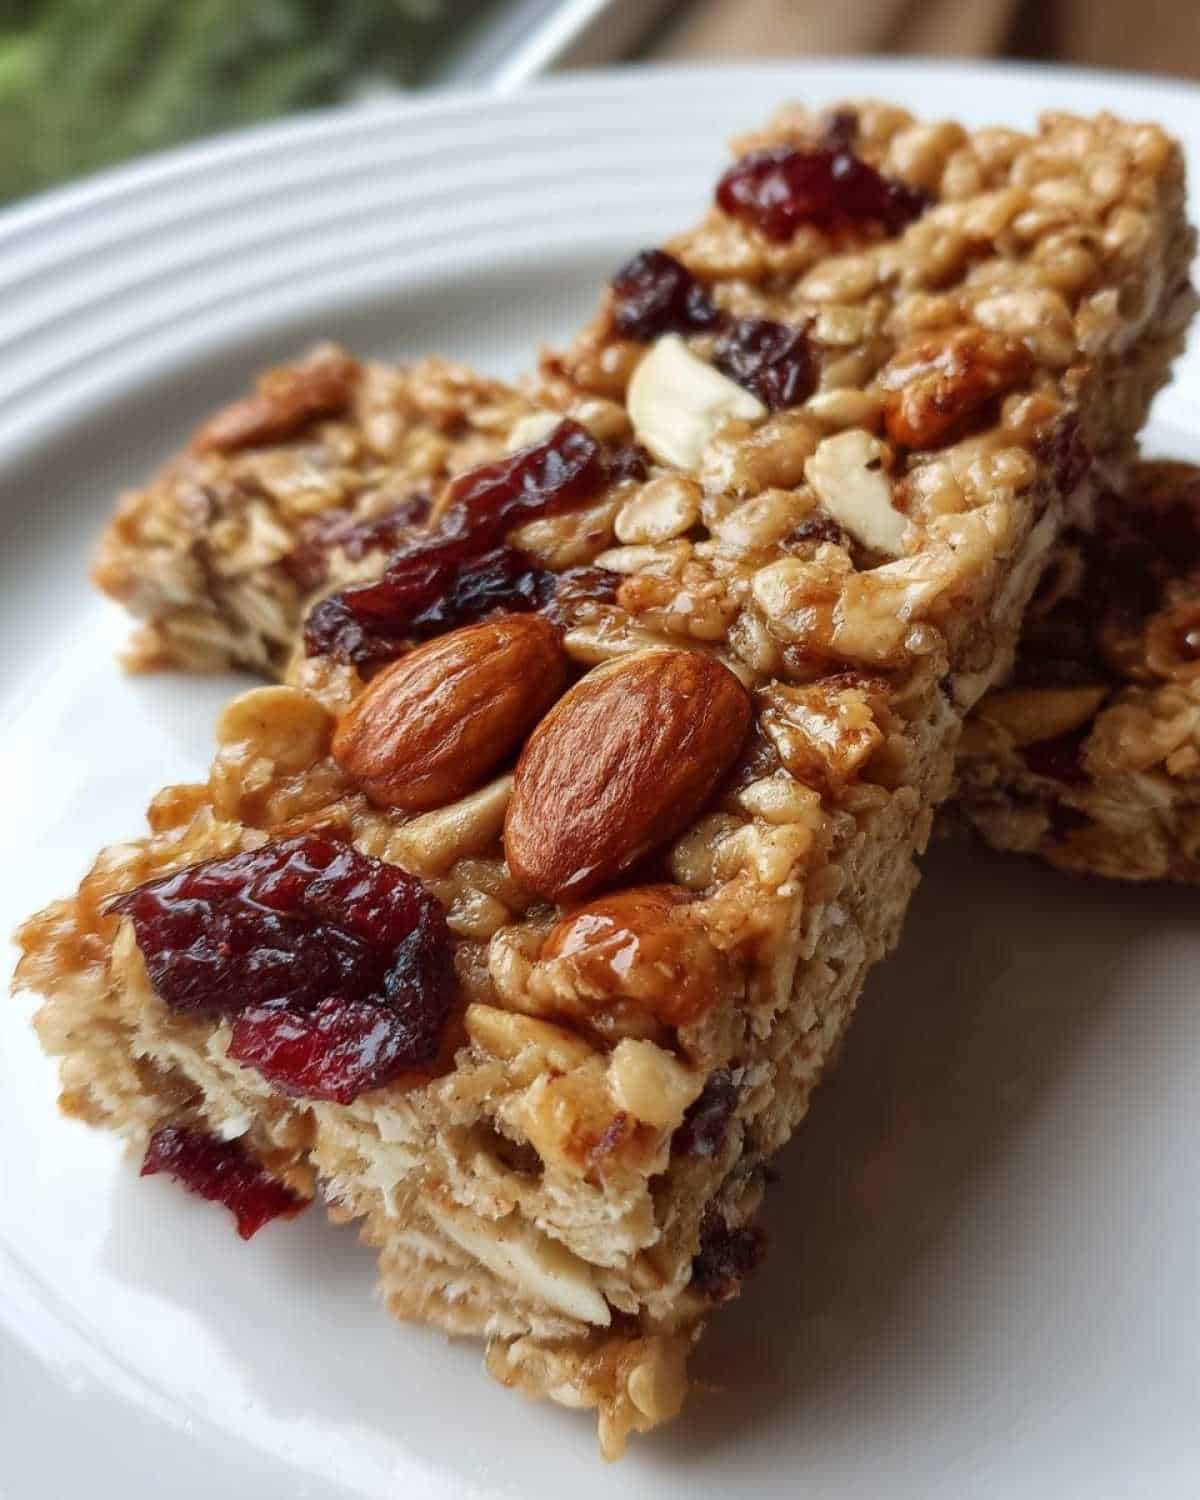
Okay, so why these Chewy Homemade Granola Bars specifically? Because they are just so darn good and simple! Seriously, they tick all the boxes for a perfect snack.
- They use really simple ingredients you likely already have.
- There’s absolutely no baking involved!
- You can totally make them your own with different nuts, seeds, or dried fruit.
- They’re a super satisfying and easy snack on the go.
- Making them at home saves a bunch of money compared to the store.
They’re just a win-win all around!

Gather Your Ingredients for Chewy Homemade Granola Bars
Alright, let’s talk ingredients for these amazing chewy homemade granola bars. The best part? You probably have most of this stuff hanging out in your pantry right now. Before you even think about heading to the store, take a peek in your cupboards!
Ingredient Notes and Substitutions for Chewy Homemade Granola Bars
Let’s break down a few things about what you’ll need. For the oats, I always use old-fashioned rolled oats. They give the best chewy texture. Instant oats just won’t work the same way. For the sticky part, you can use either honey or maple syrup. Both give that lovely sweetness and help hold everything together. Peanut butter or almond butter are great for binding and flavor; pick your favorite! And for the add-ins? This is where you get creative! Chopped nuts, seeds, or dried fruit are all wonderful. Just make sure any nuts are chopped small so they mix in nicely.
Equipment You’ll Need for Chewy Homemade Granola Bars
Making these chewy homemade granola bars is super simple, and you don’t need any fancy gadgets! You’ll just need a few basic things from your kitchen. Grab a good-sized bowl for mixing, a small saucepan for warming the wet ingredients, and your trusty measuring cups and spoons. You’ll also need an 8×8 inch baking pan and some parchment paper to line it. That’s it!
How to Make Chewy Homemade Granola Bars
Okay, ready to make these chewy homemade granola bars? It’s really straightforward. Just follow these simple steps, and you’ll have delicious bars in no time.
First, get your pan ready. Grab an 8×8 inch baking pan. Line it completely with parchment paper. Make sure the paper hangs over the sides a bit. This makes lifting the finished bars out super easy.
Next, in a large bowl, put your rolled oats. If you’re using chopped nuts or seeds, toss those in too. Same goes for any dried fruit you like. Give the dry stuff a quick stir to mix it up.
Now, let’s make the sticky part. Get out a small saucepan. Put your honey or maple syrup in there. Add the peanut butter or almond butter. Stir in the vanilla extract and the salt. Put the saucepan over medium heat. Stir it constantly. You just want it to melt and get smooth. Don’t let it boil.
Once the wet mix is smooth, take it off the heat. Pour it right over the dry ingredients in the big bowl. Grab a spoon or spatula. Stir everything together really well. Make sure all the oats and add-ins are coated in the sticky mixture.
Now, spoon the mixture into the prepared baking pan. This is a key step! You need to press it down firmly and evenly. I like to use the back of a spoon or a flat spatula for this. Really pack it in so the bars hold together nicely.
Almost done! Now comes the waiting part. Pop the pan into the refrigerator. You need to chill it for at least 2 hours. This time is important for the bars to firm up. If they don’t chill long enough, they might be too soft to cut cleanly.
After chilling, lift the whole block out of the pan using the parchment paper. Put it on a cutting board. Now, cut it into bars. You can cut them into squares or rectangles, whatever you like. And that’s it! You’ve made chewy homemade granola bars!

Tips for Perfect Chewy Homemade Granola Bars
Want your chewy homemade granola bars to turn out just right every single time? I’ve got a few little tricks I use.
When you’re mixing the wet and dry ingredients, really take your time. Make sure every single oat flake is coated. This helps them stick together and gives you that lovely chewy texture.
Pressing the mixture into the pan is super important. Don’t just lightly pat it. Get in there and press it down firmly. The harder you press, the better your bars will hold their shape when you cut them.
Don’t skimp on the chilling time! Those two hours in the fridge are a must. If you try to cut them too soon, they’ll just crumble. Patience here really pays off.
For neat cuts, use a sharp knife. You can even run the knife under hot water and dry it before slicing. It helps make cleaner lines.
And remember, the longer they chill, the firmer they’ll be. If you like them really sturdy, let them chill even longer than two hours.
Serving Suggestions for Your Chewy Homemade Granola Bars
So, you’ve got a fresh batch of chewy homemade granola bars! How should you enjoy them? Honestly, they are perfect just as they are. Grab one straight from the fridge for a quick energy boost.
I love having one with my morning coffee. It’s a simple, satisfying breakfast. You can also crumble a bar over yogurt with some fresh fruit for a delicious parfait. They’re also great packed in a lunchbox or tossed in your bag for a snack on the go. Think hiking, road trips, or just that afternoon slump!
Storing Your Chewy Homemade Granola Bars
Okay, so you’ve made your delicious batch of chewy homemade granola bars. Now, how do you keep them fresh so they last?
The best way is to pop them into an airtight container. You can keep them at room temperature for about a week. If you want them to last longer, or if your kitchen is warm, store them in the refrigerator. They’ll stay good in the fridge for up to two weeks. Just make sure that lid is on tight to keep them from drying out!
Frequently Asked Questions About Chewy Homemade Granola Bars
Got questions about whipping up these chewy homemade granola bars? It’s totally normal! Here are a few things people often ask.
Can I add other things to my granola bars? Absolutely! That’s one of the best parts about making them at home. Feel free to toss in chocolate chips, shredded coconut, or even some chia seeds. Just keep the total amount of add-ins about the same so the bars still hold together.
Why aren’t my chewy granola bars holding together? This usually happens if the wet ingredients weren’t heated enough or if you didn’t press the mixture down firmly in the pan. Make sure the honey/syrup and peanut butter are melted and smooth, and really pack that mix into the pan before chilling.
Can I use different nuts or seeds? Yes! Feel free to swap out the nuts or seeds listed for your favorites. Chopped almonds, walnuts, pecans, sunflower seeds, or pumpkin seeds all work wonderfully in these homemade granola bars.
Estimated Nutritional Information
Just so you have an idea, here’s a quick look at the estimated nutritional values for one of these chewy homemade granola bars. Remember, this is just an estimate! The exact numbers can change depending on the specific ingredients and brands you use.
- Calories: About 150
- Fat: Around 6g
- Protein: Roughly 4g
- Carbohydrates: Approximately 20g
- Fiber: About 3g
- Sugar: Roughly 8g
It’s a good way to get some quick energy and fiber in a tasty little package!
Share Your Chewy Homemade Granola Bars
I truly hope you give these chewy homemade granola bars a try! When you make them, I’d absolutely love to hear about it. Leave a comment below and tell me how they turned out. Did you add something special? Rate the recipe and share a picture on social media! Let’s celebrate making simple, delicious things together.
Print
Chewy Homemade Granola Bars: My Secret 2-Hour Joy
- Total Time: 2 hours 15 minutes
- Yield: 12 bars
- Diet: Vegetarian
Description
Make delicious, chewy homemade granola bars with simple ingredients. Perfect for a quick snack or breakfast.
Ingredients
- 2 cups rolled oats
- 1/2 cup honey or maple syrup
- 1/4 cup peanut butter or almond butter
- 1/4 cup chopped nuts or seeds (optional)
- 1/4 cup dried fruit (optional)
- 1 teaspoon vanilla extract
- 1/4 teaspoon salt
Instructions
- Line an 8×8 inch baking pan with parchment paper.
- In a large bowl, combine the rolled oats, chopped nuts or seeds (if using), and dried fruit (if using).
- In a small saucepan over medium heat, combine the honey or maple syrup, peanut butter or almond butter, vanilla extract, and salt. Stir until melted and smooth.
- Pour the wet ingredients over the dry ingredients and stir until everything is well combined.
- Press the mixture evenly into the prepared baking pan.
- Refrigerate for at least 2 hours, or until firm.
- Cut into bars.
Notes
- You can customize these granola bars with your favorite add-ins like chocolate chips, coconut flakes, or spices.
- Store the granola bars in an airtight container at room temperature for up to a week, or in the refrigerator for up to two weeks.
- For a gluten-free option, use certified gluten-free oats.
- Prep Time: 15 minutes
- Cook Time: 0 minutes
- Category: Snack
- Method: No-bake
- Cuisine: American
Nutrition
- Serving Size: 1 bar
- Calories: 150
- Sugar: 8g
- Sodium: 50mg
- Fat: 6g
- Saturated Fat: 1g
- Unsaturated Fat: 4g
- Trans Fat: 0g
- Carbohydrates: 20g
- Fiber: 3g
- Protein: 4g
- Cholesterol: 0mg

