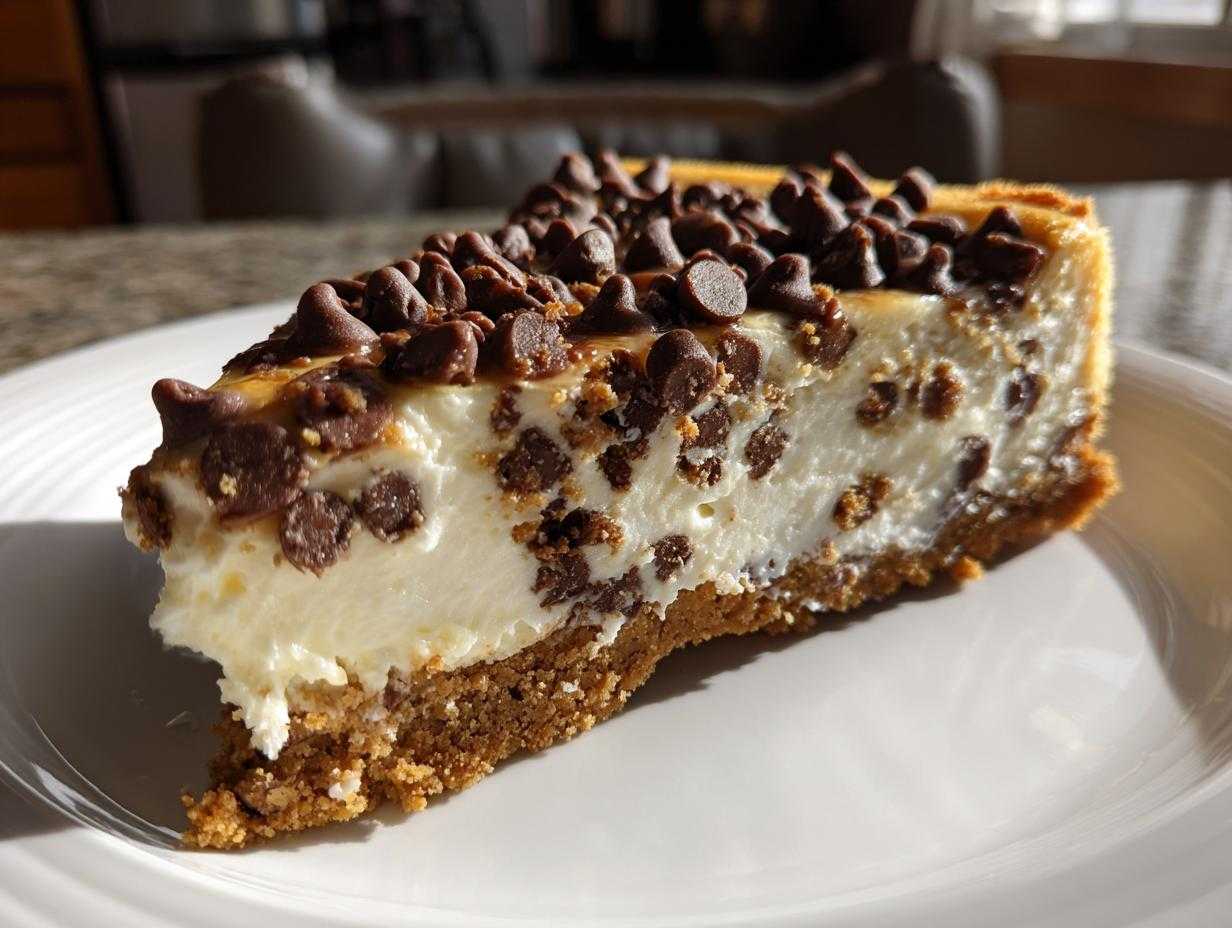
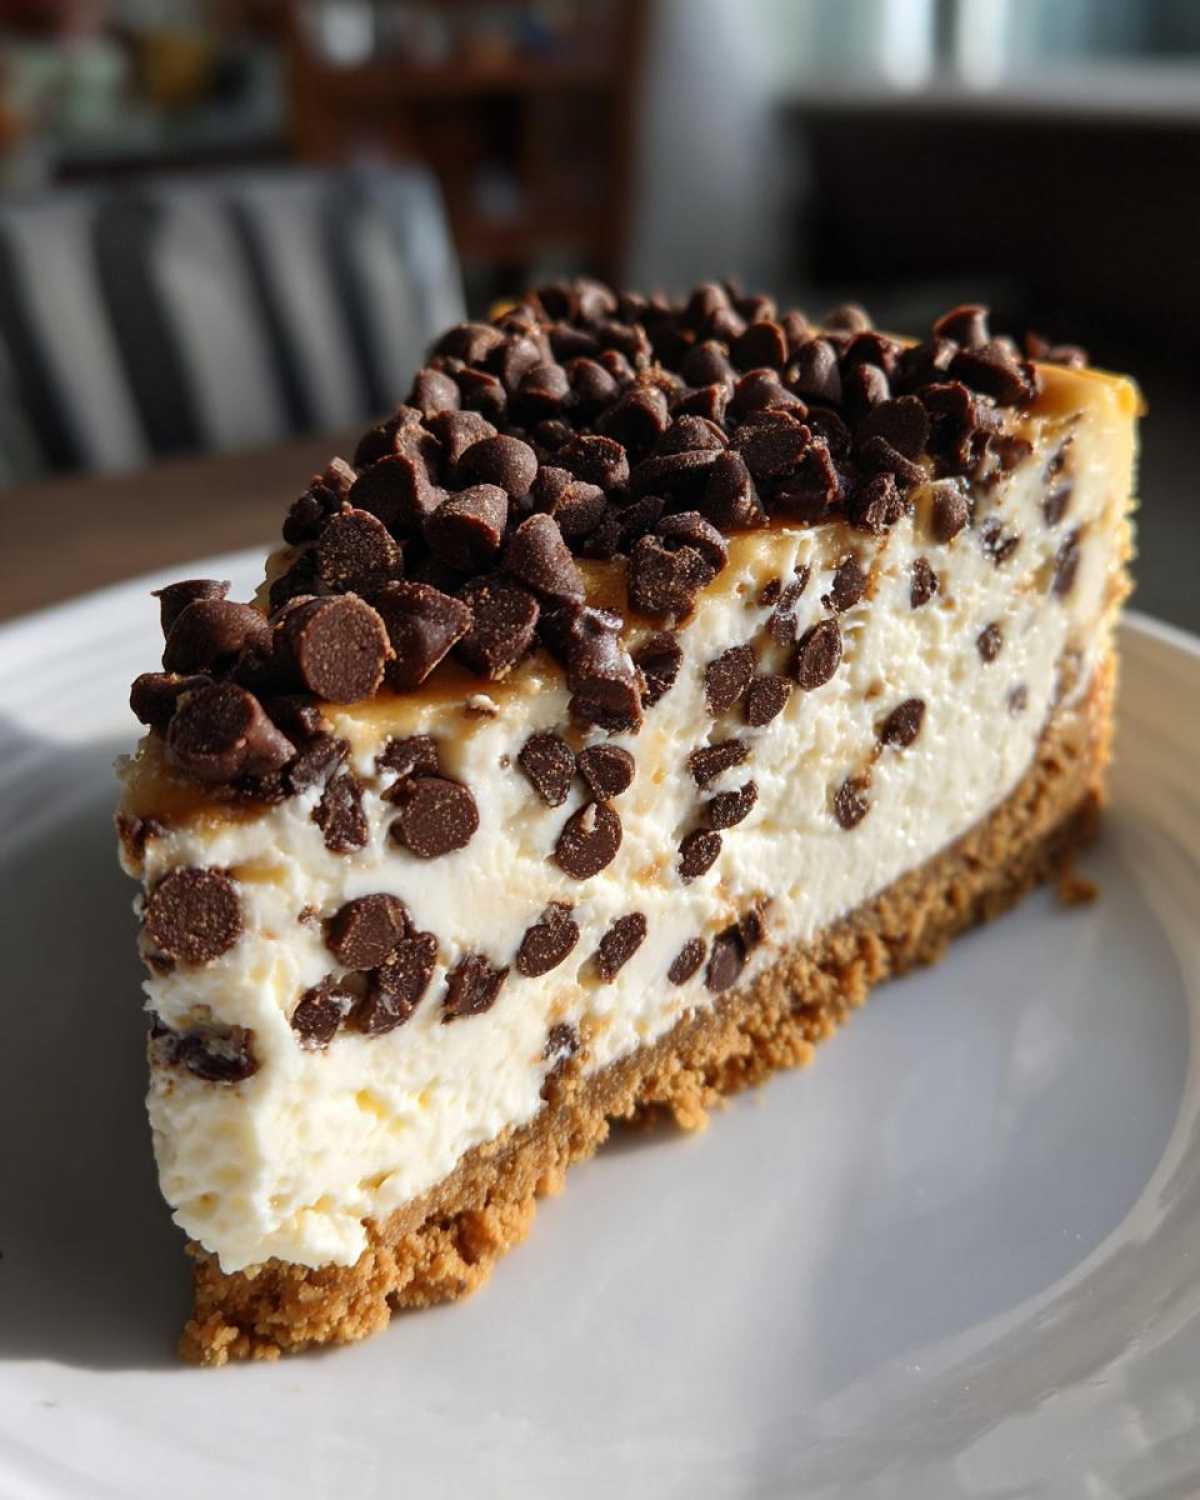
Oh, stop what you’re doing right now because if you think you know cheesecake, prepare to meet your destiny! There’s just something about digging into a rich, towering dessert when you’re craving something truly decadent. Forget all those fussy bakes you’ve seen; my Creamy Baked Chocolate Chip Cheesecake recipe is the absolute gold standard for making a bakery-style treat right in your own kitchen. Trust me on this one—I brought this specific chocolate chip cheesecake to my sister’s engagement party last summer, and people were abandoning the cocktail shrimp just to get a slice!
The beauty of this recipe is that it looks incredibly professional, but honestly, the steps are so straightforward. We’re using a classic graham cracker crust and that unmistakable smooth, sweet filling loaded with gooey chocolate chips. If you stick to my simple baking method, you are going to end up with the most indulgent cheesecake bake you’ve ever seen. This is pure happiness on a plate!

Why This Creamy Chocolate Chip Cheesecake Recipe is a Must-Try
If you’re looking for that perfect showstopper dessert that doesn’t require you to earn a culinary degree, this is it! This cake hits all the high notes: it’s incredibly rich and creamy, beautifully indulgent, and surprisingly manageable for a home baker. It truly delivers that Rich and Creamy Dessert experience without all the fuss.
- It offers superior texture compared to lighter, no-bake versions.
- The combination of chocolate and sweet cream cheese hits that indulgent flavor profile everyone adores.
- It transports beautifully, making it ideal for holidays or parties.
Achieving the Perfect Creamy Texture
Okay, the secret to that melt-in-your-mouth texture we all want in our Creamy Chocolate Chip Cheesecake? It’s all about temperature! You absolutely must let your cream cheese soften completely—I mean, totally room temperature. Then, when mixing the filling, don’t let the mixer roar! Gentle, low speed mixing is essential right after those eggs go in. That’s how we keep everything smooth and velvety!
Simple Graham Cracker Crust Cheesecake
Some crusts are overly complicated, but not this one! We’re sticking to the classic, easy-to-manage Graham Cracker Crust Cheesecake. It just needs crumbs, a little sugar, and melted butter pressed down firmly. A quick 10-minute pre-bake sets it up perfectly so it doesn’t get soggy under that thick, gorgeous filling. It’s foolproof, I promise!
Ingredients for the Best Chocolate Chip Cheesecake Recipe
When we talk about the Best Chocolate Chip Cheesecake, remember that ingredient quality matters! You can’t fake these flavors, especially not when it comes to cream cheese. I always buy the full block versions—none of that tub stuff! Having everything at room temperature is crucial for that smooth finish, so plan ahead. Making this rich and divine dessert starts right here with these core components.
Graham Cracker Crust Cheesecake Ingredients
For the base of your Graham Cracker Crust Cheesecake, you only need three things, and trust me, that simplicity shines through once you take that first bite!
- 1 1/2 cups graham cracker crumbs (Make sure they are finely crushed!)
- 1/4 cup granulated sugar (Just a little sweetness for structure)
- 6 tablespoons unsalted butter, melted (Absolutely must be melted smooth)
Creamy Chocolate Chip Cheesecake Filling Ingredients
This is where the magic happens, friends! The filling needs to be luxurious, so paying attention to the cream cheese and eggs makes all the difference for that gorgeous, Creamy Chocolate Chip Cheesecake texture.
- 3 (8 ounce) packages cream cheese, softened (This is non-negotiable! Fully soft!)
- 1 1/2 cups granulated sugar (Yes, it takes this much for richness!)
- 1 teaspoon vanilla extract
- 1/4 teaspoon salt
- 4 large eggs (Make sure they are room temperature, too!)
- 1 cup semi-sweet chocolate chips (I prefer semi-sweet; they balance the sugar perfectly)
Step-by-Step Instructions for Your Homemade Cheesecake Dessert
Okay, let’s get this show on the road! This seems like a long list of steps, but really, it’s just logical progression. We are assembling layers designed to create the most luxurious Homemade Cheesecake Dessert possible. I always put on some good music when I make this, because patience is key, especially when we get to the cooling part. Before we start mixing, remember that we are baking this beauty in a cool 350 degrees F oven, so make sure your oven is fully preheated!
Preparing and Pre-Baking the Graham Cracker Crust
First things first, we need a solid foundation for our cheesecake. Grab that 9-inch springform pan and wrap the outside bottom and sides tightly with heavy-duty aluminum foil. I mean it—wrap it really well! This foil is going to be our shield against the water bath later. Don’t skip this part, or you’ll end up with soggy cracker bits leaking out, which is just messy!
Mix up those graham cracker crumbs, the 1/4 cup of sugar, and the 6 tablespoons of melted butter until it looks like wet sand. Press that mixture firmly and evenly into the bottom of your foil-wrapped pan. Now, pop that into the oven for just 10 minutes. This short pre-bake sets the crust nicely. When it comes out, just leave it alone on a cooling rack while you work on the filling. It only needs to cool a tiny bit!
Making the Rich and Creamy Dessert Filling
Now for the star! I mentioned this before, but it bears repeating: your cream cheese needs to be *super* soft. In a big bowl, just beat that cream cheese until it’s nice and smooth on its own. Next, add the main sugar (that’s the 1 1/2 cups), the vanilla, and the salt. Mix gently until they are just incorporated. If you have one of those fancy stand mixers, use the paddle attachment, not the whisk!
Here’s where the trust-building for this Easy Cheesecake Recipe comes in: add the four eggs one at a time, mixing only on low speed after *each* egg until it’s just combined. If you beat too hard after the eggs go in, you’re whipping air into the batter. That air expands while baking, and when it cools, it collapses, giving you a big crack right down the middle. We want smooth, not cracked!
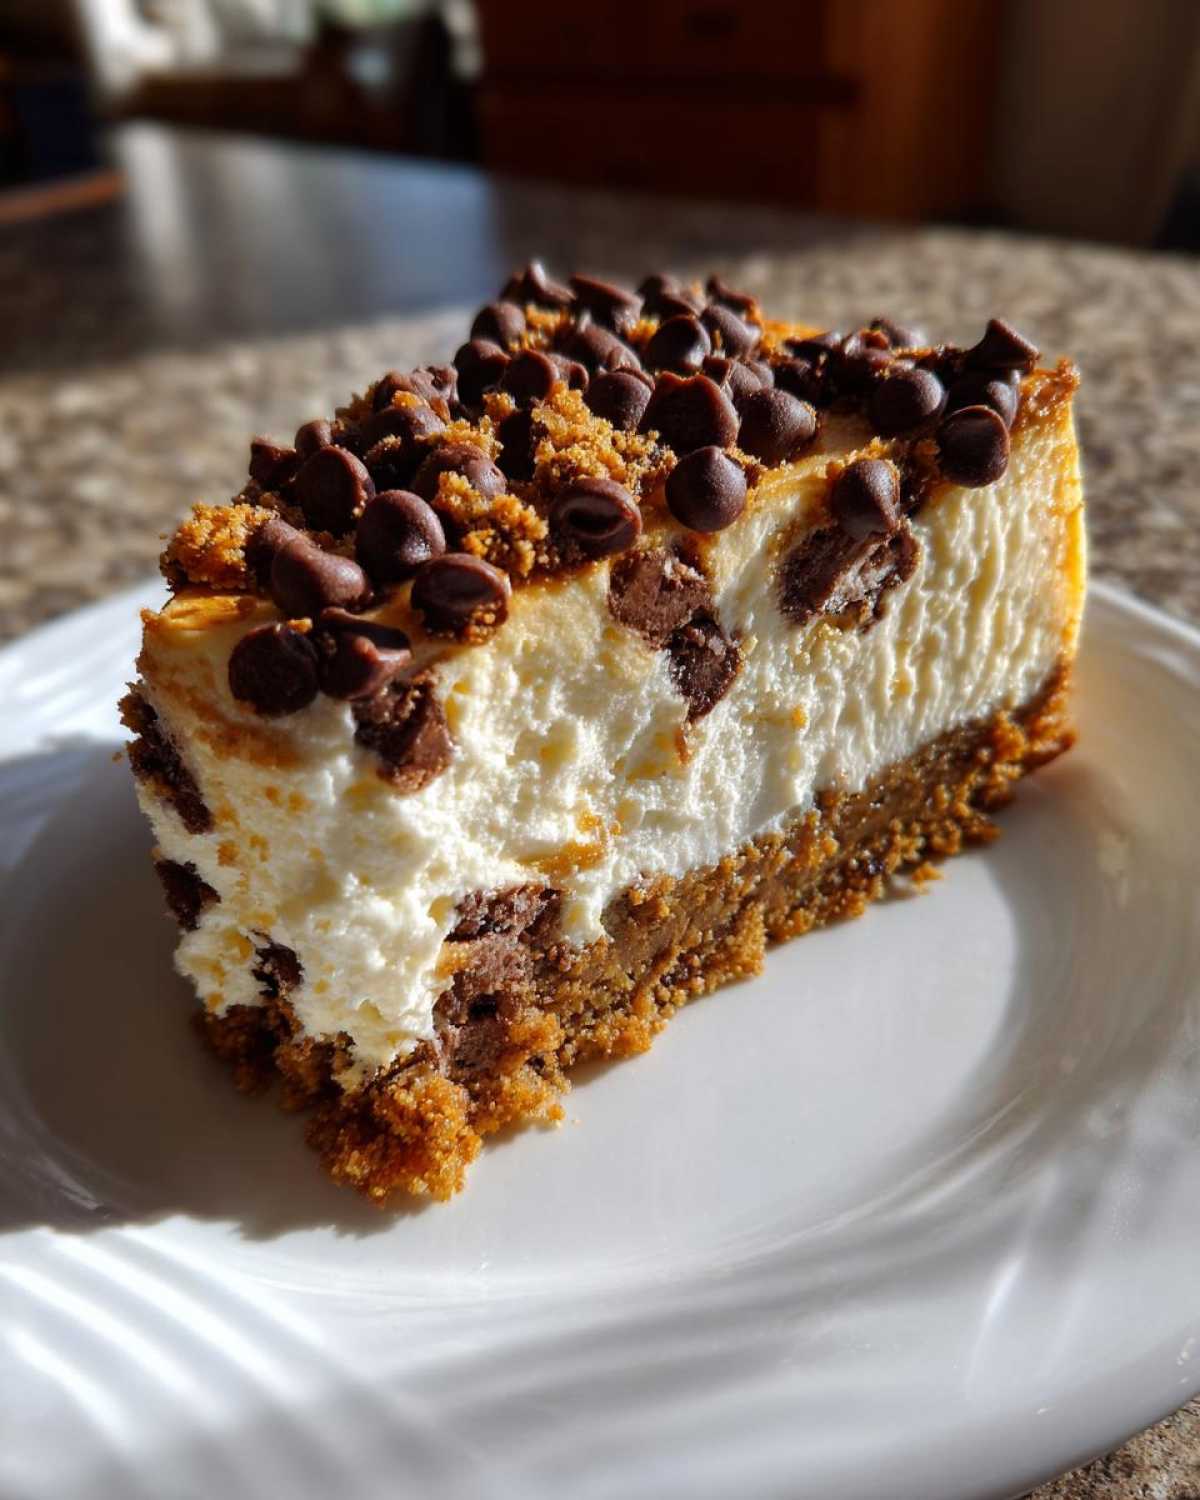
Once the eggs are in, gently fold in that cup of semi-sweet chocolate chips. Seriously, *fold* them—no mixer action here! Once they’re evenly spread, pour that amazing filling right over your slightly cooled crust.
Baking the Chocolate Chip Cheesecake with a Water Bath
We need moisture for that signature smooth texture, and that means a water bath, also known as a *bain-marie*. This is what keeps the crust from getting soggy and the filling steaming gently! Take your foil-wrapped springform pan and set it inside a larger roasting pan. Next, boil up some water—hot water is faster!
Carefully pour that hot water into the roasting pan, making sure it comes about halfway up the sides of your springform pan. Be careful not to splash any water *into* the cheesecake! Slide the whole setup into your 350-degree oven. Bake it for about 55 to 65 minutes. You aren’t looking for it to be totally firm. The edges should look set, but when you give the pan the tiniest wiggle, the center should still have a little adorable jiggle, like gelatin.
The Critical Cooling Process for Perfect Chocolate Chip Cheesecake
This next part is maybe the hardest, but it guarantees a beautiful finish for your Chocolate Chip Cheesecake. When that bake time is up, DO NOT pull it out! Turn the oven off completely. Prop the oven door open just a little crack—I usually wedge a wooden spoon handle in there. Let the cheesecake just sit inside the cooling oven for a full hour. This gradual temperature drop is essential for preventing cracks!
After that hour, take it out of the oven, carefully lift the springform pan out of the water bath, and take the foil off. Let it sit on the counter until it reaches room temperature—usually another hour or two. Only then can it go into the fridge. You need to chill this masterpiece for at least 6 hours, but honestly, chilling it overnight is the secret weapon for the absolute best flavor and texture. If you rush this, you risk a soft center!
P.S. If you are planning to make chocolate chip cookies to eat alongside this heavenly dessert, I found this amazing recipe for soft ones over here: soft, chewy chocolate chip cookies!
Tips for Success: Baking the Ultimate Chocolate Chip Cheesecake
Look, I know baking cheesecake can feel a little nerve-wracking sometimes. You see those giant cracks on the top and think, “Ugh, why did I even try?” But honestly, cheesecake is more about technique than talent, and these tips are exactly what separates the winners from the cracked messes. These little secrets come from years of practice, and they’re the same ones I use whenever I craft this chocolate chip delight. Honestly, if you follow these few rules, you’re practically guaranteed a showstopper!
Room Temperature Ingredients for Smooth Chocolate Chip Cheesecake
I can’t stress this enough about your Chocolate Chip Cheesecake unless you want lumps the size of marbles in your final product. Everything needs to be room temperature! I mean your cream cheese, and yes, even those four eggs. If the cream cheese is cold, it won’t mix smoothly with the sugar, and you’ll end up beating it forever trying to smooth out the lumps, which just incorporates air—bad news later!
When I get ready to bake, I usually pull my dairy and eggs out onto the counter about two hours before I plan to start mixing. If you are in a hurry, you can microwave the cream cheese blocks—just for a few seconds at a time—until you can press a finger into it easily. No major melting allowed, though! Cold ingredients lead to uneven mixing, and that’s just the first step toward trouble.
Avoiding Cracks in Your Baked Cheesecake with Chocolate Chips
This is the big finale—cracks! No one wants a cracked top, especially not on a special occasion dessert. Luckily, it’s not complicated to avoid them. It comes down to three main issues we tackle during the whole process:
- Don’t Overmix After Adding Eggs: We talked about this, but seriously, keep that mixer on low. We are aiming for smooth, not fluffy.
- Use That Water Bath: The water bath creates steam, which cooks the cheesecake gently and evenly from the sides and bottom. This prevents the outside edge from setting too fast while the middle is still liquid, which causes that horrible pulling and cracking.
- Cool It Slowly, Slowly, Slowly: Baking is only half the battle! Turning the oven off and letting the cheesecake relax inside for an hour while the temperature drops is non-negotiable. That slow transition respects the protein structure we just built!
If you’re curious about other ways to get that perfect texture in a baked good, I recently made a fantastic sour cream coffee cake that relies on similar low-and-slow cooking principles—you can check out how I use dairy for moisture in that sour cream coffee cake streusel recipe!
Variations on the Chocolate Chip Cheesecake Recipe
Once you master this foundational Chocolate Chip Cheesecake Recipe, you’ll realize how easy it is to shake things up! That creamy filling is just begging for little tweaks, and the crust offers so much room for creativity. Don’t feel like you have to stick to the basic graham cracker every single time. Changing the shell is a super fun way to completely refresh this Decadent Chocolate Dessert!
Crust Swaps for Your Chocolate Chip Cheesecake
If you’re feeling like something extra crunchy, ditch the crumbs and go for brand-name cookies! Replacing the graham crackers with finely crushed Oreos is a game-changer, creating a dark, delicious base for your Cheesecake with Oreo Crust. Just remember if you use Oreos, you probably need to cut back *way* on the added sugar in the crust since the cookies are already quite sweet! Shortbread cookies also smash down beautifully for a buttery, less traditional change.
Making Simple Cheesecake Slices or Bars
Sometimes, a huge round cheesecake is just too much commitment, or maybe you just need easy grab-and-go desserts for a big crowd. That’s where making Chocolate Cheesecake Bars comes in handy! You can bake this exact same recipe in a 9×13 inch rectangular pan instead of the springform. It bakes up a little faster, and once chilled, you just slice it into perfect squares. It’s such an easy way to serve this treat!
Speaking of delicious squares, if you want another amazing treat that combines chocolate and cream cheese perfectly but in a different format, I absolutely adore this recipe for red velvet cheesecake brownies. It’s fantastic for parties!
Serving Suggestions for This Decadent Chocolate Dessert
This Chocolate Chip Cheesecake is already a showstopper, but a few finishing touches can elevate it even further for your next gathering! When I serve this as one of my go-to Party Dessert Recipes, I like to keep the topping simple so the chocolate chips still shine through. A light dusting of cocoa powder just before serving adds a lovely visual contrast against the white cream cheese.

If you want something extra special, a drizzle of caramel sauce or a dollop of fresh whipped cream is divine. For those who love an intense chocolate punch, maybe a thin drizzle of the melted chocolate from my super easy frozen hot chocolate recipe works perfectly when it’s cooled slightly! It’s such a rich and sophisticated look for such a simple bake.
Storage and Reheating Instructions for Homemade Cheesecake Dessert
Now that you’ve gone through all that trouble to make the perfect Homemade Cheesecake Dessert, we need to talk about keeping it pristine! Cheesecake is super delicate when it comes to fridge smells—you do *not* want your leftover chicken breast flavor sneaking into your sweet cream cheese this week.
The first and most important rule is that this needs to stay chilled. Cover that cheesecake really, really securely before it goes back into the refrigerator. I usually use plastic wrap pressed right up against the surface of the cake itself. If you aren’t serving the whole thing right away, it’s smart to slice off what you need first, cover the cut edges tightly with plastic wrap, and *then* cover the whole pan/cake with foil. This double barrier works magic!
It stays wonderfully fresh, tasting just as decadent as the day it was baked, for about four to five days in the fridge. If you need it longer? You can absolutely freeze it! Let it chill completely overnight first. Then, cover the chilled cake tightly in plastic wrap, followed by a heavy layer of aluminum foil, or slip the whole thing into a proper freezer bag. It lasts beautifully for about a month in the freezer. When you want to eat it, just transfer it, still wrapped, to the fridge and let it thaw slowly overnight. Never try to microwave a cheesecake, because honestly, that just turns into sad, melted puddle soup!
Frequently Asked Questions About Chocolate Chip Cheesecake
I know you might have a few lingering thoughts after reading through all those baking steps. Cheesecake can be intimidating, but it really doesn’t have to be! We want this to be the easiest, most reliable recipe in your arsenal. Here are the questions I get asked most often about perfecting this Chocolate Chip Cheesecake!
Can I make a No Bake Chocolate Chip Cheesecake instead?
That’s definitely an option if you’re in a rush, but you can’t use this recipe straight up without a few changes. Since this recipe is designed for baking, it relies on the eggs to set everything up firmly. If you want a No Bake Chocolate Chip Cheesecake, you’d need to skip the eggs entirely and use a different stabilizer, like unflavored gelatin dissolved in hot water, or maybe even some whipped heavy cream folded in at the end to get that structure. It won’t have the exact same dense texture, but it sure is fast!
What is the best way to store leftover Chocolate Chip Cheesecake?
This is so important for keeping that incredible flavor intact! You want airtight storage so it doesn’t absorb any weird smells from the fridge, which can definitely ruin a perfectly good Sweet Cream Cheese Dessert. As I mentioned before, fully chill it first. Then, cover the top edge directly with plastic wrap, pressing it down lightly, and then cover the whole thing tightly with foil or put the whole pan into a large, sealed plastic container. It wants to stay cold and covered!
Can I substitute the chocolate chips in this Easy Cheesecake Recipe?
Absolutely! This is an Easy Cheesecake Recipe, so feel free to customize the chocolate situation. If you want a deeper flavor that cuts through the sweetness of the cream cheese, grab some dark chocolate chunks instead of semi-sweet chips. Milk chocolate chips work too if you prefer something sweeter, but just be aware that it might make the whole thing taste a tad sweeter overall. You could even mix in white chocolate chips for a triple-chocolate swirl, though you might want to use a little less sugar in the main filling if you do that!
If you ever decide you want to try a variation that skips the baking entirely, I have a fun recipe for a no-bake chocolate chip cookie cake that some of my friends swear by when they don’t want to turn on the oven!
Estimated Nutritional Data for This Indulgent Cheesecake Bake
I always feel a little bit naughty digging into this dessert, but hey, you deserve a treat now and then! Since this is such a rich and Indulgent Cheesecake Bake, it’s good to know what you’re diving into. Keep in mind that these numbers are always estimates, right? Depending on the exact brands of chocolate chips or butter you use, things can shift around a little bit. You know how it is in the kitchen—nothing is perfectly exact!
This is based on the recipe yielding 12 generous slices, which is how I always cut mine (because who wants a tiny slice of the best cheesecake ever?). Here’s a rundown of what you can generally expect per slice:
- Serving Size: 1 slice
- Calories: 450
- Sugar: 35g
- Sodium: 250mg
- Fat: 30g
- Saturated Fat: 18g
- Unsaturated Fat: 12g
- Trans Fat: 0g
- Carbohydrates: 40g
- Fiber: 1g
- Protein: 8g
- Cholesterol: 95mg
See? It’s definitely a decadent slice, but that’s why we only make it for special occasions! It’s worth every single calorie, though. Just remember, this breakdown is an estimate based on the listed ingredients. If I’m being honest, when I’m eating this Crowd Pleaser Cheesecake, I’m really not thinking about the cholesterol count, I’m just savoring that creamy chocolate goodness!
Print
Creamy Baked Chocolate Chip Cheesecake with Graham Cracker Crust
- Total Time: 100 min
- Yield: 12 servings
- Diet: Vegetarian
Description
Make a rich, creamy baked cheesecake loaded with chocolate chips on a simple graham cracker crust.
Ingredients
- 1 1/2 cups graham cracker crumbs
- 1/4 cup granulated sugar (for crust)
- 6 tablespoons unsalted butter, melted
- 3 (8 ounce) packages cream cheese, softened
- 1 1/2 cups granulated sugar (for filling)
- 1 teaspoon vanilla extract
- 1/4 teaspoon salt
- 4 large eggs
- 1 cup semi-sweet chocolate chips
Instructions
- Preheat your oven to 350 degrees F. Wrap the outside of a 9-inch springform pan tightly with heavy-duty aluminum foil.
- Combine graham cracker crumbs, 1/4 cup sugar, and melted butter. Press the mixture firmly into the bottom of the prepared springform pan. Bake the crust for 10 minutes. Remove from oven and let cool slightly.
- In a large bowl, beat the softened cream cheese with an electric mixer until smooth. Gradually add 1 1/2 cups sugar, vanilla extract, and salt. Beat until just combined. Do not overmix.
- Beat in the eggs one at a time, mixing on low speed after each addition until just incorporated.
- Gently fold in the chocolate chips. Pour the filling over the cooled crust.
- Place the springform pan inside a larger roasting pan. Carefully pour hot water into the roasting pan until the water reaches halfway up the sides of the springform pan (this is a water bath).
- Bake for 55 to 65 minutes, or until the edges are set but the center still has a slight jiggle.
- Turn off the oven, crack the oven door open slightly, and let the cheesecake cool inside the oven for 1 hour.
- Remove the cheesecake from the water bath and let it cool completely on a wire rack. Refrigerate for at least 6 hours, or preferably overnight, before serving.
Notes
- For the best texture, ensure your cream cheese is fully softened to room temperature before mixing.
- The water bath prevents cracking by creating a humid baking environment.
- To easily remove the foil, run a thin knife around the edge of the cheesecake before releasing the springform side.
- Prep Time: 25 min
- Cook Time: 65 min
- Category: Dessert
- Method: Baking
- Cuisine: American
Nutrition
- Serving Size: 1 slice
- Calories: 450
- Sugar: 35g
- Sodium: 250mg
- Fat: 30g
- Saturated Fat: 18g
- Unsaturated Fat: 12g
- Trans Fat: 0g
- Carbohydrates: 40g
- Fiber: 1g
- Protein: 8g
- Cholesterol: 95mg