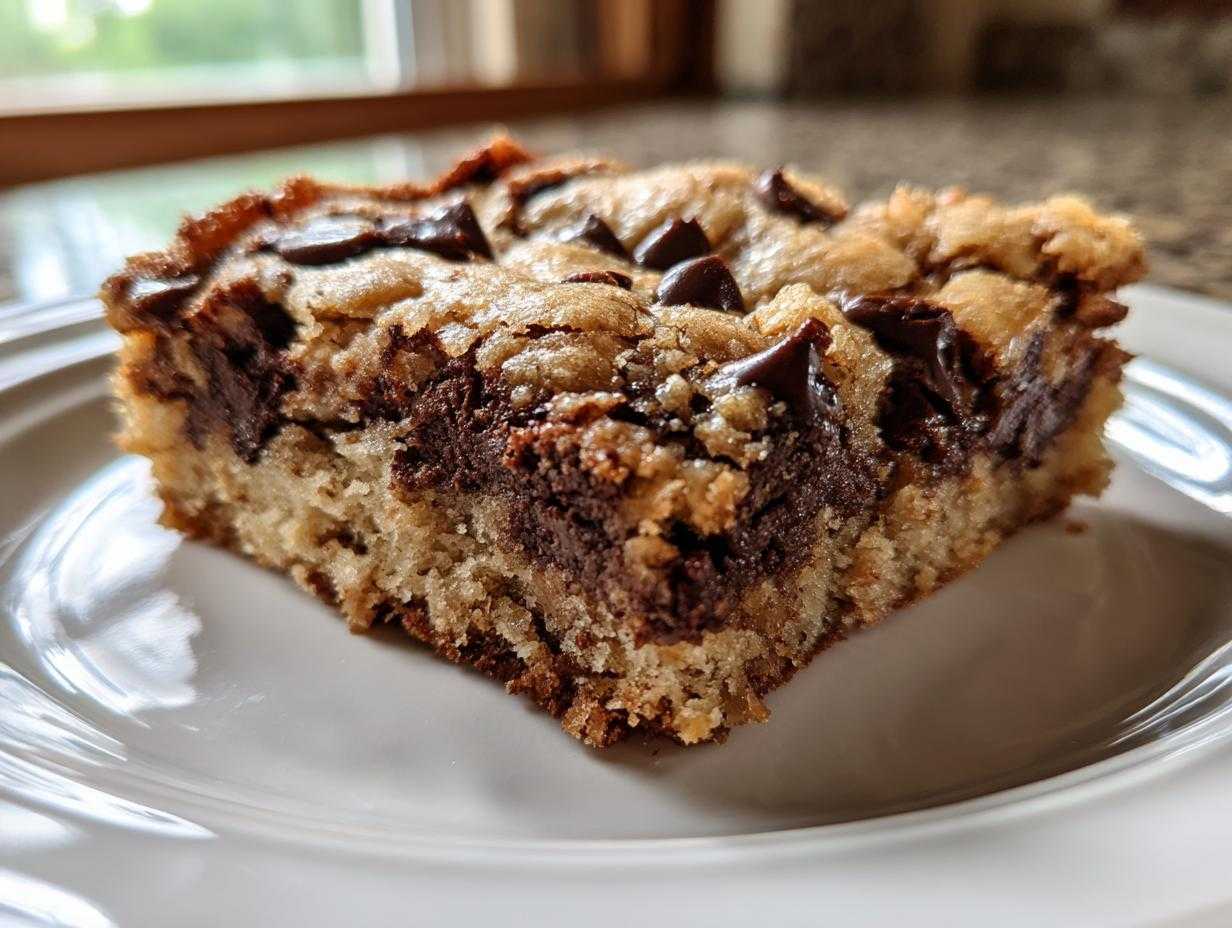
Listen, I love a classic round cookie as much as the next person, but honestly, sometimes you just don’t have the time or the patience for balling up dough, right? That’s why bar cookies are my weeknight secret weapon! I feel like I’ve finally cracked the code on achieving that perfect texture in the pan. Forget those dry, crumbly square disasters you sometimes get; we are making The Ultimate Chewy Chocolate Chip Cookie Bars Recipe here.
My focus for these Chocolate Chip Cookie Bars is strictly on chewiness. We want that slightly crisp edge that gives way to a gloriously soft, almost gooey center. After countless batches in my kitchen (seriously, my family got sick of eating test rounds!), I figured out the little tricks—mostly involving melted butter and sugar ratios—that keep these pan baked treats feeling incredibly rich and satisfying. Trust me, these pan baked chocolate chip cookies are about to become your new go-to quick dessert.
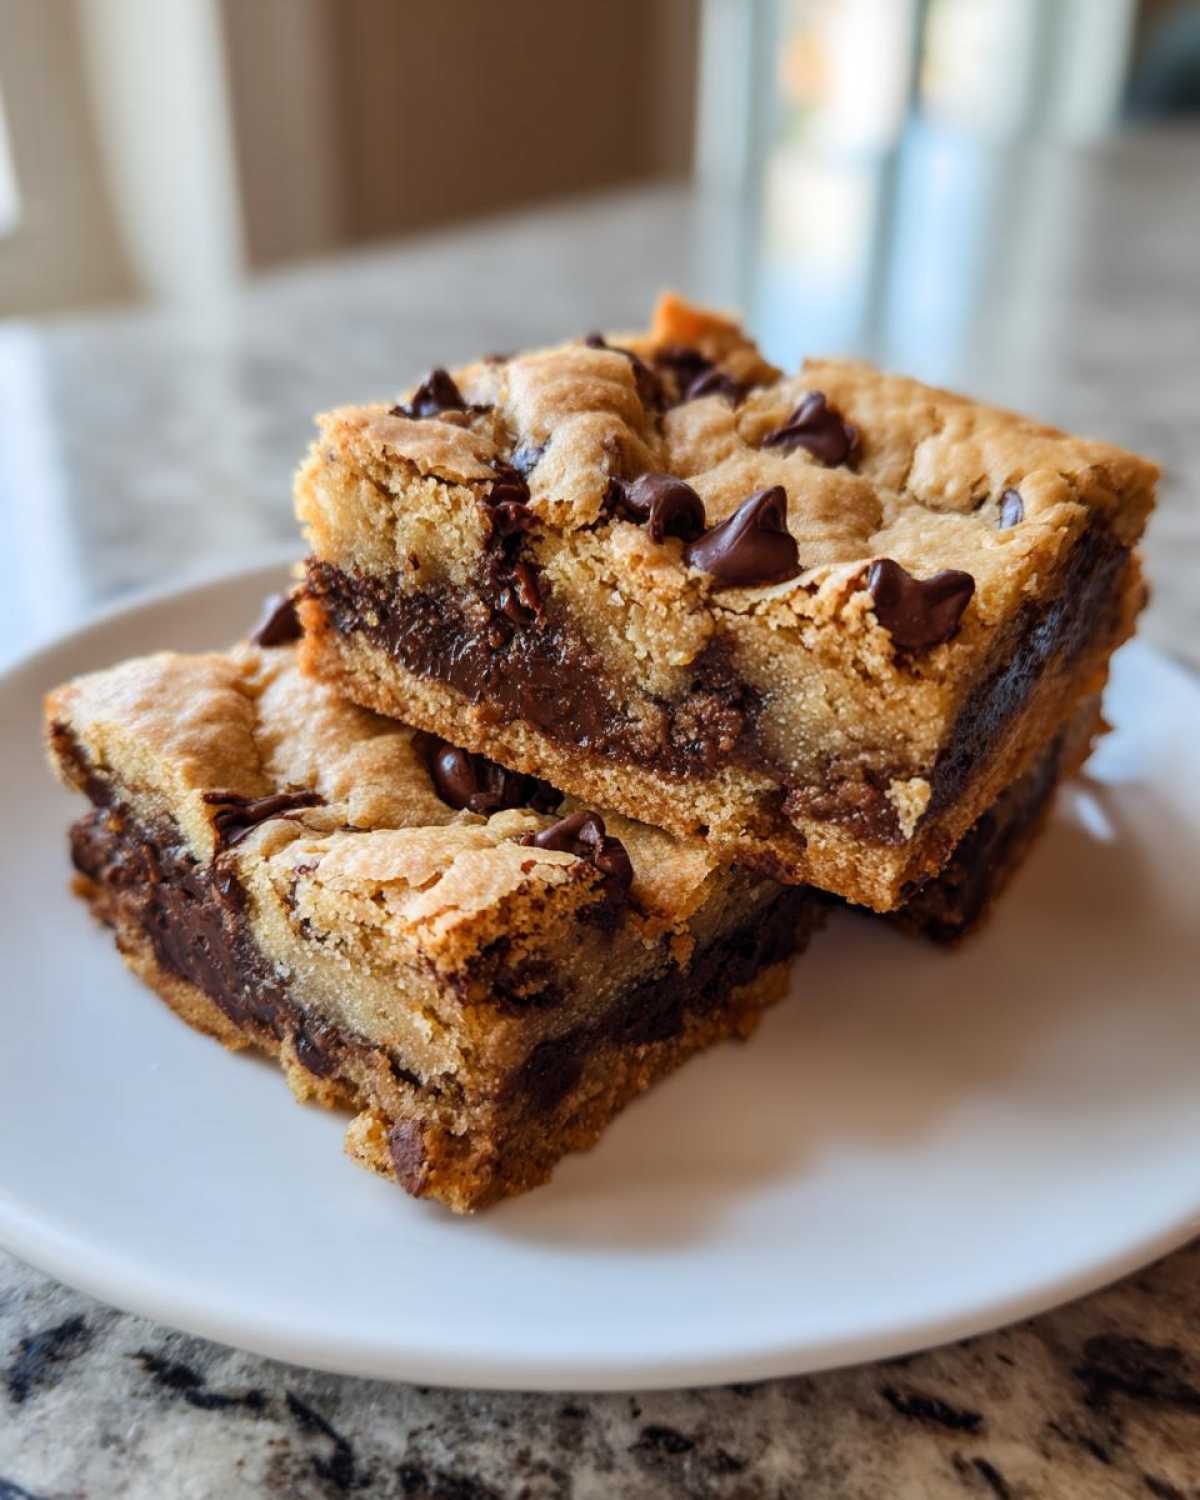
Why You Will Love These Chewy Chocolate Chip Cookie Bars
I know you’ve got a million cookie recipes hanging around, but these bars are different. They deliver that decadent, satisfying texture without the usual fuss. Seriously, when you’re craving something amazing but don’t want to stand around dropping spoonfuls of dough, these are your answer!
- Chewy Factor is Maxed Out: I use melted butter, you guys, and that is the secret sauce for keeping these thick chocolate chip bakes deliciously soft for days.
- Seriously Fast Prep: We’re talking about a super simple, no-fuss mix—no chilling required! You can have this dough mixed up faster than you can preheat your oven.
- Perfect for Sharing (Or Not!): Baked right in the pan, these are the easiest things to transport to parties, picnics, or just hide away for yourself.
- Simple From Scratch Goodness: All the ingredients are pantry staples. No fancy trips to specialty stores necessary to make these gooey chocolate chip bars.
Essential Ingredients for Perfect Chocolate Chip Cookie Bars
Okay, so you want the best of the best? That means we have to respect the ingredients! This list is short and sweet, which is why taking note of the specifics really matters for getting those unbelievably satisfying results. We aren’t messing around with substitutes here; remember, we are aiming for chewy, not cakey!
Make sure you start with exactly 1 cup of unsalted butter, and yes, it *must* be melted—that’s key for the structure of these bars. For the sugars, we need a full cup of light brown sugar (packed down tight!) and half a cup of regular white sugar. We use two large eggs, and I always have them sitting out so they aren’t frigid. You’ll need 2 1/4 cups of all-purpose flour; add that in carefully! Then, just a teaspoon of baking soda and half a teaspoon of salt to keep everything balanced. And, obviously, a heaping 1 1/2 cups of semi-sweet chocolate chips!
Ingredient Notes and Substitutions for Your Chocolate Chip Cookie Bars
Let’s talk about the melted butter for a second. If you tried to use softened butter, you’d end up closer to a traditional drop cookie texture, maybe even a bit drier. Melted butter completely changes the molecular structure when combined with that packed brown sugar, guaranteeing those gooey chocolate chip bars we’re looking for! Don’t skip that step.
Also, don’t be afraid to mix up your chocolate! While the recipe calls for semi-sweet, I’ve used half semi-sweet and half milk chocolate chips before, and wow, the flavor bloom is incredible. If you love texture, toss in some chopped pecans or walnuts with your chips, but if you want that classic chocolate punch, stick to what I listed.
Step-by-Step Guide: How to Make Easy Chocolate Chip Cookie Bars
This is where the magic happens, and I promise you, if you can stir ingredients in a bowl, you can nail these bars. Because we are skipping the chilling process, these truly are some of the easy chocolate chip cookie bars out there. Just get everything ready to go, and you’ll be smelling chocolate heaven in under an hour!
Preparing the Pan and Oven for Your Chocolate Chip Cookie Bars
First things first: heat up that oven to 350 degrees Fahrenheit. Don’t bake cookie bars in a lukewarm oven; trust me on this! Now, for the pan, grab a 9×13 inch baking dish. This size gives us those lovely thick bars.
Here is the pro move: line that entire pan with parchment paper, but leave a good overhang, like handles, hanging over the sides. When these are done, the pan will be hot, and you don’t want to scratch the bottom trying to scoop them out. Those parchment “handles” let you lift the whole beautiful thing out later in one piece. Seriously, don’t skip that overhang!
Mixing the Wet and Dry Components for Gooey Chocolate Chip Bars
Grab your biggest bowl, because we start with the wet stuff. Whisk that melted butter together with both sugars until it looks totally smooth—no clumps allowed! Then, drop in your eggs one at a time, making sure the first one is mixed in before adding the second. Stir in your vanilla extract, too.
In a separate, smaller bowl, just quickly whisk your flour, baking soda, and salt together. You want those dry ingredients evenly distributed before they hit the wet stuff. When you combine them, add the dry mix gradually to the wet. You have to mix gently here, stop stirring the second you stop seeing white streaks of flour. Overmixing is the enemy of chewiness, my friend! Finally, fold in those chocolate chips gently. You want them nestled in there, not beaten into the batter.
Baking and Cooling Your Thick Chocolate Chip Bake
Take your dough—it will be thick, almost like thick cookie dough—and press it evenly into that prepared pan. Use your fingers, or maybe the bottom of a measuring cup, to make sure it’s flat. Pop it into the preheated oven!
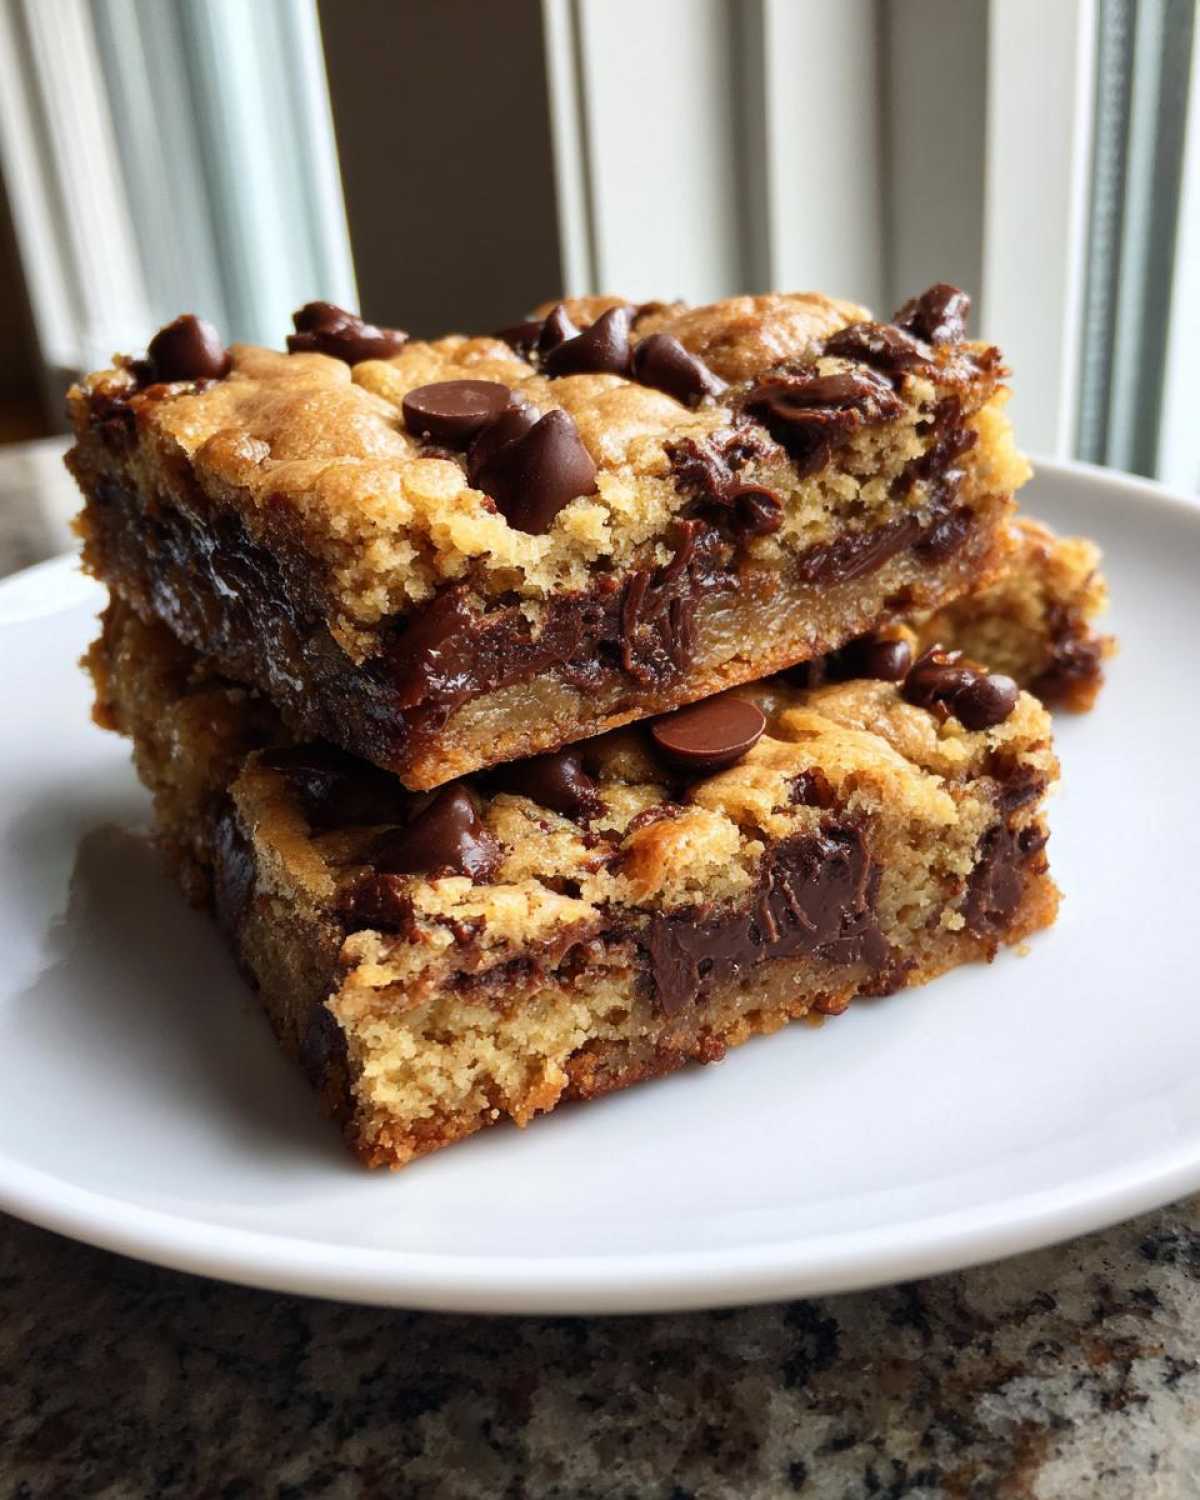
Bake for about 25 to 30 minutes. You are watching for the edges to turn just barely golden brown. The center should look mostly set, maybe a tiny bit shiny or soft in the middle—that guarantees a wonderful texture when cooled. If you want to see how I make similar textures in my regular cookies, check out my tips on making soft, chewy chocolate chip cookies. Once they look ready, pull them out! And here’s the hardest part: you absolutely must let them cool completely in the pan. If you try to cut them warm, they’ll just turn into a chocolatey mess, even though that sounds delicious right then. Patience earns you those clean squares!
Tips for Perfectly Baked Dessert Bars
You’ve followed the mixing instructions, they smell amazing coming out of the oven, but now we have to talk about the final stretch! Getting these bars out of the pan and cut perfectly is where so many people mess up that gorgeous bake. Remember, we are aiming for perfectly baked dessert bars, not an abstract chocolate sculpture, right?
My very first piece of advice comes straight from the recipe notes, but it bears repeating because it’s non-negotiable for clean, pretty squares. You HAVE to let them cool. I mean, really cool—room temperature at minimum. But if you want razor-sharp edges that don’t stick to your knife, you need the fridge! Pop the whole thing, still in the parchment slings, into the refrigerator for at least an hour.
It firms everything up beautifully. Once it’s chilled, you can lift it out and cut them with a big, sharp knife. Speaking of knives, a little trick I learned for super gooey bars: when you slice, wipe your knife down between cuts! Chocolate residue gums up the blade fast, and that’s when you start tearing the soft center edges.
Now, let’s look at texture adjustment. If you are lucky enough to have some leftovers—which, let’s be honest, is rare with these—and you find they are maybe just a *touch* too soft for your liking the next day, I have a trick for you. You can toss them onto a baking sheet (still separate squares!) and warm them at 300°F for maybe five or seven minutes. This won’t dry them out, but it will set them up just a hair firmer. It’s a great way to refresh them too. If you are curious how I approach baking textures in general, especially when dealing with delicate toppings, you might enjoy my thoughts on making coffee cake with a streusel topping, because balancing tender cake and crunchy topping is a similar game of temperature control!
And remember that note about fudgy results? If you pull them out just when the middle looks barely wet instead of mostly set, you’ll get those extra fudgy cookie bars how to make recipes promise. But you have to watch them like a hawk! A minute too long, and you’ve gone from fudgy to just underbaked. It’s a thin line, but if you’re making these for the first time, stick to the edges being golden brown first!
Variations: Customizing Your Chocolate Chip Cookie Bars
Part of the fun of making from scratch cookie bars recipe favorites is making them truly *yours*, right? This base recipe is so solid—it’s our foundation for the thick chocolate chip bake—but it’s begging to be customized. Since the base is so dependable, you can throw in a bunch of goodies without worrying if the whole thing is going to collapse. It just won’t! The structure is too strong thanks to that melted butter ratio.
The recipe notes already hinted at swapping in different chocolates, but let’s lean into that! If you want a richer, deeper flavor profile, use chopped dark chocolate chunks instead of standard chips. I find that when you chop the bar yourself, you get those uneven pieces—some big, some small—that melt differently in the oven. That uneven chocolate distribution is just gorgeous.
For texture folks, nuts are your best friend here. Walnuts or pecans always turn out great, but if you are feeling a little more adventurous, try using toffee bits instead of some of the chips! It adds a lovely salty-sweet crunch. If you have a serious sweet tooth, you can even drizzle caramel sauce over the top right before the last five minutes of baking!
If you’re a fan of the brown butter flavor—and seriously, who isn’t?—you can totally incorporate that into this recipe, though it does take an extra step. Browning the butter adds this amazing nutty depth which works so well with the caramel notes from the brown sugar we used. It’s a little extra work, sure, but it elevates these bars instantly! If you ever make a crispy treat that involves browning butter, like my recipe for brown butter crispy bars, you already know the deep flavor you get. You’ll use the cooled, browned butter instead of the regular melted butter in step two, and BAM! Instant upgrade.
The key is that you don’t need to adjust any flour or leavening when you add mix-ins, as long as you keep the total volume of additions to around 1 to 1 1/2 cups. Just fold them in gently at the end with the chocolate, press it into the pan, and you’re ready for the oven!
Storage and Reheating Chocolate Chip Cookie Bars
So, you managed to save some of these magnificent **Chocolate Chip Cookie Bars**? Good job! Because we got that perfect chewy texture using melted butter, these stay soft longer than traditional cookies, which is a huge bonus. But we still have to store them right so they don’t turn into hockey pucks.
If you plan on eating them within three or four days, room temperature storage is totally fine. The key here is airtightness. I wrap the whole cooled slab tightly in plastic wrap first, and *then* I put it into a large Ziploc bag or an airtight container. Storing them too close to anything strongly scented—like garlic or onions, which I’ve accidentally done before—can taint the buttery flavor, so keep them near the sweet stuff!
Now, if you’re like me and you baked a huge batch for the future, freezing is your best friend. You absolutely must slice them first! Trying to cut a frozen slab is just asking for crumbs everywhere. Once they are cut into perfect squares, wrap each bar individually in a small piece of plastic wrap or wax paper. Then, stack those individually wrapped bars into a heavy-duty freezer bag. You can fit so many more this way!
They freeze beautifully for up to three months. When you want one, just pull it out and let it thaw on the counter for about 30 minutes. They come back to almost perfect chewiness as they return to room temp.
If you’re craving that warm, just-out-of-the-oven moment, you can reheat them quickly. Don’t microwave the whole batch—that’ll make them rubbery fast. Just take one or two squares and zap them for about 10 to 15 seconds. That’s just enough time to melt those chocolate pockets again without ruining the structure. If you’re looking for crunchy textures instead of chewiness, you could try warming them in a toaster oven for two minutes, but honestly, these bars shine best when they are soft and chewy!
Frequently Asked Questions About Making Chocolate Chip Cookie Bars
I get so many questions when people try this recipe for the first time, and honestly, I love hearing what everyone is tweaking! It’s natural to wonder about swaps and changes, especially when you’re trying to achieve that perfect texture everybody talks about. I’ve gathered the most common queries I receive about these Chocolate Chip Cookie Bars right here for you.
When people ask me about substitutions, they usually want to know how to get that incredible chewiness, or how to handle sizing different pans. Even folks looking for the best cookie bar recipe often get stuck on the chilling versus no-chill debate!
Can I use cold butter instead of melted butter in these Chocolate Chip Cookie Bars?
Oh, I know it seems like a quick fix, especially if you forgot to sit your butter out. But here’s the deal: using cold, cubed butter means you have to cream it with the sugar for what feels like forever, and even then, you won’t get the right structural makeup for these bars. Melted butter coats the flour differently, which is what locks in the moisture and gives us that dense, glorious chew.
If you use cold butter, you’re going to end up with something much closer to a thicker, somewhat cakey cookie bar rather than the gooey melt-in-your-mouth experience we worked so hard for here. Stick to melted butter for this recipe; it’s non-negotiable for maximum chew!
What is the best way to cut fudgy cookie bars cleanly?
Ah, the eternal struggle of the bar baker! You pull them out of the oven, they smell divine, but the moment you go in with a knife, it’s just a beautiful, smeared mess. That’s why chilling is your secret weapon, especially if you managed to slightly underbake them for an extra gooey chocolate chip bars center, like I sometimes do!
You absolutely have to let them cool down fully first. Even room temperature is better than warm. But for those perfect, café-style squares that look like they came from a bakery display case? Pop the entire cooled slab into the fridge for at least an hour. That firmness makes all the difference! Once they are cold and firm, run your sharp knife under very hot water, wipe it completely dry, and then make your cut. The heat from the knife melts just enough chocolate to glide through, leaving you with an incredibly clean edge. You might need to occasionally reheat the knife as you go, but it is worth the effort for those sharp sides!
If you are interested in techniques for making traditional cookies soft and chewy, I share a few more temperature tricks over on my post about soft, chewy chocolate chip cookies; the science behind the chewiness is often similar!
Estimated Nutritional Breakdown for Chocolate Chip Cookie Bars
I always feel a little goofy putting nutrition info up because let’s be real, we aren’t making these for the vitamins, are we? But for those who are tracking, here is the estimate for one square based on the recipe yield of 16 bars. Remember, these are estimates, and they certainly change depending on what kind of chocolate chips you splurge on!
- Serving Size: 1 square
- Calories: 280
- Fat: 16g (with 10g saturated fat)
- Carbohydrates: 33g
- Sugar: 25g
- Protein: 3g
It’s a treat, plain and simple, but knowing the numbers upfront helps when planning out the menu!
Share Your Ultimate Chewy Chocolate Chip Cookie Bars Experience
I put my heart and soul into perfecting these Chocolate Chip Cookie Bars so you don’t have to guess if they’ll turn out right. Now it’s your turn! When you bake a batch, I absolutely love seeing your results. Did you manage to get those clean edges? Were they perfectly chewy, or did you lean into extra fudgy territory?
Please come back here and leave me a little star rating in the comments below—that feedback helps other bakers know what to expect. And if you happen to snap a photo of how gorgeous your squares look, tag me on social media! I’m always looking for ways to share the love for great home baking, and I’ve got tons of other quick dessert bars recipes coming soon. If you’re looking for a different kind of pan bake, maybe try out my quick berry cobbler with a biscuit topping next week!
Estimated Nutritional Breakdown for Chocolate Chip Cookie Bars
I always feel a little goofy putting nutrition info up because let’s be real, we aren’t making these for the vitamins, are we? But for those who are tracking, here is the estimate for one square based on the recipe yield of 16 bars. Remember, these are estimates, and they certainly change depending on what kind of chocolate chips you splurge on!
- Serving Size: 1 square
- Calories: 280
- Fat: 16g (with 10g saturated fat)
- Carbohydrates: 33g
- Sugar: 25g
- Protein: 3g
It’s a treat, plain and simple, but knowing the numbers upfront helps when planning out the menu!
Share Your Ultimate Chewy Chocolate Chip Cookie Bars Experience
I put my heart and soul into perfecting these Chocolate Chip Cookie Bars so you don’t have to guess if they’ll turn out right. Now it’s your turn! When you bake a batch, I absolutely love seeing your results. Did you manage to get those clean edges? Were they perfectly chewy, or did you lean into extra fudgy territory?
Please come back here and leave me a little star rating in the comments below—that feedback helps other bakers know what to expect. And if you happen to snap a photo of how gorgeous your squares look, tag me on social media! I’m always looking for ways to share the love for great home baking, and I’ve got tons of other quick dessert bars recipes coming soon. If you’re looking for a different kind of pan bake, maybe try out my quick berry cobbler with a biscuit topping next week!
Print
The Ultimate Chewy Chocolate Chip Cookie Bars Recipe
- Total Time: 45 min
- Yield: 16 squares
- Diet: Vegetarian
Description
Make thick, chewy chocolate chip cookie bars from scratch. This recipe yields a soft center and slightly crisp edges, perfect for cutting into squares.
Ingredients
- 1 cup (2 sticks) unsalted butter, melted
- 1 cup packed light brown sugar
- 1/2 cup granulated sugar
- 2 large eggs
- 1 tablespoon vanilla extract
- 2 1/4 cups all-purpose flour
- 1 teaspoon baking soda
- 1/2 teaspoon salt
- 1 1/2 cups semi-sweet chocolate chips
Instructions
- Preheat your oven to 350 degrees Fahrenheit. Line a 9×13 inch baking pan with parchment paper, leaving an overhang on the sides for easy removal.
- In a large bowl, whisk together the melted butter, brown sugar, and granulated sugar until smooth.
- Beat in the eggs one at a time, then stir in the vanilla extract.
- In a separate medium bowl, whisk together the flour, baking soda, and salt.
- Gradually add the dry ingredients to the wet ingredients, mixing until just combined. Do not overmix.
- Fold in the chocolate chips.
- Press the dough evenly into the prepared baking pan.
- Bake for 25 to 30 minutes, or until the edges are lightly golden brown and the center is mostly set.
- Let the bars cool completely in the pan on a wire rack before lifting them out using the parchment paper overhang.
- Cut into squares and serve.
Notes
- For cleaner cuts, chill the cooled bars in the refrigerator for at least one hour before slicing.
- Substitute half the chocolate chips with milk chocolate or chopped nuts for variation.
- If you prefer a fudgier texture, slightly underbake the bars by about 3 minutes.
- Prep Time: 15 min
- Cook Time: 30 min
- Category: Dessert
- Method: Baking
- Cuisine: American
Nutrition
- Serving Size: 1 square
- Calories: 280
- Sugar: 25
- Sodium: 150
- Fat: 16
- Saturated Fat: 10
- Unsaturated Fat: 6
- Trans Fat: 0
- Carbohydrates: 33
- Fiber: 1
- Protein: 3
- Cholesterol: 45