
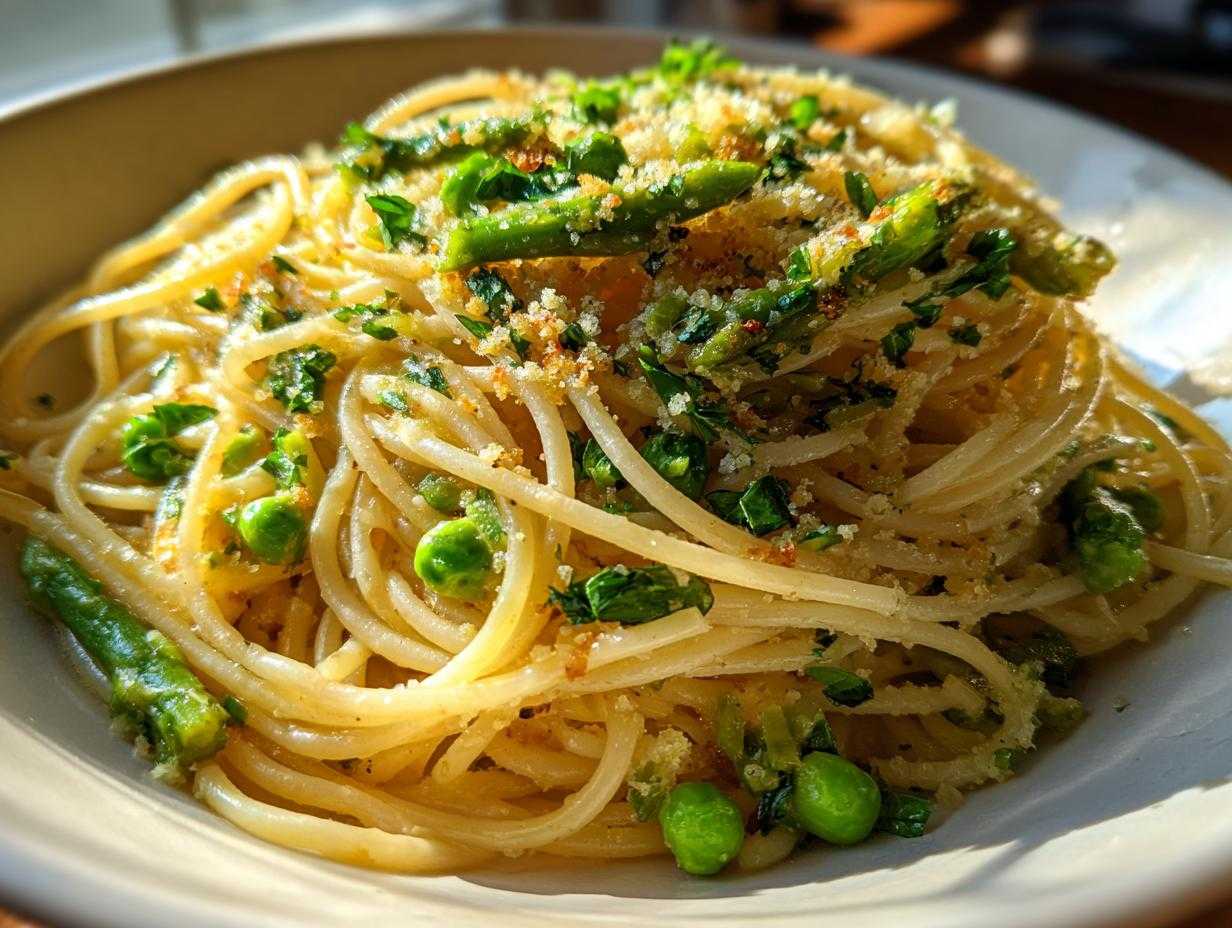
Oh my goodness, when that first wave of truly warm weather hits, my cravings change completely! I put away the heavy, slow-cooked sauces and start reaching straight for the freshest greens I can find. This Lemon Asparagus and Spring Pea Aglio e Olio is what I consider the absolute peak of spring dining. It’s everything you want: bright, zesty, packed with green goodness, and built on that gorgeous, simple foundation of garlic infused into good olive oil. Trust me, this Spring Pasta with Garlic and Olive Oil is officially my designated Tuesday night hero; I can whip it up faster than most take-out places can deliver!
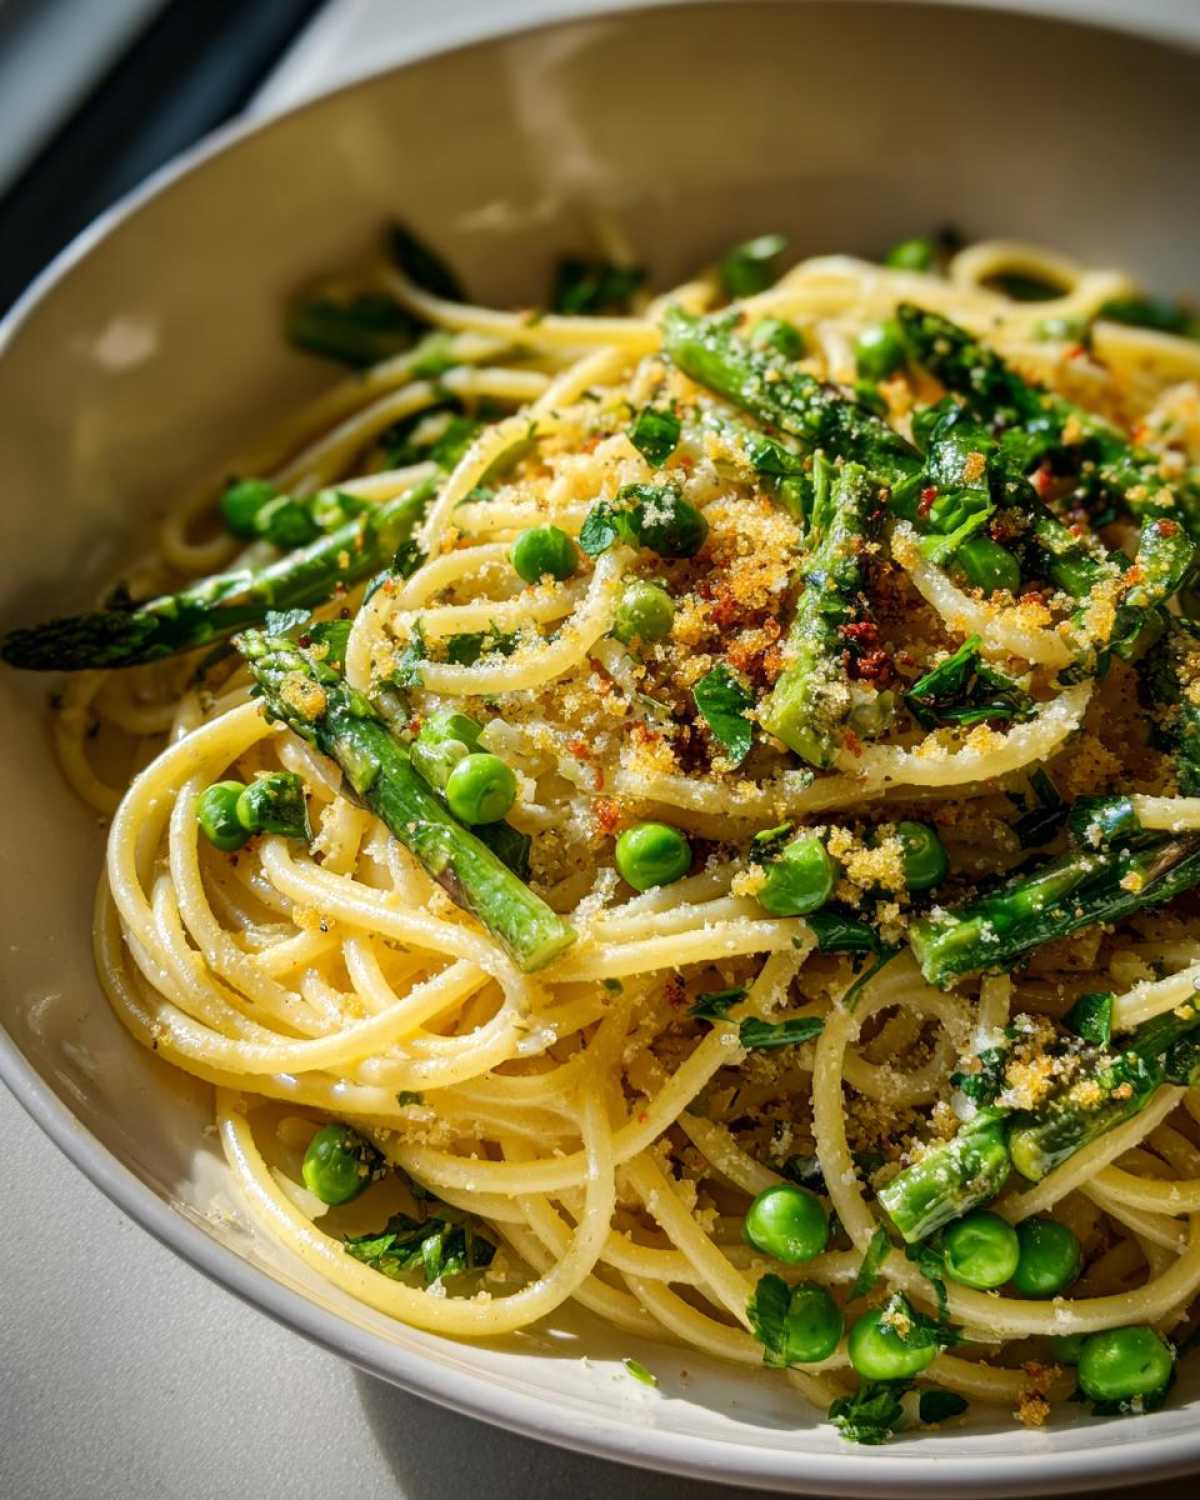
Why This Spring Pasta with Garlic and Olive Oil Shines
I know you’re looking for something that tastes like spring but doesn’t require babysitting a pot for an hour, and this recipe absolutely delivers on that promise. It hits all the right notes without making you feel weighed down.
- It’s all about those spring stars! The asparagus and sweet peas give you that beautiful snap of fresh garden flavor that just sings when paired with lemon.
- Talk about fast! From chopping to serving, we’re looking at maybe 35 minutes total. This makes it a stellar Quick Weeknight Pasta option when you want something impressive but effortless.
- The foundation is pure Italian magic. We aren’t relying on any heavy cream here; it’s a classic Garlic Olive Oil Pasta Ideas base, meaning the whole thing stays incredibly light and bright.
- And that texture contrast? Unbeatable. The crunch from the toasted panko breadcrumbs against the tender pasta is what stops everyone from just eating one bowl. Seriously, don’t skip the crunch, even if you’re tempted to rush!
Gathering Ingredients for Spring Pasta with Garlic and Olive Oil
The beauty of this recipe is that it celebrates just a few truly fantastic things. Because the sauce is so simple, the quality of your components really matters! I always stress using high-quality extra virgin olive oil—it’s the backbone of this entire dish, so grab the good stuff you usually reserve for dipping.
You’ll need your pasta, of course, whether you grab spaghetti or linguine. Then come our stars: we trim and cut that gorgeous green asparagus into one-inch chunks, and we use sweet frozen peas, which are perfect when you need speed. Don’t forget the garlic—four cloves, thinly sliced—and the absolute burst of freshness from the lemon zest, lemon juice, and a generous handful of fresh mint and parsley.
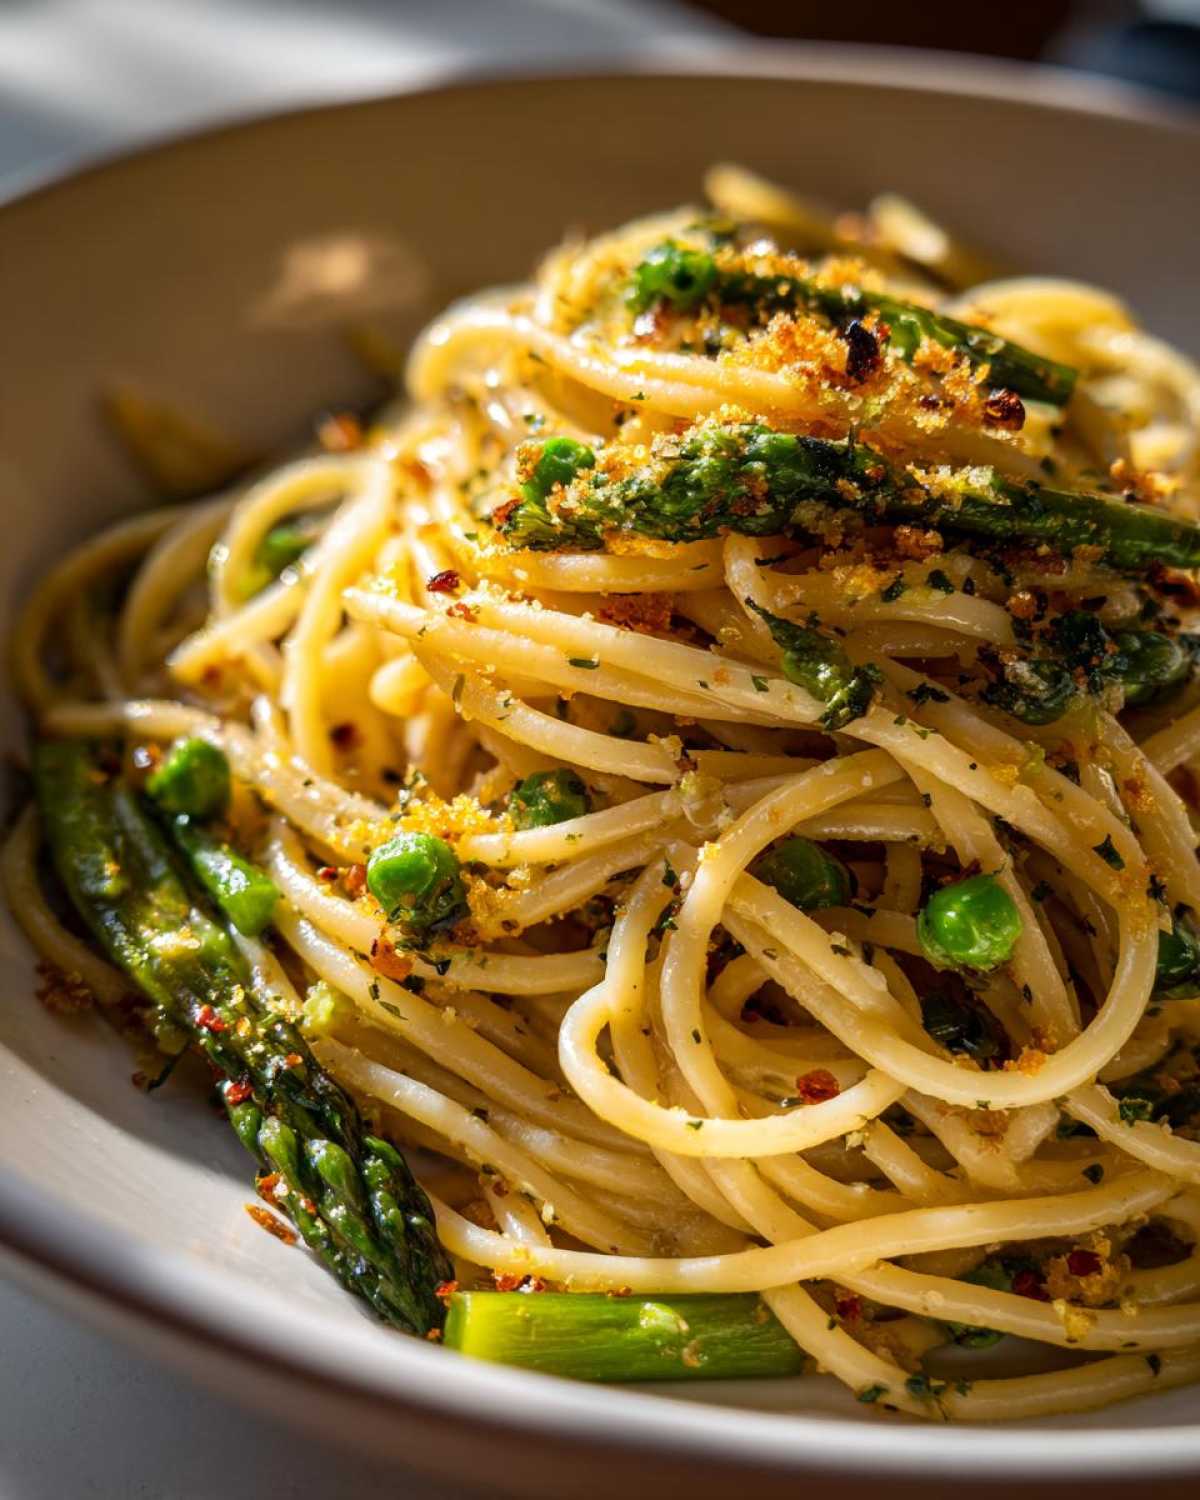
Finally, for that incredible texture, we whip up some toasted panko breadcrumbs. If you’re planning on having some crusty bread on the side, I highly recommend checking out my favorite Italian Herb and Cheese Bread recipe to go along with this! It’s perfect for soaking up the extra garlic oil.
Essential Equipment for Your Spring Pasta with Garlic and Olive Oil
You don’t need a whole arsenal of fancy gadgets for this dinner, which is another reason I love pulling it out on a busy evening. It’s all about having the right pots ready so you can move quickly between steps.
First up, you obviously need a big pot for boiling your pasta. Make it big—the pasta needs room to swim to cook evenly!
For the sauce itself, you absolutely must have a large, wide skillet. This is key because once the pasta is drained, everything—the oil, the garlic, the veggies, and the pasta—needs to fit in there comfortably so you can toss it all together without things flying out onto the stovetop. Trust me on this; trying to toss a large batch of this Aglio e Olio variation in a pan that’s too small is a messy disaster waiting to happen.
You’ll also need a couple of smaller items:
- A microplane or fine zester for getting that beautiful, fragrant lemon zest without any of the bitter white pith.
- A sturdy wooden spoon or tongs for tossing everything gently but thoroughly.
- A small, separate pan. We do this for the breadcrumbs! They need focused, high heat to toast perfectly, and we don’t want them cooking in the same oil we used for the garlic.
Get these few pieces ready on the counter before you even turn on the water, and you’re halfway to serving dinner!
Step-by-Step Instructions for Perfect Spring Pasta with Garlic and Olive Oil
Okay, get everything prepped first—that’s my golden rule for any quick pasta night. Once you start cooking, you have to move fast! Seriously, have your asparagus cut, your lemon zested, and your garlic sliced before you even boil the water. This isn’t the kind of dish you stop and walk away from; it’s a performance! We build this beautiful flavor layer by layer, and getting the timing right is everything. I even broke down the instructions into three main acts, just like cooking a little play!
Cooking the Pasta and Preparing the Toasted Breadcrumbs
First things first: get that big pot of salted water boiling. Cook your spaghetti or linguine until it’s perfectly al dente—remember, it’s going back into the pan later, so you don’t want it mushy! Before you drain it, scoop out at least one full cup of that starchy, salty liquid and set it aside. That is liquid gold; it’s our emulsifier!
While that’s happening, head over to your small separate pan. Add that extra tablespoon of oil and those panko breadcrumbs. Keep the heat at medium. You HAVE to stir constantly here! If you walk away for even thirty seconds, they burn and turn bitter. We want them golden brown and crunchy, smelling nutty, not smoky. Pull them off the heat the second they hit that perfect color.
Building the Flavor Base: Garlic and Spring Vegetables
Now, switch to the large skillet. Pour in that main quarter cup of olive oil and set the heat to medium-low. Here’s where patience comes in: add your thinly sliced garlic. We cook this slowly for about three or four minutes until it’s fragrant and just *barely* turning pale gold around the edges. If your garlic browns too fast, it ruins the whole dish, so keep that flame gentle!
Once the garlic smells intoxicating, boost the heat up to medium. Toss in the chopped asparagus first and sauté for three minutes. They need a head start. Then, toss in the frozen peas and cook for just two more minutes. They are mostly just warming through and absorbing that garlic oil.
Bringing the Spring Pasta with Garlic and Olive Oil Together
Time to bring the party together! Pour in the white wine or half a cup of that reserved pasta water right into the veggies; let it bubble and scrape up any little brown bits on the bottom—that’s flavor building! Now, drain your pasta and drop it straight into that skillet with the veggies.
Add the lemon zest and the lemon juice right there. This is the moment you emulsify! Start tossing everything together vigorously. If it looks a little dry, add splashes of the reserved pasta water until you see a light, glossy sauce coating every strand of pasta. Don’t dump the water in all at once, though! Finally, kill the heat, stir in your chopped mint and parsley—they go in last so they stay bright green—and season it up with salt and pepper. Serve immediately, topped with those crunchy breadcrumbs. You can see how this quick preparation makes it a fantastic Aglio e Olio alternative!

Expert Tips for the Best Spring Pasta with Garlic and Olive Oil
I’ve made this dish more times than I can count, and I’ve learned a few things along the way that elevate it from just good to absolutely show-stopping. When you’re working with so few ingredients, technique really shines through, so listen up!
First, let’s talk about the star: the oil. I know it’s tempting to just grab whatever cooking oil you have nearby, but for this particular Pasta with Lemon and Garlic, a good quality Extra Virgin Olive Oil (EVOO) is non-negotiable. You need something that tastes vibrant and peppery on its own because it forms the entire coating for the pasta. Don’t be shy; this recipe uses a decent amount, but it’s healthy fat, baby!
Next, that sauce consistency we talked about—it’s all about the emulsion! When you toss the pasta with the garlic oil and start splashing in that reserved pasta water, you need movement. I use tongs and toss vigorously, almost like I’m trying to throw the pasta at the ceiling (carefully, of course!). That vigorous tossing is what forces the starch from the water to bind with the olive oil, creating that silky, cloudy sauce that sticks perfectly to the pasta instead of just running into the bottom of the bowl like oily soup. If you want to learn more about building flavor bases, you might find my guide on caramelized onions useful for other recipes, but here, gentle heat is your friend.
My last big tip is for the herbs. Mint and parsley are fragile! You must pull them off the heat *before* stirring them in. If you add them while the pan is still scalding hot, they wilt instantly and turn bitter and dull-looking. Wait until the pasta is off the flame, then fold the chopped greens in gently. They’ll warm up just enough to release their incredible aroma while keeping that beautiful, bright green pop of color.
Garlic Olive Oil Pasta Ideas: Variations on This Spring Pasta with Garlic and Olive Oil
You know, as much as I adore perfection, sometimes you need to shake things up a bit, especially if you’re making this Spring Pasta with Garlic and Olive Oil more than once a week! The base recipe for this dish is so pure that it’s practically crying out for little additions. The beauty of the Aglio e Olio style is its flexibility; it just welcomes whatever fresh ingredients you have on hand.
Add Heat: The Pepperoncino Kick
If you like a little fire with your freshness, this is the easiest tweak you can make. Just before you add the sliced garlic to the oil, toss in about half a teaspoon of red pepper flakes—what Italians call *peperoncino*. Let those flakes warm up gently with the oil for about thirty seconds. They’ll release their heat right into the base flavor. It adds this wonderful, little underlying warmth that plays incredibly well against the sweetness of the peas and the tang of the lemon. It turns into a brighter, punchier version of our Pasta with Lemon and Garlic.
Swap Out the Greens for Broccoli Rabe
While asparagus and peas are quintessential spring, sometimes you get a hankering for something a little earthier. If you can find good, tender broccoli rabe, that makes a phenomenal switch for the asparagus! The only thing you need to adjust is the cooking time slightly. Broccoli rabe is a bit tougher, so you might want to blanch it quickly in the boiling pasta water for about two minutes *before* you sauté it in the garlic oil. It brings a pleasing bitterness that cuts through the richness of the olive oil beautifully, making it a fantastic next-level Aglio e Olio Variation.
Herbal Switch-Up: Basil and Tarragon
Mint is fantastic, but if you want to lean more Italian and less Mediterranean, try swapping out the mint completely and introducing sweet basil. Basil melts into the warm oil so deliciously. For serious gourmet flair, try adding just a whisper of fresh tarragon along with the parsley! Tarragon has this subtle, almost licorice-like note that pairs unexpectedly well with asparagus and lemon. It makes the whole dish feel wonderfully sophisticated, like something you’d eat on the Amalfi Coast, and it’s still ready in under thirty minutes!
For more ideas on how to build out a simple pasta, you can check out my full guide on Pasta with Lemon and Garlic dishes. Honestly, you can’t mess this base up!
Serving Suggestions for Your Bright Flavored Pasta
Now that you’ve made this incredible, light, zesty plate of pasta, you can’t just serve it alone, can you? Well, you *could*, and it would still be delicious, but the way you pair it can really turn a quick weeknight meal into something special!
Because this dish is so gloriously non-heavy—remember, it’s all olive oil, garlic, and crisp spring vegetables—we want to keep our sides equally bright. Forget those heavy, creamy sides; we need things that enhance that fresh garden flavor, not weigh it down.
The first thing you absolutely need is something to mop up those glorious little puddles of lemon-garlic oil left on the bottom of your bowl. Seriously, don’t waste a drop! A slice or two of crusty, slightly chewy bread is perfect. If you happen to have some homemade bread around, even better, but I’ve always loved having a simple, good quality baguette on hand.
If you want a real side dish, I insist on a sharp, simple salad. Nothing complicated, just greens that provide a nice peppery bite against the sweet peas. If I’m feeling ambitious, I’ll throw together a very quickly dressed salad. My go-to is a simple shredded cabbage with a sharp vinaigrette; you can find my tips right here on making that Zesty Vinaigrette. The crunch is just fantastic.
And for the adults at the table? This pasta screams for a crisp, dry white wine. Think Pinot Grigio or a clean Sauvignon Blanc. The acidity cuts through the richness of the olive oil beautifully and highlights the lemon and mint. It’s such a refreshing pairing that just screams, “Spring is finally here!”
Storage and Reheating for Leftover Spring Pasta with Garlic and Olive Oil
It’s rare that I actually have leftovers of this dish because my family devours it, but when I do manage to sneak a container away for lunch the next day, I have a few tricks to keep it tasting almost as good as fresh.
First, cool it down quickly! Don’t let that pasta sit on the counter for hours after dinner. Cover your container tightly and get it into the fridge within two hours maximum. It should keep beautifully for about three days. After that, the texture of the asparagus can start to get a little soft, and we don’t want that.
The biggest hurdle with leftovers of any pasta built on olive oil, like this lovely Spring Pasta with Garlic and Olive Oil, is reheating. The oil solidifies when it gets cold, so it can look clumpy and sad when you first pull it out.
The Best Way to Reheat Garlic Olive Oil Pasta
Please, please, please, do not microwave this unless you absolutely have no other choice! Microwaving tends to dry pasta out really fast, and it just doesn’t handle the olive oil well. If you must use the microwave, do it in very short bursts and sprinkle a teaspoon of water over the top before heating.
My preferred method is the stovetop, always. Take the pasta out of the fridge about 20 minutes before you want to eat so it can warm up slightly. Heat a large skillet over medium-low heat. Add a tiny splash—maybe a teaspoon—of fresh olive oil, or even just a tablespoon of fresh water. Add the cold pasta and toss constantly as it heats up. That little bit of extra liquid helps re-emulsify the sauce clinging to the noodles and dissolves the congealed oil.

Keeping Fresh Herbs Bright
If you didn’t eat every bit of the fresh mint and parsley the first night, be aware that they will look quite sad by day two. The intense cold of the fridge really wears them out! For this reason, I always store the leftover pasta *without* the fresh herbs stirred in, if possible.
If you have leftover toasted breadcrumbs, keep those stored in a dry, airtight container separately. If they get refrigerated next to the moisture of the pasta, they’ll go soft, and we worked hard to get them crunchy!
When you reheat your leftovers using the stovetop method I mentioned, stir in a small pinch of *fresh* mint and parsley right at the very end, once the pasta is hot. It gives you that fresh pop of color and flavor back without having to chop a whole new bundle just for one serving!
Frequently Asked Questions About This Easy Spring Pasta Recipe
It’s totally normal to have questions when you’re trying a new spin on a classic like the Garlic Olive Oil Pasta Ideas! Since this recipe is so simple, making little tweaks can throw things off if you aren’t sure about the science behind it. I’ve gathered up the most common things people ask me about making this the perfect No Cream Spring Pasta.
Can I substitute the asparagus or peas in this recipe?
Absolutely, yes! That’s the spirit of a Seasonal Pasta Recipes dish—use what’s best when you are cooking. If you can’t find perfect asparagus or just prefer something different, feel free to swap them out! I love using tender broccoli florets in the early spring, or even some thinly sliced zucchini if I’m making it toward the end of the season.
The key adjustment is timing. Anything you swap in needs to be a quick-cooking vegetable, just like the asparagus and peas. If you use something like carrots, you’d have to steam or blanch those pieces first, because they won’t soften enough just by sautéing for a few minutes like our main stars do.
How do I make sure the garlic doesn’t burn when making this Spring Pasta with Garlic and Olive Oil?
Oh, this is the question that separates the spectacular from the slightly bitter! Garlic burns faster than anything else, and burned garlic tastes harsh and ruins the subtle sweetness we are going for. Remember, this is not a quick fry like you might do in a stir-fry. For this fantastic Light Pasta Dishes for Spring, you need low and slow heat.
My advice is to start your heat on medium-low before you even add the garlic. Let the oil warm up gradually. When you add the thin slices, if you hear aggressive sizzling right away, your pan is too hot! You want them to gently perfume the oil; they should move slowly from white to creamy pale gold over a good three to four minutes. If you see even one tiny speck start to turn brown, pull the pan off the heat immediately. They will keep cooking for a moment even off the burner!
Is this recipe truly a light pasta dish for spring?
It genuinely is, and that’s why I love it so much for spring and summer eating! It fits securely in the category of Bright Flavored Pasta because we are intentionally leaving out the heavy hitters. You won’t find any cream, heavy tomato bases, or even huge amounts of Parmesan cheese in the main sauce.
The richness comes entirely from using a good amount of quality olive oil and using the starchy pasta water to create a beautiful, thin emulsion. It coats everything beautifully, but it washes clean off your palate, leaving you refreshed by the lemon and mint. If you’re looking for an even lighter alternative to sauces that take hours, this type of Aglio e Olio variation is your best friend!
Print
Lemon Asparagus and Spring Pea Aglio e Olio with Toasted Breadcrumbs
- Total Time: 35 min
- Yield: 4 servings
- Diet: Vegetarian
Description
A quick and light pasta dish featuring asparagus, peas, lemon, and fresh mint, built on a simple garlic and olive oil base.
Ingredients
- 12 oz spaghetti or linguine
- 1/4 cup olive oil
- 4 cloves garlic, thinly sliced
- 1 bunch asparagus, trimmed and cut into 1-inch pieces
- 1 cup frozen sweet peas
- 1/2 cup dry white wine or pasta water
- Zest of 1 large lemon
- Juice of 1/2 lemon
- 1/4 cup fresh mint leaves, chopped
- 1/4 cup fresh parsley, chopped
- 1/2 cup panko breadcrumbs
- 1 tablespoon olive oil (for breadcrumbs)
- Salt and black pepper to taste
Instructions
- Cook the pasta according to package directions until al dente. Reserve 1 cup of the pasta cooking water before draining.
- While the pasta cooks, heat 1/4 cup olive oil in a large skillet over medium-low heat. Add the sliced garlic and cook slowly until fragrant and lightly golden, about 3-4 minutes. Do not let the garlic burn.
- Increase the heat to medium. Add the asparagus pieces to the skillet and sauté for 3 minutes until slightly tender-crisp.
- Add the frozen peas and cook for 2 minutes more.
- Add the white wine or 1/2 cup of reserved pasta water to the skillet. Let it simmer for 1 minute, scraping up any bits from the bottom.
- Add the drained pasta, lemon zest, and lemon juice to the skillet. Toss well to coat. Add more pasta water, a splash at a time, until a light sauce forms.
- In a separate small pan, heat 1 tablespoon of olive oil over medium heat. Add the panko breadcrumbs and toast, stirring constantly, until golden brown and crisp, about 3 minutes. Remove from heat immediately.
- Remove the pasta from the heat. Stir in the fresh mint and parsley. Season generously with salt and pepper.
- Divide the pasta among bowls. Top each serving with a sprinkle of the toasted breadcrumbs.
Notes
- Toast the breadcrumbs separately for the best texture contrast.
- Use high-quality extra virgin olive oil for the best flavor in this simple sauce.
- If you prefer a richer sauce, add 2 tablespoons of grated Parmesan cheese at the end, though this deviates from a strict Aglio e Olio style.
- Prep Time: 15 min
- Cook Time: 20 min
- Category: Dinner
- Method: Stovetop
- Cuisine: Italian
Nutrition
- Serving Size: 1 serving
- Calories: 550
- Sugar: 5
- Sodium: 350
- Fat: 20
- Saturated Fat: 3
- Unsaturated Fat: 17
- Trans Fat: 0
- Carbohydrates: 78
- Fiber: 6
- Protein: 18
- Cholesterol: 0

