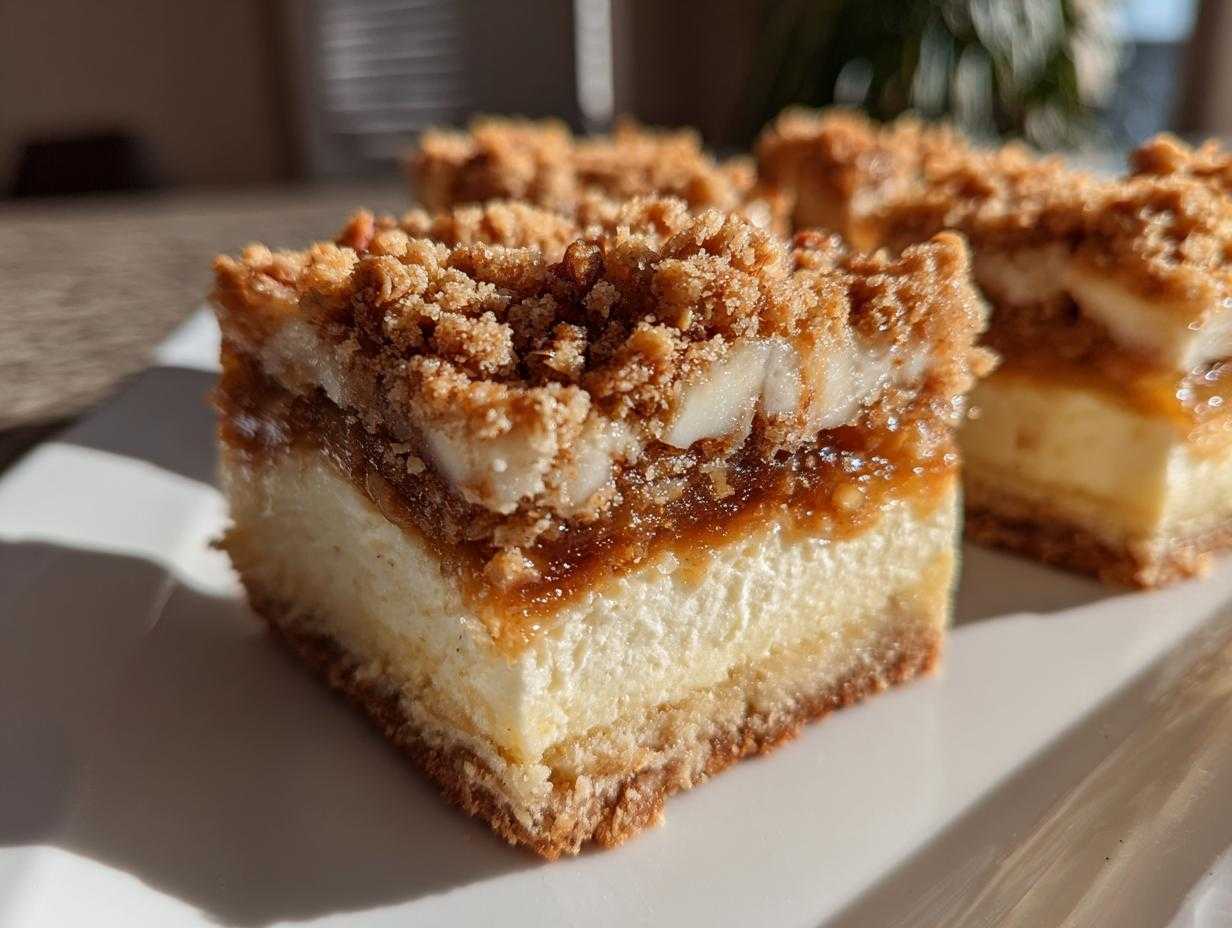
Oh my goodness, listen up, because when the air gets crisp and the leaves start turning, I know exactly what needs to be in my oven: these spectacular Apple Crumble Cheesecake Bars! I’ve been tweaking and testing this layered dessert for years—trying to get that perfect marriage of textures—and I finally nailed it. Honestly, they are the ultimate fall treat. Forget fussing with a soggy pie crust; these handheld squares give you the buttery base, the creamy cheesecake filling, and a crunchy, cinnamon-spiced apple topping all in one bite. If you want the absolute best apple cheesecake bars that scream autumn happiness, keep reading!
Why This Apple Cheesecake Bars Recipe is the Best Fall Dessert Bars
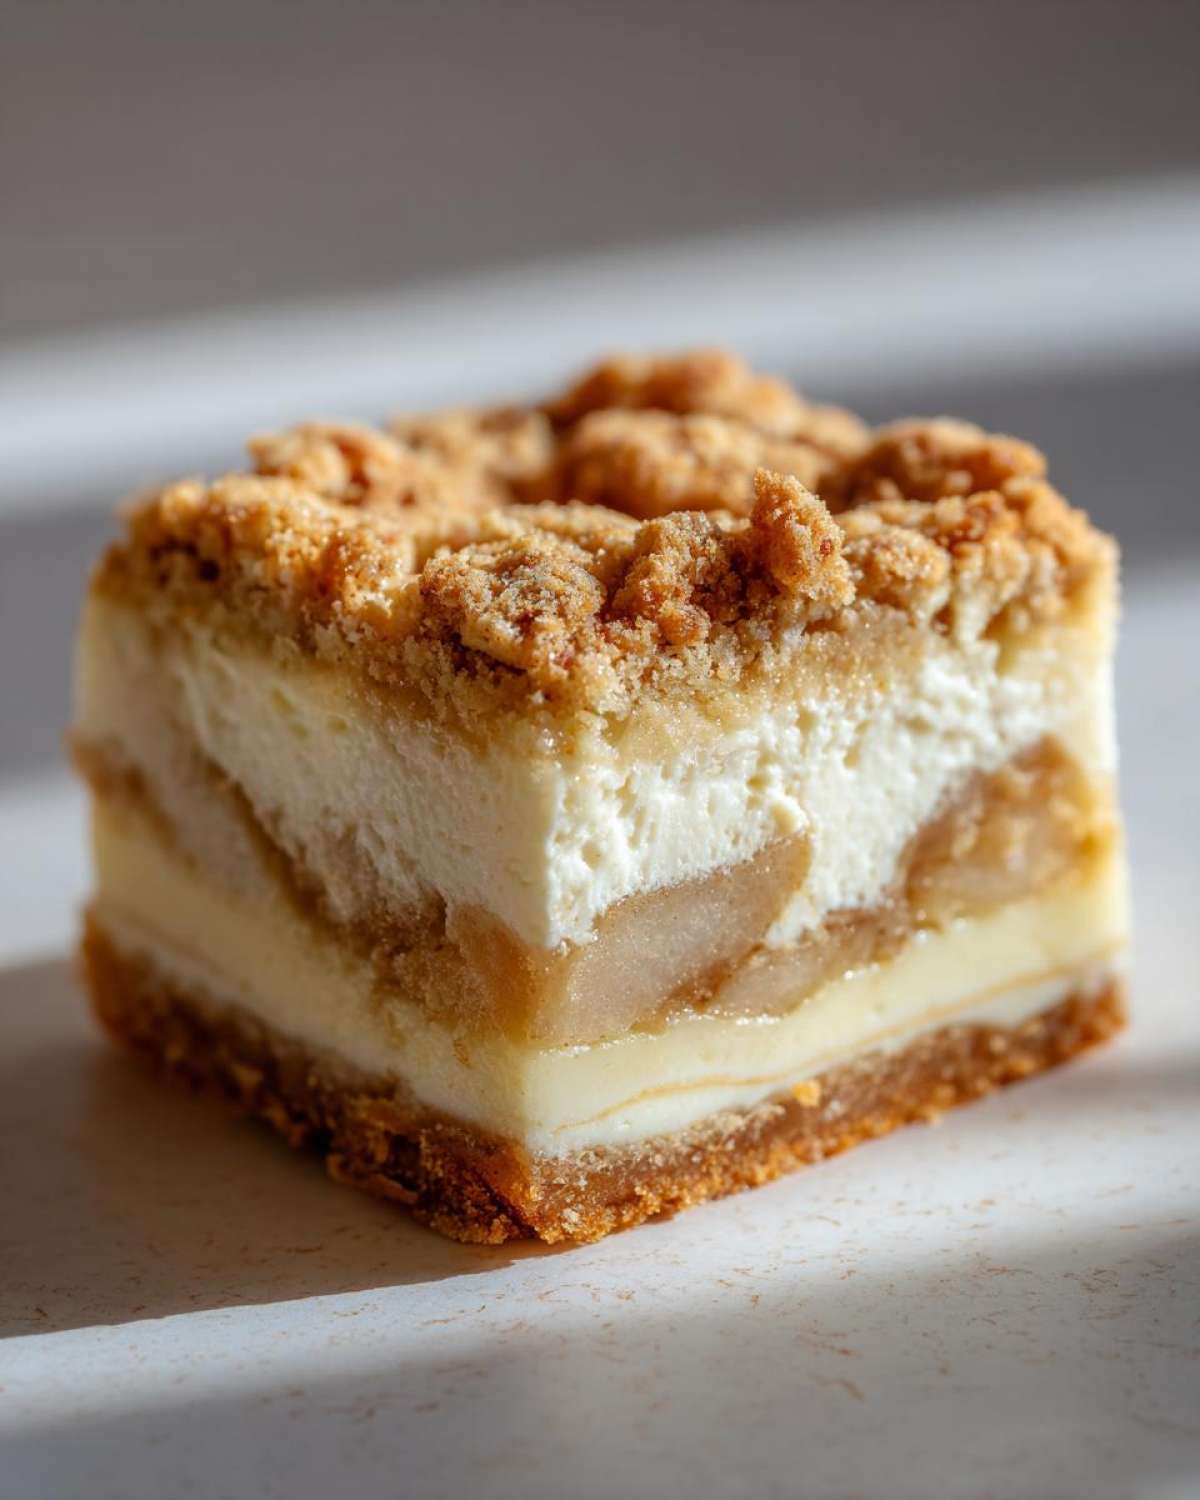
Look, I’ve made a lot of desserts for Thanksgiving, but these stand head and shoulders above the rest. These aren’t just slices; they are architectural marvels of flavor! The reason these Fall Dessert Bars are my go-to secret weapon is the sheer contrast in every layer. You bite through that crunchy topping, hit the cool, smooth cheesecake, and then BAM—a burst of warm, cinnamon-spiced apple hits you. It’s everything good about autumn baking wrapped up neatly.
When I bring these to parties, they vanish first. People want something handheld, but they also want that rich flavor you usually only get from a fully dressed pie or cake. These Thanksgiving Cheesecake Bars deliver that decadence without needing forks or fuss. Trust me, this layered magic is worth every single minute.
Texture Perfection: Crust, Cream, and Crumble
The texture combination is what sets these apart from standard cheesecake squares. We start with a dense, buttery crust that actually stands up to the topping. Then comes the luxurious layer of rich, slightly tangy cheesecake. Finally, that crisp oat crumble provides the necessary crunch. It’s a symphony, honestly!
Gathering Ingredients for Your Apple Crumble Cheesecake Bars
Okay, organizing for these Apple Crumble Cheesecake Bars is half the battle, but it keeps things moving smoothly when you assemble the layers. You need to make sure everything is prepped right, especially regarding temperature! Remember, we aren’t just mixing blobs together; we’re building a dessert masterpiece. Having your ingredients ready in separate bowls makes the whole process feel way less stressful. I always pull out the cream cheese early, but keep that butter for the crust and topping rock-solid cold.
For the Buttery Crust Cheesecake Bars
This is the foundation, so we treat it right! It needs that cold butter to get crumbly and never greasy. Here’s what you need to get started:
- 1 1/2 cups all-purpose flour
- 1/2 cup granulated sugar
- 1/4 teaspoon salt
- 1/2 cup cold unsalted butter, cubed
For the Spiced Apple Topping
I insist on Granny Smiths here—you need that little bit of tartness to cut through the rich cheesecake. Don’t skip the lemon juice; it keeps our apples from turning a sad brown color!
- 2 medium apples (like Granny Smith), peeled, cored, and diced
- 1/4 cup brown sugar
- 1 teaspoon ground cinnamon
- 1 tablespoon lemon juice
For the Creamy Cheesecake Layer
This is where the creaminess comes from! Make sure your cream cheese is truly softened, or you’ll end up with little lumps. Nobody wants a lumpy cheesecake bar, trust me on this one.
- 8 ounces cream cheese, softened
- 1/2 cup granulated sugar
- 1 large egg
- 1 teaspoon vanilla extract
For the Apple Streusel Cheesecake Bars Topping
This topping is what gives us that amazing crunch. If you use cold butter here, you’ll get the perfect texture for sprinkling. We’re aiming for pebble-sized crumbles!
- 1/4 cup all-purpose flour
- 1/4 cup rolled oats
- 1/4 cup brown sugar
- 2 tablespoons cold unsalted butter (for topping)
Step-by-Step Instructions for Easy Apple Cheesecake Bars
Alright, let’s get baking! These are genuinely some of the Easy Apple Cheesecake Bars you will ever make, and that’s because we are building this in deliberate stages. Don’t rush this process, especially the layers! We are preheating the oven to 350 degrees F right now, so let’s get moving. First thing: prepare your 9×9 inch pan. You absolutely have to line it with parchment paper, making sure it hangs over two of the sides. This overhang will be your handles later—trust me, you’ll thank yourself when it’s time to lift these beauties out!
Prep the Pan and Bake the Crust
Time for the base! In a bowl, you’ll mix your 1 1/2 cups of flour, the 1/2 cup of sugar, and the salt. Now, take that 1/2 cup of cold butter, cubed, and use your fingers or a pastry blender to work it into the dry mix. You want it to look like coarse sand or little peas—that’s the texture that makes a great buttery crust. Press this firmly and evenly into the bottom of your prepared 9×9 pan. Pop this into the oven for a quick 12 minutes until it’s just barely starting to look set. We’re just giving it a head start!
Cooking the Apple Crumble Cheesecake Bars Filling
While the crust is getting cozy in the oven, deal with the apples. In a saucepan, combine your diced apples—remember, we want firm ones!—with the 1/4 cup of brown sugar, cinnamon, and lemon juice. Cook this over medium for about 5 to 7 minutes. You aren’t trying to make applesauce; you just want them slightly softened so they don’t fight the cheesecake when we slice it later. Set that lovely spiced apple mix aside to cool a little.
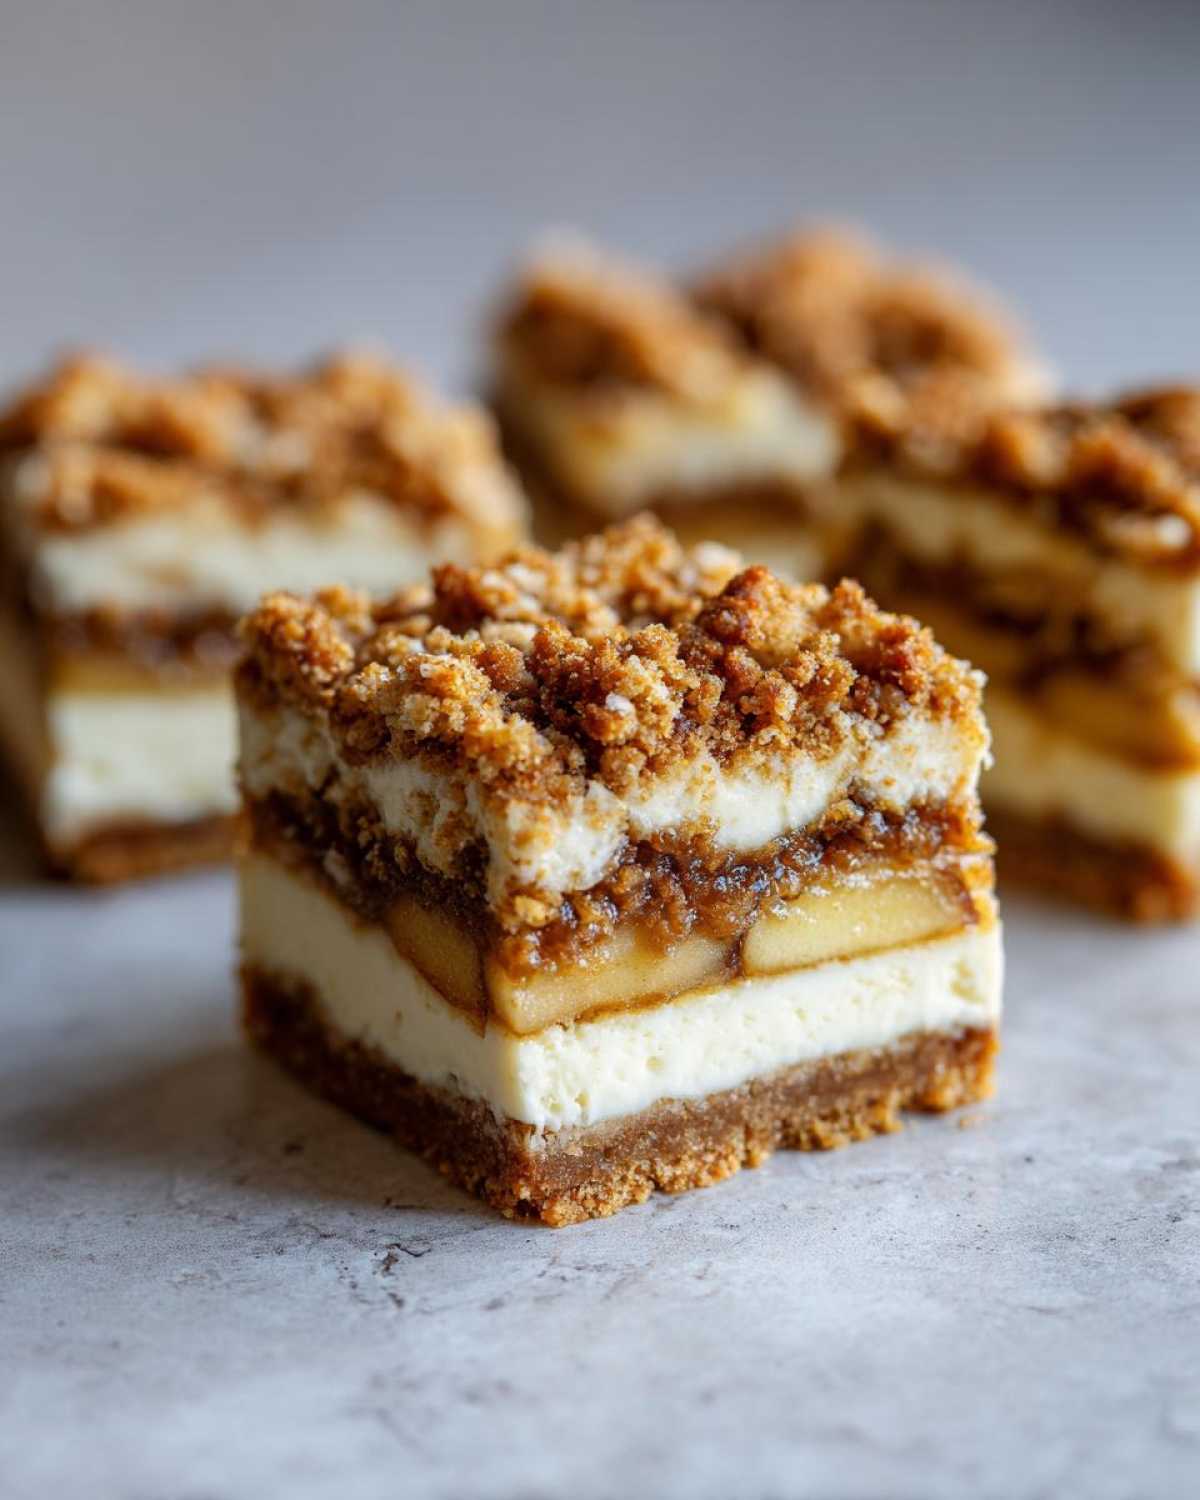
Next up is the cheesecake filling. Take your softened cream cheese and the 1/2 cup of sugar and beat them until they are completely smooth—no lumps allowed! Beat in the last egg and the vanilla extract gently. Remember one of my big notes: don’t overmix after the egg goes in! We just want it combined so the filling stays nice and creamy.
Assembling and Baking the Layered Apple Cheesecake Squares
When the crust comes out, spread that creamy cheesecake mixture evenly over the warm base. After that, gently spoon your cooked apple mixture right over the cheesecake layer. It looks messy, but don’t worry; the topping holds it all together.
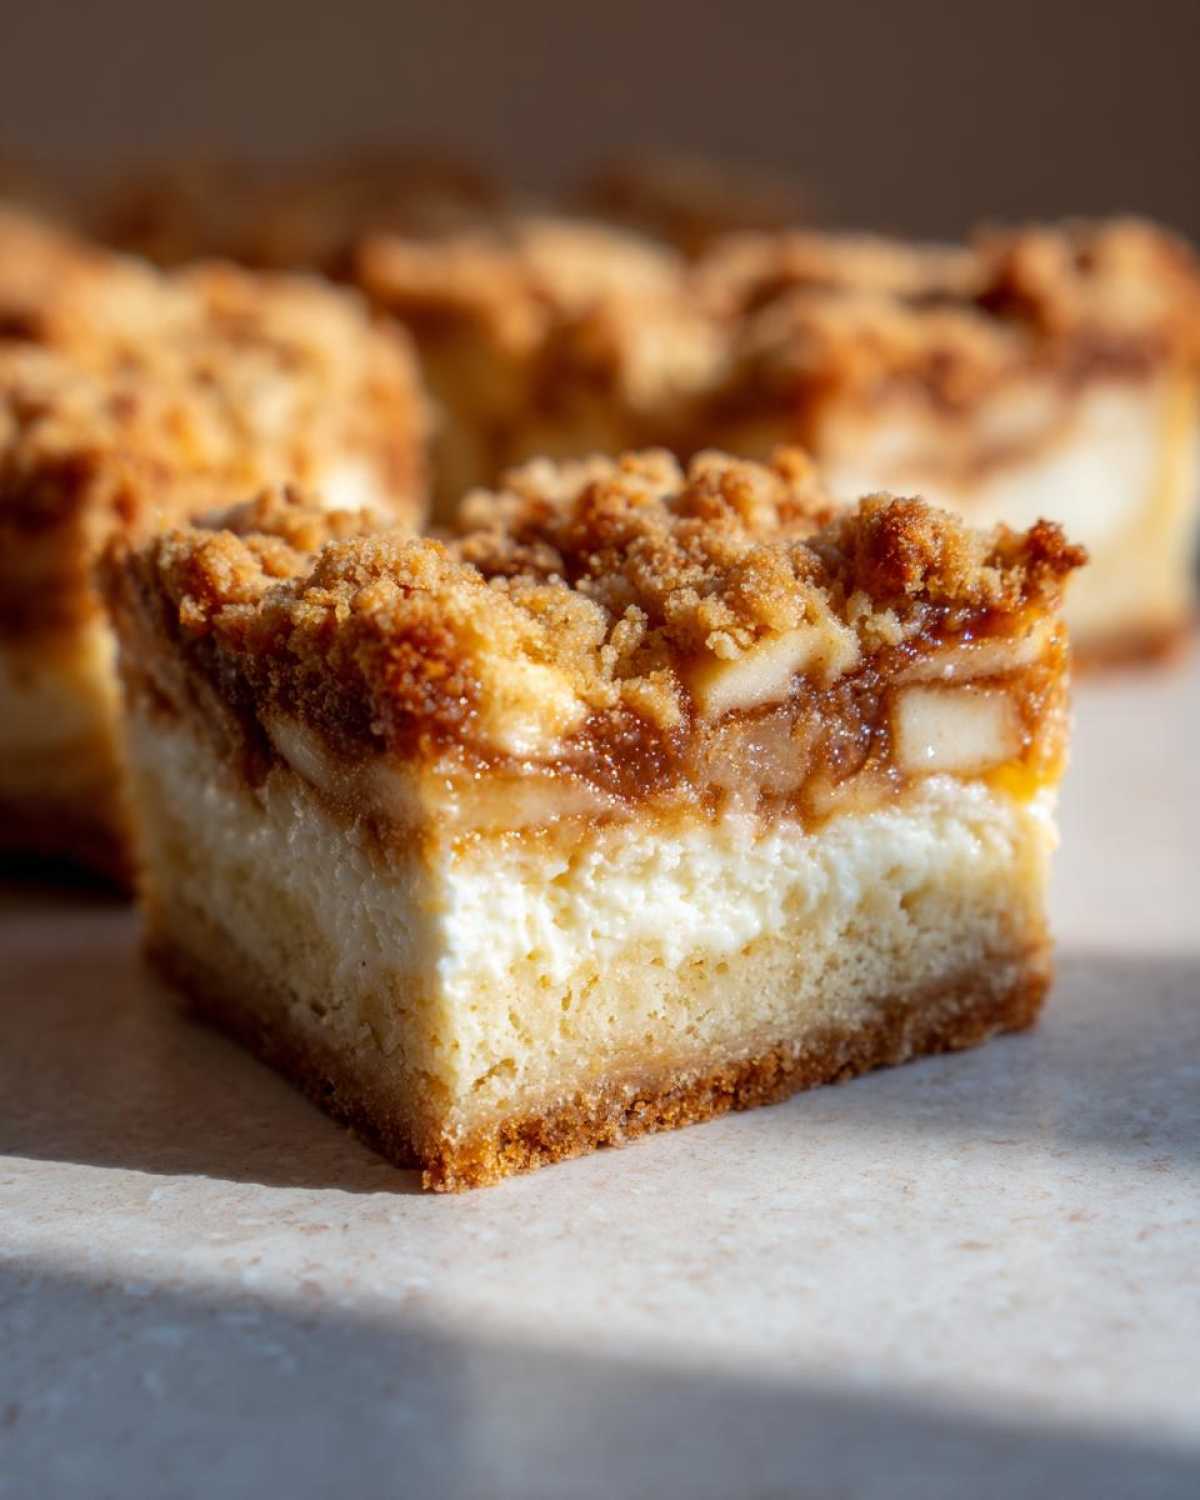
Now, for the crunch! For the streusel topping, quickly rub the remaining 1/4 cup flour, oats, 1/4 cup brown sugar, and 2 tablespoons of that cold butter together until you have crumbly bits. Sprinkle this topping evenly all across the apples. Pop the whole pan back into the 350°F oven for about 35 to 40 minutes. You’re looking for golden brown on top and edges that look set.
Cooling and Serving Your Homemade Apple Dessert Bars
This is perhaps the hardest step: waiting! Once they come out, let them cool completely on a wire rack first. Then, use those parchment paper handles we planned for to lift the whole slab out onto a cutting board. For those super clean slices you see in pictures? You need to chill these Homemade Apple Dessert Bars for at least 2 hours in the fridge. Really! If you try to cut them warm, the cheesecake layer will squish everywhere. Patience equals perfect squares!
Tips for Perfect Apple Cheesecake Bars Every Time
Even with a great recipe, a few tricks up your sleeve can turn these layers from great to absolutely unforgettable. Baking is chemistry, but it’s also intuition, right? I’ve learned these small things make the biggest difference when making these gorgeous apple cheesecake bars. Pay attention to the apples and the cream cheese, and you’ll be set!
Apple Selection for the Best Apple Cheesecake Bars
Please, please, please use tart apples!
If you use something too sweet, like a Red Delicious, they turn into mush when cooked, and you lose that lovely sweet-and-tart flavor that balances the richness of the cheesecake. Granny Smith apples are my absolute favorite because they hold their shape beautifully during that light simmer. They give you delicious texture instead of a watery sauce in your bars.
Achieving the Creamy Apple Dessert Slices Filling
This is a little piece of advice I learned the hard way after making a tough cheesecake once. When you get to mixing the cream cheese layer, stop mixing the second the egg is incorporated. Seriously, stop! Egg whites start developing gluten when they’re overworked, and that’s what gives cheesecakes a slightly rubbery or dry texture. We want smooth, silky, creamy filing for these Apple Dessert Slices, not chewiness!
Variations: Making Caramel Apple Cheesecake Bars
Now, I know what some of you are thinking: what about caramel? Oh yes, we absolutely have to talk about caramel! If you want these to transition right into pure autumn indulgence, turning them into glorious Caramel Apple Cheesecake Bars is so easy. It requires just one extra step that bumps them right up to holiday dessert status. Right before you sprinkle on that crunchy streusel topping, simply drizzle about half a cup of good, thick caramel sauce straight over the cooked apple layer, spreading it gently. The caramel soaks in a little and gets wonderfully gooey while baking. It’s a perfect match for the cinnamon!
Storage & Reheating Instructions for Apple Cheesecake Bars
Since these apple cheesecake bars have three distinct layers, they need a little TLC for leftovers. Keep them in an airtight container in the refrigerator, always! They stay wonderfully moist and delicious for up to four or five days this way. If you want them slightly softer for serving, just let them sit on the counter for about 20 minutes before tasting your Creamy Apple Dessert Squares. Honestly, I think they taste even better the next day!
Frequently Asked Questions About Apple Cheesecake Bars Recipe
Whenever I share this recipe, folks always have a few burning questions, especially around baking times and ingredients. It’s totally normal! These layered desserts throw a few curveballs compared to a standard cookie, but once you know the secrets, you’re golden. Here are the things I get asked most often about getting these apple cheesecake bars just right.
Can I make these apple cheesecake bars without baking the crust first?
Oh, you absolutely could try, but please don’t! If you skip that initial 12-minute bake for the crust, you end up with a sad, sandy base that gets instantly soggy when you pour the wet cheesecake filling on top. That initial bake is crucial. It sets the butter into the flour so you get that perfectly sturdy, buttery base for your Handheld Apple Cheesecake. It takes barely any time, so it is worth the wait before moving to the next layer.
Are there options for making these without cream cheese?
Well, if you skip the cream cheese, you aren’t really making cheesecake anymore, are you? If you have a dairy restriction, you could perhaps try using mascarpone cheese; it behaves similarly but is a bit richer. Greek yogurt is a popular substitute in other recipes, but honestly, you risk losing that signature dense, velvety texture that makes these apple cheesecake bars so special. It would become much more like a standard apple square, not the creamy dream we are aiming for!
How do I ensure my apple topping is sweet and tart?
This goes back to my favorite tip: you absolutely need tart apples! I recommend Granny Smith 99% of the time for these Cinnamon Apple Dessert Slices. They keep their shape beautifully and provide that necessary sour note to balance out both the sugar in the cheesecake and the brown sugar in the crumble. If your apples are super ripe and sweet, just add an extra squeeze of lemon juice when you cook them down.
Estimated Nutritional Information for Apple Crumble Cheesecake Bars
I always feel a little weird posting nutrition facts because, honestly, when you’re making something this amazing, sometimes ignorance is bliss, right? These are rich, layered apple cheesecake bars, so they definitely count as an indulgent treat! This chart is just an estimate based on the standard ingredient amounts we used for our 16 servings. If you cut them smaller, your numbers will change, but for a full square, here’s what we are looking at:
- Serving Size: 1 bar
- Calories: 310
- Fat: 18g (11g saturated)
- Carbohydrates: 34g
- Sugar: 22g
- Protein: 4g
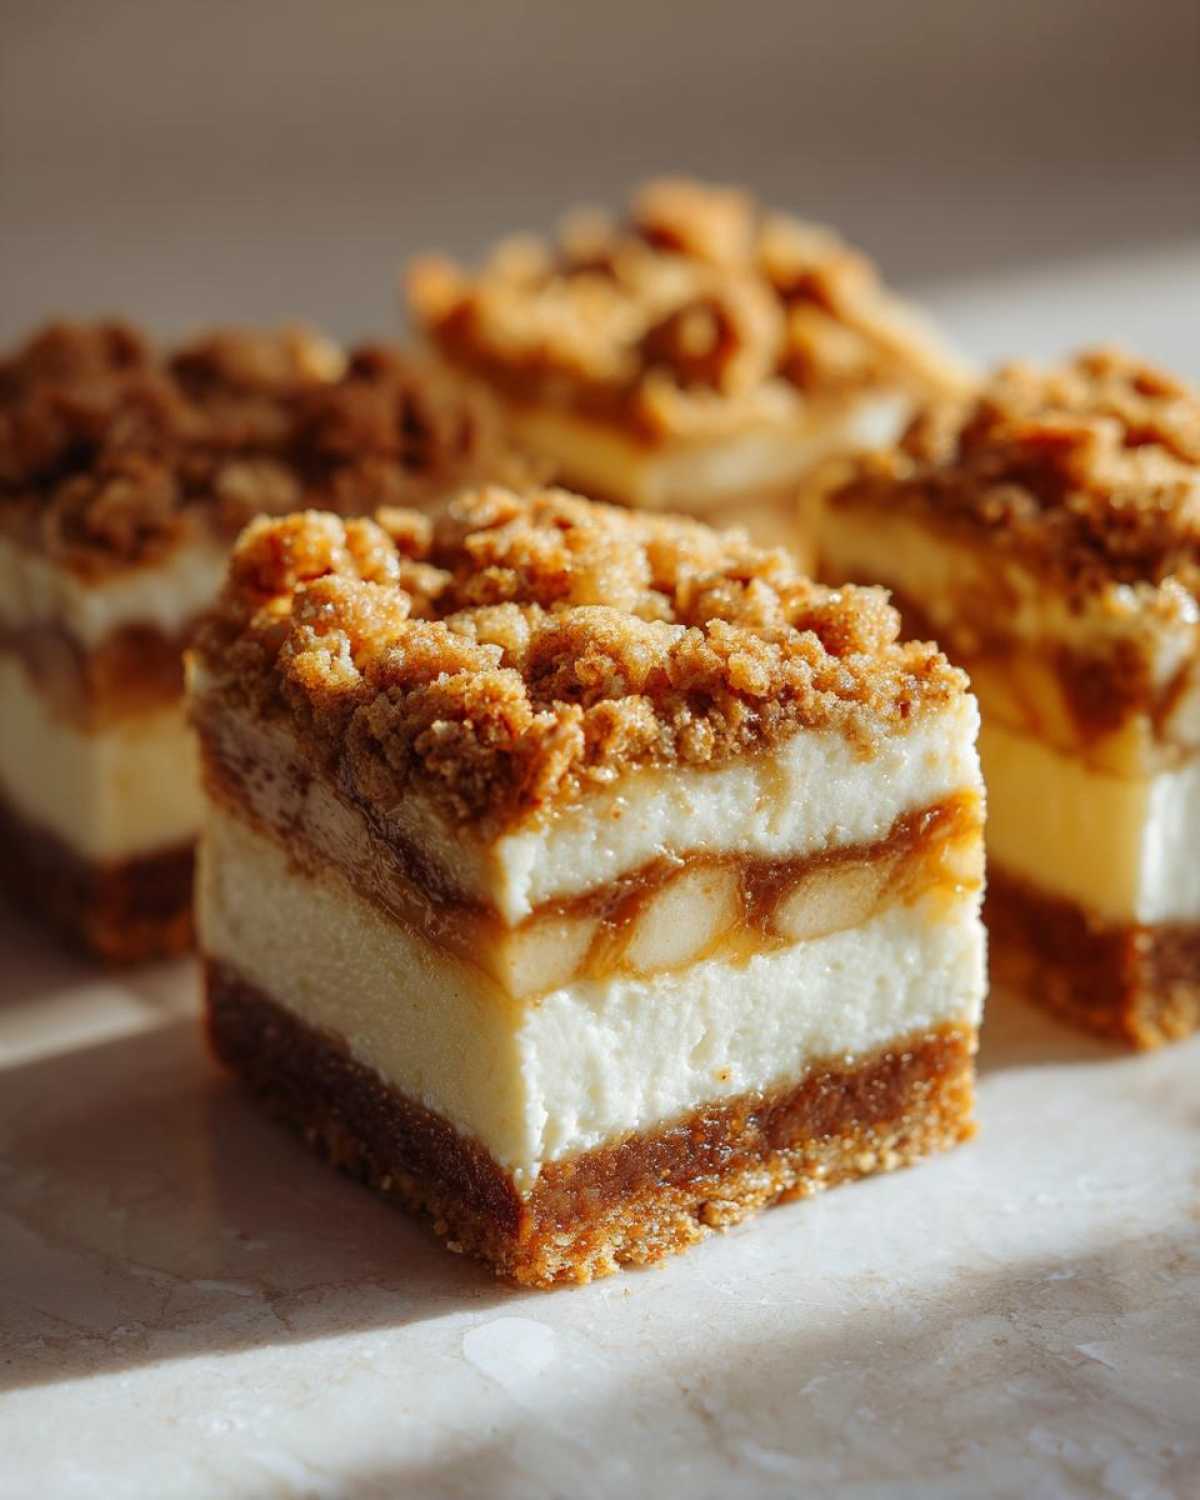
See all that sugar? That’s the blend of brown sugar, the apples, and the cheesecake goodness all working together! Remember, these are estimates, especially because how much apple cooks down can vary. But it gives you a rough idea of what you’re diving into when you grab one of these incredible Layered Apple Cheesecake Squares!
Share Your Best Apple Cheesecake Bars Creations
I really hope you jump into the kitchen and try these! When you do make these apple cheesecake bars, I desperately want to know how they turned out for you. Did you stick to the cinnamon, or did you drizzle that caramel? Please leave a rating right here on the recipe page—it helps other bakers know what to expect when they try my favorite fall dessert!
And honestly, snapping a picture is mandatory! Tag me on social media when you share your beautiful squares. Seeing your homemade apple dessert bars makes my entire day. There’s nothing better than knowing this recipe is making kitchens smell like apple pie and that creamy goodness all over the place!
Tell me everything in the comments below about your crumb texture and how long you managed to wait before slicing into them—because I know some of you cheat and eat them warm!
Print
Apple Crumble Cheesecake Bars
- Total Time: 75 min
- Yield: 16 servings
- Diet: Vegetarian
Description
Make these layered dessert bars featuring a buttery crust, a creamy cheesecake filling, spiced apple topping, and a crunchy streusel.
Ingredients
- 1 1/2 cups all-purpose flour
- 1/2 cup granulated sugar
- 1/4 teaspoon salt
- 1/2 cup cold unsalted butter, cubed
- 8 ounces cream cheese, softened
- 1/2 cup granulated sugar
- 1 large egg
- 1 teaspoon vanilla extract
- 2 medium apples (like Granny Smith), peeled, cored, and diced
- 1/4 cup brown sugar
- 1 teaspoon ground cinnamon
- 1 tablespoon lemon juice
- 1/4 cup all-purpose flour (for topping)
- 1/4 cup rolled oats
- 1/4 cup brown sugar (for topping)
- 2 tablespoons cold unsalted butter (for topping)
Instructions
- Preheat your oven to 350 degrees F. Line a 9×9 inch baking pan with parchment paper, leaving an overhang for easy removal.
- Prepare the crust: In a medium bowl, mix 1 1/2 cups flour, 1/2 cup sugar, and salt. Cut in the 1/2 cup cold butter until the mixture resembles coarse crumbs. Press this mixture firmly into the bottom of the prepared pan. Bake for 12 minutes.
- Prepare the apple layer: In a small saucepan, combine the diced apples, 1/4 cup brown sugar, cinnamon, and lemon juice. Cook over medium heat for 5 to 7 minutes until the apples soften slightly. Set aside.
- Prepare the cheesecake layer: In a separate bowl, beat the softened cream cheese and 1/2 cup sugar until smooth. Beat in the egg and vanilla extract until just combined.
- Spread the cheesecake mixture evenly over the warm, pre-baked crust. Spoon the cooked apple mixture over the cheesecake layer.
- Prepare the crumble topping: In a small bowl, combine the remaining 1/4 cup flour, oats, 1/4 cup brown sugar, and 2 tablespoons cold butter. Use your fingers to mix until crumbly. Sprinkle this topping evenly over the apples.
- Bake for 35 to 40 minutes, or until the edges are set and the topping is golden brown.
- Cool completely on a wire rack before lifting the bars out of the pan using the parchment overhang. Chill for at least 2 hours before slicing into squares.
Notes
- For a Caramel Apple variation, drizzle 1/2 cup of prepared caramel sauce over the apple layer before adding the streusel topping.
- Use firm, tart apples like Granny Smith for the best texture and flavor contrast.
- Do not overmix the cheesecake batter once the egg is added.
- Prep Time: 25 min
- Cook Time: 50 min
- Category: Dessert
- Method: Baking
- Cuisine: American
Nutrition
- Serving Size: 1 bar
- Calories: 310
- Sugar: 22
- Sodium: 150
- Fat: 18
- Saturated Fat: 11
- Unsaturated Fat: 7
- Trans Fat: 0
- Carbohydrates: 34
- Fiber: 1
- Protein: 4
- Cholesterol: 65