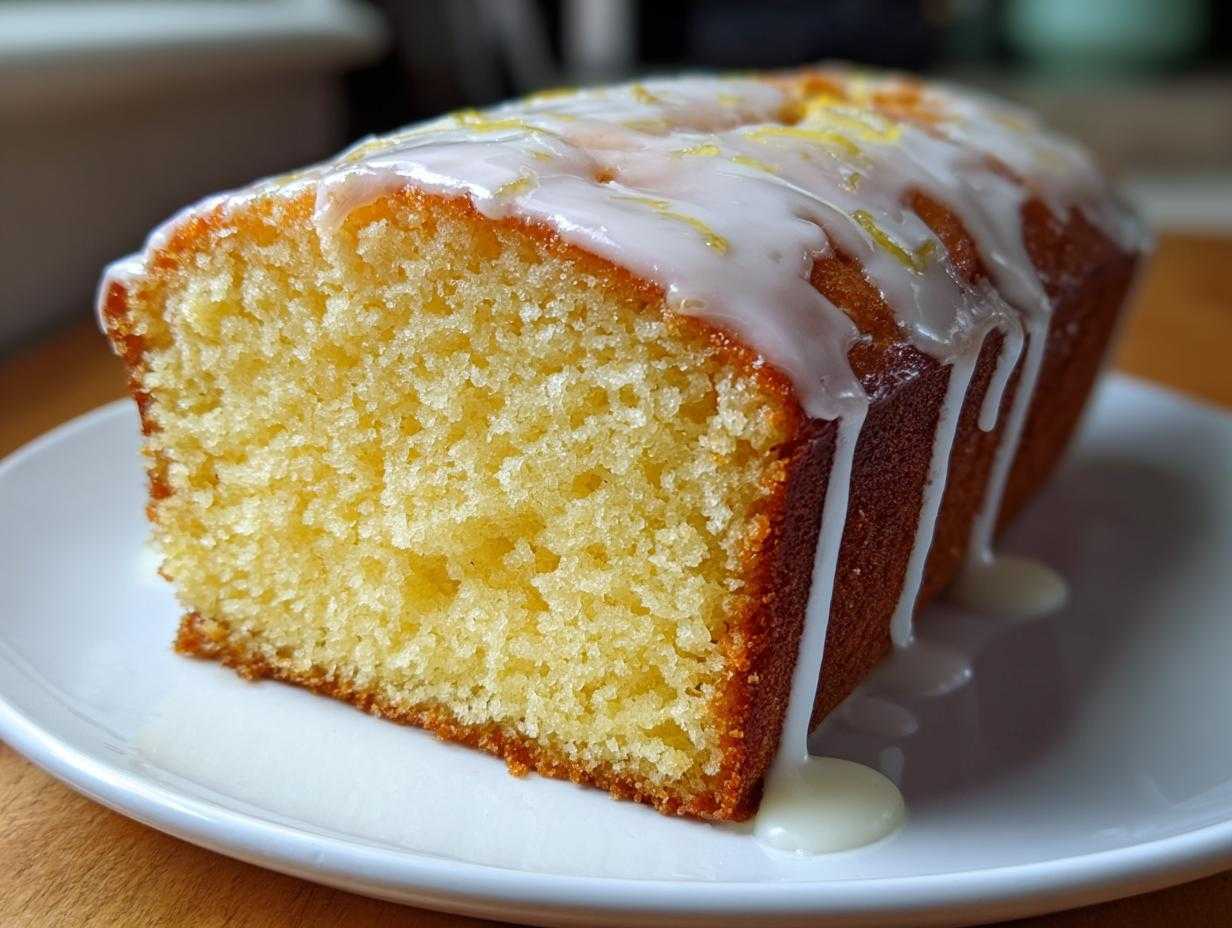
Oh my gosh, are you ready for this? I swear, sometimes I just get that craving—you know, for that perfectly tangy, incredibly moist slice of lemon cake you get at those fancy bakeries? Well, stop spending $5 a slice! I finally cracked the code on my ultimate Bakery-Style Moist Lemon Loaf with Tangy Lemon Glaze. This isn’t just any lemon loaf; this is the one that tastes exactly like that famous coffee shop version you love, only better because you made it! It took me three whole batches just to nail that spot-on moisture level without making it gummy. Trust me, it’s worth every second, and you’re getting the recipe right now!

Why This Bakery-Style Moist Lemon Loaf Recipe Works
You might have tried a few lemon recipes that turned out dry or fell flat, right? Not this one! This recipe delivers on everything you want: unbelievable moisture, that satisfying crumb, and a flavor that just screams fresh citrus. Forget those pale imitations; this is the real deal.
- It’s unbelievably moist, so it stays fresh for days.
- The flavor hits you hard—it’s seriously zesty!
- That topping isn’t just sweet; it’s a tangy glaze that sinks right in.
Achieving the Perfect Tender Lemon Bread Texture
The texture is everything when we talk about proper tender lemon bread. We start by creaming the butter and sugar until it’s super pale and fluffy. That step whips air right into the batter, which is key! Once you start adding the flour, you have to stop mixing the second it disappears. Seriously, put the mixer on the lowest speed or switch to a spatula. Overmixing builds gluten, and gluten means tough cake, and we want tender, delicate lemon bread, not chewy bread, got it?
The Secret to an Intense Zesty Lemon Loaf Flavor
If you want a truly intense lemon flavor in your zesty lemon loaf, you have to use two things: zest AND juice. I make sure to grate two whole lemons before I even start measuring anything else. I try to rub that zest right into the sugar when I cream it with the butter. That action releases those amazing oils right into the fat, making the flavor bloom! Using fresh juice later is non-negotiable, too. That combination of zest flavor mixed throughout the batter and the juice powering the moistness and the glaze is what makes this loaf sing.
Essential Ingredients for Your Lemon Loaf with Glaze
Okay, let’s get down to the nitty-gritty. A great lemon loaf with glaze only works if you start with the right building blocks. I’ve listed out exactly what you need below. Don’t try to cheat on the fresh ingredients here—especially that lemon zest! If you want that bakery magic, you need to follow the specifics. I actually keep my favorite lemon pound cake recipe handy for reference, but these ingredients are all you need for this simpler loaf version.
For the Moist Lemon Loaf Batter
Make sure your butter is actually soft—not melted! And please, only use large eggs; the science behind baking counts on that size for structure.
- 1 3/4 cups all-purpose flour
- 1 1/2 teaspoons baking powder
- 1/2 teaspoon salt
- 1 cup granulated sugar
- 2 large eggs, one at a time
- 1/2 cup unsalted butter, softened just right
- 1/2 cup whole milk
- 1/4 cup fresh lemon juice (that’s important!)
- 2 tablespoons fresh lemon zest (from about 2 lemons—don’t skimp!)
- 1 teaspoon vanilla extract
For the Tangy Lemon Glaze Recipe
This glaze is the star, honestly. We need that thick, bright white coating that hardens just a little but still melts on your tongue. Achieving that perfect thickness means watching your powdered sugar to juice ratio very closely!
- 1 1/2 cups powdered sugar (sifted if it’s clumpy)
- 3 tablespoons fresh lemon juice (yes, more fresh lemon!)
Step-by-Step Instructions for the Easy Lemon Loaf Recipe
This is where the magic happens, but don’t rush it! Since this is an easy lemon loaf recipe, the steps are straightforward, but the timing matters. The whole process, not counting the bake time, is super quick—you’ll have this batter mixed up in about fifteen minutes. Just follow my steps carefully, and you’ll have a beautiful citrus loaf recipe that rivals any bakery display. Remember, getting your oven hot while you measure is a great way to save a few minutes!
- First things first: Crank that oven up to 350°F (175°C). Get your 9×5 inch loaf pan ready—grease it well and then dust it lightly with flour. This guarantees an easy release later.
- In a medium bowl, whisk together your dry stuff: the flour, baking powder, and salt. Set that aside so it’s ready to go when we need it.
- Now for the big cream step! In your large bowl, beat the softened butter and granulated sugar together until it looks pale yellow and super fluffy. This usually takes a few minutes with an electric mixer, but it builds that structure we love.
- Add those two large eggs, one at a time, making sure they are fully incorporated before adding the second one.
- In a little separate bowl, quickly mix your wet flavor components: the milk, the 1/4 cup of lemon juice, that precious lemon zest, and the vanilla.
- Time to alternate! Add about a third of the dry ingredients to your butter mix, mix it gently, then pour in half of your lemon milk mixture. Repeat this—dry, wet, dry—always starting and ending with the dry ingredients.
- Pour that beautiful batter right into your prepared pan. It should fill it about two-thirds full.
- Bake it for 50 to 60 minutes. You know it’s done when a long wooden skewer pulled right out of the middle comes out clean—no wet batter clinging to it!
- Crucial step for cooling: Let the loaf chill out in the pan for a solid 15 minutes. If you try to pull it out sooner, it might just crumble on you. Then, flip it out onto a wire rack to cool down completely. You can find some fun tips on making easy loaf desserts like this one on my desserts page, too!
- While it cools, whisk up your glaze ingredients: powdered sugar and about 3 tablespoons of lemon juice. Keep whisking until it’s smooth but thick enough to leave a trail when you lift your whisk. If it’s too runny, add a teeny bit more sugar.
- Once the loaf is totally cool—and I mean *totally* cool, or the glaze will just melt into a puddle—drizzle that tangy goodness all over the top and let it set before slicing!

Mixing the Batter for a Tender Lemon Bread
Listen, I can’t stress this enough: when you alternate the dry and wet ingredients, you are controlling the texture of your tender lemon bread. The absolute biggest sin in baking this loaf is overmixing once the flour goes in. When you mix flour with liquid, gluten starts to form, and gluten means chewy. We want that cake to practically dissolve in your mouth! Add the flour mixture slowly, just mix until those white streaks disappear, and then stop immediately. If you see a tiny bit of flour here or there, don’t panic! It’s better than creating a dense brick.
Baking and Cooling Your Lemon Loaf
Make sure that oven is truly at 350°F before that loaf goes in, because temperature consistency is key for an even bake. For a standard 9×5 inch pan, plan on 50 to 60 minutes. Use that skewer test—it’s more reliable than just watching the timer. Once it passes, don’t just yank it out! Let the lemon loaf sit right there in the hot pan for 15 minutes. This lets the structure firm up enough that when you invert it onto the cooling rack, it stays beautifully intact. Then it needs to reach room temperature before we even *think* about glazing.
Applying the Perfect Lemon Loaf with Glaze
This is the make-or-break moment for that bakery look! If you try to glaze this while the loaf is warm, the sugar just melts right into the crumb, and you end up with a sticky, see-through top instead of that thick, opaque, tangy layer we love. Wait until the loaf is completely cool—it needs to feel cool to the touch all over. When you mix the glaze, start with less lemon juice than you think you need. You want that thick, slow pour. If it sets up too fast and becomes difficult to pour over your beautiful, fully cooled lemon loaf with glaze, add just a few extra drops of juice until you get that perfect, dreamy drizzling consistency.

Tips for Success When Making This Lemon Loaf
Even with a great recipe, sometimes little things can trip you up. Think of these as my shortcuts so you get bakery perfection on your first try! I’ve learned a couple of tricks over the years that really set this lemon loaf apart. If you check out other recipes, like my yummy lemon blueberry loaf cake recipe, you’ll see these core principles pop up again and again.
My favorite pro-tip, which I totally snagged from my baker friend, is what you do immediately after it comes out of the oven. Grab a wooden skewer—no need for a fancy thermometer here—and poke holes all over the top surface of that still-warm loaf. These little channels allow the glaze to soak deep inside instead of just sitting on top. That means every single bite gets that extra punch of tangy sweetness!
Also, remember the note about using fresh lemons? Please don’t use the bottled stuff for the zest or juice if you can help it. That bright, almost sharp flavor you taste in bakery goods comes from those fresh oils. And finally, about storage: because the glaze seals in some moisture, this loaf keeps great uncovered at room temperature for a few days. Don’t even bother with the fridge!
Ingredient Notes and Substitutions for Your Citrus Loaf Recipe
I get so many questions about swapping ingredients, and honestly, for this citrus loaf recipe, some things you just can’t mess with if you want that perfect texture. My biggest warning sign is always when someone asks, “Can I just use bottled lemon juice?” Please, please don’t! Bottled juice is fine for emergencies, I guess, but it just doesn’t have the vibrant “zing” that the fresh stuff brings, and that’s what makes this recipe!
When it comes to the fat, we’re using softened butter here for a reason—it creams up perfectly with the sugar to create those tiny air pockets we talked about earlier, giving us that melt-in-your-mouth crumb. If you absolutely must substitute, you could technically use a high-quality vegetable oil, but I’m telling you right now, the texture won’t be the same. You’ll lose some of that wonderful, tender structure that butter provides. Stick with the butter for the best homemade lemon loaf!
The sugar measurement is also precise. We use granulated sugar in the batter for structure and powdered sugar for the glaze. Brown sugar just doesn’t offer that clean, bright lemon taste we’re aiming for in this specific loaf. You can check out some other flavor profiles on my general citrus loaf recipe page, but for this specific copycat style, stick to the sugar called for!
Serving Suggestions for Your Homemade Lemon Loaf
One of the best things about a great homemade lemon loaf is how versatile it is! Honestly, I don’t save this just for fancy occasions. It works for totally different times of the day, which is why it’s such a great recipe to keep on hand. You have to figure out how you want to enjoy your slice!
For a super easy breakfast or brunch treat, I love serving it just slightly warmed up. Pop a slice in the microwave for about 15 seconds—just enough to make the butter in the crumb soft again and slightly melt that sweet glaze. It’s heavenly alongside a hot cup of coffee. If you’re serving it for an afternoon tea, it’s perfect just as it is, room temperature, so the glaze is fully set and crackly.
If you are taking this loaf to something fancier, like a spring picnic or a dessert spread, you can chill it first. Serving the lemon loaf cake slightly chilled actually makes the bread part feel a little denser, almost like a lemon pound cake, and the glaze feels firmer and crisper against your tongue. It’s totally different, but delicious! For an extra touch, especially if you’re having it for dessert, I sometimes serve it with a tiny dollop of fresh, lightly sweetened whipped cream on the side. It’s such a simple, bright dessert. If you need more inspiration for quick sweet things, check out the fun ideas on my desserts page!

Storage & Reheating Instructions for the Lemon Loaf Cake
This is one of the things I love most about this lemon loaf cake—it’s just so forgiving! Unlike some delicate cakes, this one actually seems to get *better* the second day once the glaze has fully set against the crumb. You absolutely do not need to refrigerate this loaf. In fact, please don’t!
The fridge temperature tends to dry out the beautiful crumb we worked so hard to achieve. My notes specifically say that the high sugar content of the glaze acts as a natural seal. So, just wrap the loaf tightly in plastic wrap or pop it into an airtight container. Store it right on your countertop at a cool room temperature. If you wrap it up well, it stays wonderfully moist and delicious for up to three days. Seriously, three days!
Now, if you’re grabbing a slice on day three and you want that ultra-soft texture back, I have a little trick for reheating. It’s super easy! Just take a single slice and pop it in the microwave for about 10 to 15 seconds. That short burst warms the bread up just enough to soften the inside slightly without melting all the glaze off into a puddle. It makes it taste almost freshly baked again. It’s the perfect way to enjoy that last piece of your zesty treat!
Frequently Asked Questions About This Zesty Lemon Loaf
I know you’re going to make this zesty lemon loaf, but you probably have a few lingering questions! Baking is all about confidence, so I want to clear up any confusion right now. Having the right answers means you get that perfect slice every time, whether you’re aiming for an easy loaf desserts vibe or something fancy.
Is this truly a Starbucks lemon loaf copycat?
That’s what everyone asks! Yes, my goal in developing this recipe was to hit that exact flavor profile. We use the precise amount of zest and that iconic tangy glaze that soaks into the top crust. If you are searching for a spectacular Starbucks lemon loaf copycat, this is the recipe that gets the closest, especially because we focus so much on getting that amazing moisture level you see in their bakery display. You can even check out some deeper details on replicating that look over here!
Can I make this a quick lemon loaf by reducing the bake time?
While the prep time for this lemon loaf is super fast—less than 15 minutes, which is amazing—you can’t really rush the bake time! It needs that 50 to 60 minutes at 350°F to cook all the way through without the outside burning. If you pull it out early just to save time, you end up with a gooey, undercooked center, and nobody wants that sad, wet spot in their moist lemon bread recipe. Trust the skewer test and let it bake!
What’s the trick to getting the glaze so thick and white?
It’s all about the ratio, my friend, and using powdered sugar, not granulated sugar, for the glaze. You mix the powdered sugar with just enough fresh lemon juice to make a very thick paste. If it’s too thin when you pour it, it just runs right off. You want it thick enough to glob slightly on the stirring spoon before dropping off. Remember: always wait until the bread is completely cool so the heat doesn’t melt it into nothingness!
Can I adapt this recipe for a Bundt pan instead of a loaf pan?
You totally can! This recipe works beautifully as a lemon pound cake recipe in a Bundt pan. Since the loaf pan is deep, a Bundt is also deep, so your baking time might stay pretty similar, maybe leaning toward that 60-minute mark. Just make sure you grease and flour that Bundt pan like your life depends on it! Sticky Bundts are the worst heartbreak, I promise you. If you use a shallow pan, you’ll need to bake it way less time, so stick to the heavy-duty pans for this specific batter.
Estimated Nutritional Data for One Slice of Lemon Loaf
Alright, just because this lemon loaf tastes like pure joy doesn’t mean we don’t look at the reality of what we’re eating, right? When you’re enjoying a slice of this deliciousness, perhaps with your morning coffee or as a mid-day treat, here’s the approximate breakdown based on the ingredients used in the recipe. Remember, since we’re using fresh butter and real sugar, it’s a treat, but boy, is it worth it!
Keep in mind these numbers are estimates for one slice, assuming the full recipe yields 10 servings. If you cut larger pieces—and let’s be honest, sometimes I do for myself—the numbers for fat and sugar will definitely go up!
- Serving Size: 1 slice
- Calories: 320
- Sugar: 38g (That glaze really adds up, but wow, what flavor!)
- Fat: 15g
- Saturated Fat: 9g
- Unsaturated Fat: 6g
- Trans Fat: 0.3g
- Carbohydrates: 45g
- Protein: 4g
I always make sure to note the slightly higher sugar content because we are using a thick glaze, which is essential for that bakery-style experience. We’re also getting a decent amount of fat from the butter, which is what creates that incredible tender lemon bread crumb we’re after. Enjoy this guilt-free—it’s homemade and made with love!
Print
Bakery-Style Moist Lemon Loaf with Tangy Lemon Glaze
- Total Time: 70 min
- Yield: 1 loaf (about 10 servings)
- Diet: Vegetarian
Description
This recipe yields a moist, tender lemon loaf bursting with fresh citrus flavor, topped with a sweet and tangy glaze that soaks into the cake.
Ingredients
- 1 3/4 cups all-purpose flour
- 1 1/2 teaspoons baking powder
- 1/2 teaspoon salt
- 1 cup granulated sugar
- 2 large eggs
- 1/2 cup unsalted butter, softened
- 1/2 cup whole milk
- 1/4 cup fresh lemon juice
- 2 tablespoons lemon zest (from about 2 lemons)
- 1 teaspoon vanilla extract
- For the Glaze: 1 1/2 cups powdered sugar
- For the Glaze: 3 tablespoons fresh lemon juice
Instructions
- Preheat your oven to 350°F (175°C). Grease and flour a standard 9×5 inch loaf pan.
- In a medium bowl, whisk together the flour, baking powder, and salt. Set aside.
- In a large bowl, cream together the granulated sugar and softened butter until light and fluffy.
- Beat in the eggs one at a time, mixing well after each addition.
- In a small bowl, mix the milk, 1/4 cup lemon juice, lemon zest, and vanilla extract.
- Gradually add the dry ingredients to the wet ingredients, alternating with the milk mixture, beginning and ending with the dry ingredients. Mix until just combined; do not overmix.
- Pour the batter into the prepared loaf pan.
- Bake for 50 to 60 minutes, or until a wooden skewer inserted into the center comes out clean.
- Let the loaf cool in the pan for 15 minutes before inverting it onto a wire rack to cool completely.
- While the loaf cools, prepare the glaze: Whisk together the powdered sugar and 3 tablespoons of lemon juice until smooth. Add more powdered sugar or juice as needed to reach a thick but pourable consistency.
- Once the loaf is completely cool, pour the glaze evenly over the top, allowing it to drip down the sides. Let the glaze set before slicing and serving.
Notes
- For extra moisture, you can poke holes over the top of the warm loaf with a skewer before applying the glaze.
- Use fresh lemons for the best zest and juice flavor.
- This loaf keeps well covered at room temperature for up to three days.
- Prep Time: 15 min
- Cook Time: 55 min
- Category: Dessert
- Method: Baking
- Cuisine: American
Nutrition
- Serving Size: 1 slice
- Calories: 320
- Sugar: 38g
- Sodium: 210mg
- Fat: 15g
- Saturated Fat: 9g
- Unsaturated Fat: 6g
- Trans Fat: 0.3g
- Carbohydrates: 45g
- Fiber: 1g
- Protein: 4g
- Cholesterol: 55mg