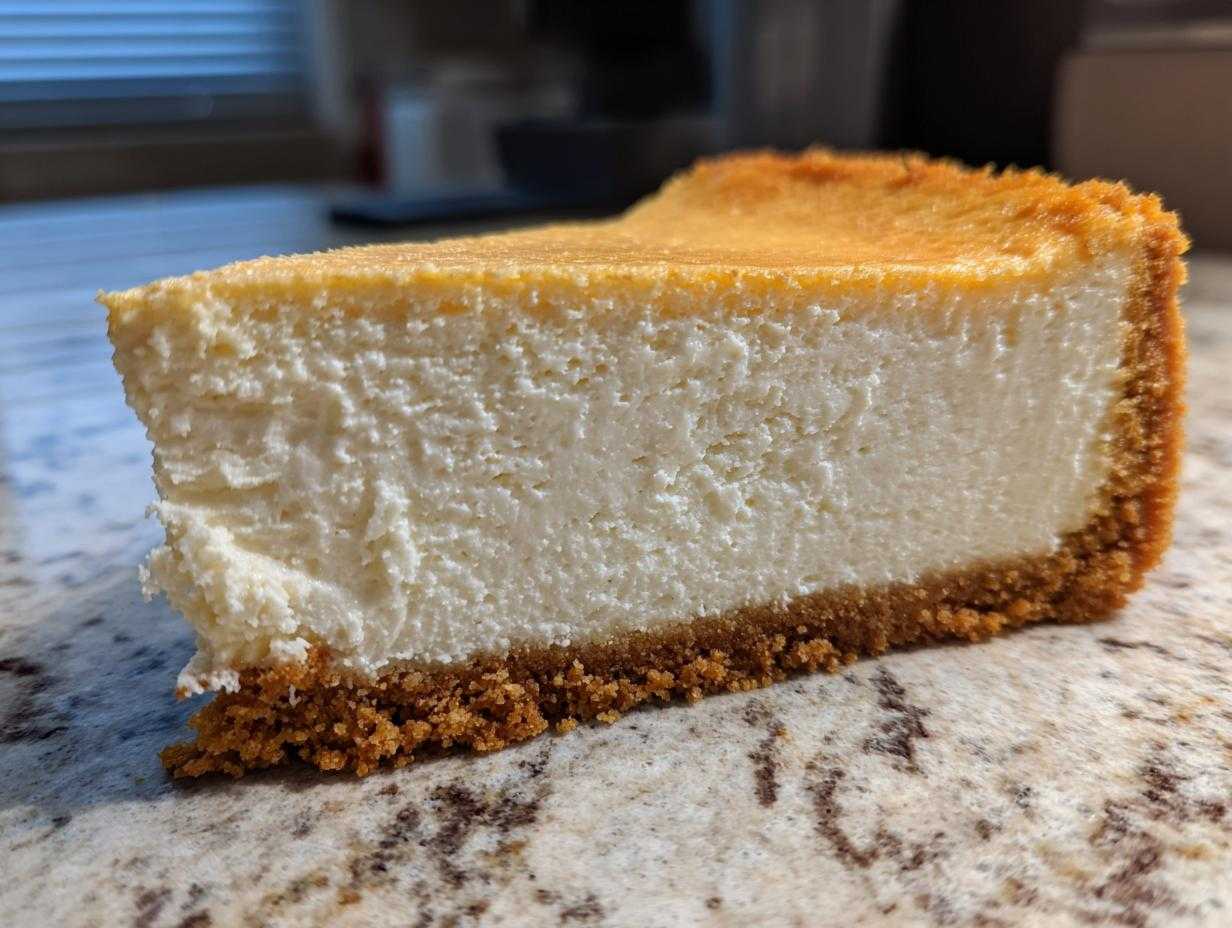
Oh my goodness, let me tell you something: I have had *disasters* in the kitchen involving cheesecake. Seriously, sunken puddles shaped like sad Frisbees? Yep, been there. But I promised myself I’d conquer it, and friends, I finally have unlocked the code for the Best Cheesecake Recipe out there! This isn’t just any dessert; this is my go-to, can’t-mess-it-up, ultra-creamy Classic New York Style cheesecake. Forget that anxiety about cracking; this simpler method completely skips the tricky water bath but still delivers that thick, rich, decadent slice you dream about. If you’ve been searching for a foolproof cheesecake recipe, your hunt ends right here. This one sets up beautifully every single time!
Why This Classic Cheesecake Recipe Guarantees Success (The Perfect Texture)
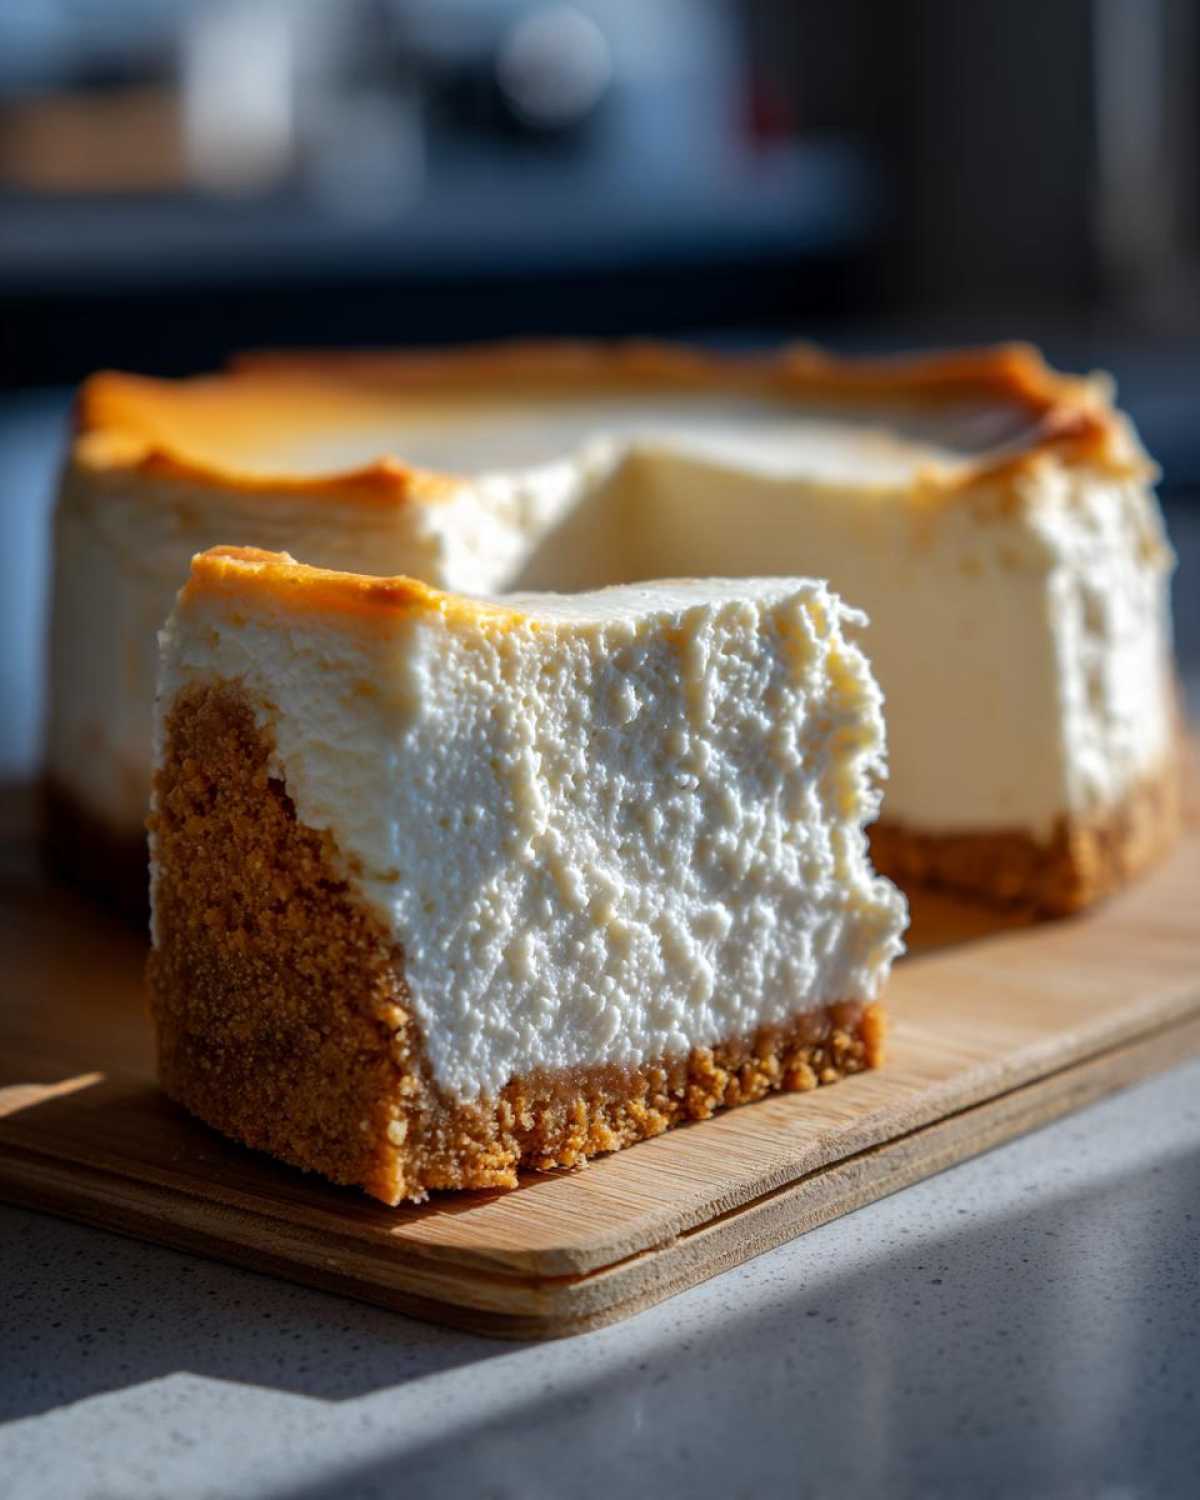
Listen, the difference between an okay cheesecake and a *wow* cheesecake is all about managing texture. This **cheesecake recipe** is designed to give you that signature, dense, unbelievably creamy experience you expect from a true New York style dessert. We are tackling that terrifying crack head-on, and honestly, we do it mostly by cheating the system—we slow the cooling process down! That’s the secret sauce for achieving the Perfect Cheesecake Texture without needing to hassle with a messy water bath. If you follow just these two points for this Creamy Cheesecake Tutorial, you’re already miles ahead of most bakers. It’s all about what happens *before* the oven and what happens *after*.
The Secret to a Creamy Cheesecake Recipe: Room Temperature Ingredients
This is non-negotiable, trust me! If your cream cheese is cold, it will NOT blend smoothly. You end up with little lumps, and lumps ruin the whole vibe. I always pull my cream cheese, eggs, and sour cream out at least two hours before I plan to start mixing. When everything is the same happy room temperature, it emulsifies perfectly into a velvety dream batter. No streaks, no clumps, just pure smoothness!
Avoiding Air: The Key to a No Crack Cheesecake Recipe
Here’s where people go wrong with a No Crack Cheesecake Recipe: they beat the batter like they’re whipping up meringue! When you beat in the eggs, you’re introducing air. Too much air causes the cheesecake to puff up really high while baking, and when it cools rapidly, it collapses and *crack*! So, once the eggs go in, I mix on the absolute lowest setting, just until I can’t see streaks of yellow anymore. We want dense, not fluffy, in this dessert.
Ingredients for Your Ultimate New York Cheesecake Recipe
Gathering your ingredients is half the battle won! For this gorgeous **cheesecake recipe**, we really only have two separate parts: the crust foundation and the rich, dreamy filling. You need accurate measurements here because baking from scratch demands respect, but don’t stress! Having everything ready to go makes pulling this Classic Cheesecake Recipe together so fast. Remember that important rule about room temperature ingredients we just talked about? Make sure you grab your pan—a 9-inch springform is what we’ll be using today. If you’re looking for other fun, simpler versions, you can always check out my no-bake Oreo options, but for this classic style, organization is everything!
Graham Cracker Crust Recipe Components
For the base that holds everything up, you’ll need:
- 1 1/2 cups graham cracker crumbs (I always crush mine fresh, it just smells better!)
- 1/4 cup granulated sugar (just a touch for the crust)
- 6 tablespoons unsalted butter, melted (don’t try to substitute this fat!)
Rich and Creamy Filling for Your Cheesecake Recipe
This mixture is what makes it amazing. Don’t skimp on the quality here—it’s what earns this the title of Rich and Creamy Dessert:
- 3 (8 ounce) packages full-fat cream cheese, softened to room temperature (I mean it—softened!)
- 1 1/2 cups granulated sugar (this is for the main filling)
- 1/4 cup all-purpose flour (this helps stabilization!)
- 1 teaspoon vanilla extract
- 1/4 teaspoon salt
- 4 large eggs, room temperature (remember our air warning?)
- 1/2 cup sour cream, room temperature
How to Prepare the Best Cheesecake Recipe Step-by-Step
Okay, deep breaths! This is where we turn all those beautiful, room-temperature ingredients into magic. I know you’re eager to get this stunning **cheesecake recipe** in the oven, but patience in these steps is what separates a good bake from a truly incredible one. We are going easy on the oven heat and focusing on a slow cool-down to make sure that top stays looking like glass. Don’t worry about the water bath—we’ve got other tricks up our sleeve for that perfect finish!
Step 1: Preparing the Graham Cracker Crust for this Cheesecake Recipe
First things first, let’s get that base ready! Preheat your oven right now to 325 degrees F. Before we mix anything, grab your 9-inch springform pan and wrap the outside bottom tightly in heavy-duty foil. Even though we aren’t submerging it in water, I still do this wrapping, just in case any butter melts out during the bake—it’s peace of mind! In a small bowl, mix your graham cracker crumbs, the quarter cup of crust sugar, and that melted butter until it looks like damp sand. Press this mixture firmly and evenly right into the bottom of that prepared pan. I use the bottom of a measuring cup to really pack it down tight. Then, pop it into the oven for just 10 minutes. This little pre-bake sets the crust so it doesn’t fall apart later. Pull it out and let it cool down a bit while you mix the filling.
Step 2: Mixing the Filling for a Smooth Cheesecake Recipe
Now for the star! Get that perfectly smooth cream cheese from earlier and beat it on medium speed until, I mean *truly* smooth—no grainy bits allowed! Scrape the bowl, please! Next, add your larger amount of sugar, the flour (that’s important for structure!), vanilla, and salt. Mix this on LOW speed until it’s *just* incorporated. Seriously, keep that mixer slow. The real danger time is when you add the eggs. Add them one at a time, and promise me you’ll only beat long enough for the previous egg to disappear into the batter before adding the next. Then, mix in that sour cream gently until everything looks uniform. You want it creamy? Don’t overmix! If you overbeat, you get air, and air means cracks later on.
Step 3: Baking and Slow Cooling for a No Water Bath Cheesecake Recipe
Pour all that lovely, smooth batter right over your slightly cooled crust. Give the pan a couple of gentle taps on the counter—just two or three—to coax any giant air pockets hiding in there out to the surface. Time to bake! Pop it into your 325°F oven for about 60 to 75 minutes. You’re looking for the edges to seem set, but you want the middle two inches to still have a little jiggle when you nudge the pan gently. It shouldn’t look like soup, but it should definitely wobble! This timing is crucial for a great No Water Bath Cheesecake Recipe. Once that time is up, turn the oven OFF completely, but *do not* pull the cheesecake out! Pry the oven door open about two inches—just enough to let a small crack of air escape—and just leave it in there like that for a full hour. This gradual cooling is the *magic* trick that keeps this amazing **cheesecake recipe** from shrinking!
Tips for Achieving the Ultimate Cheesecake Texture
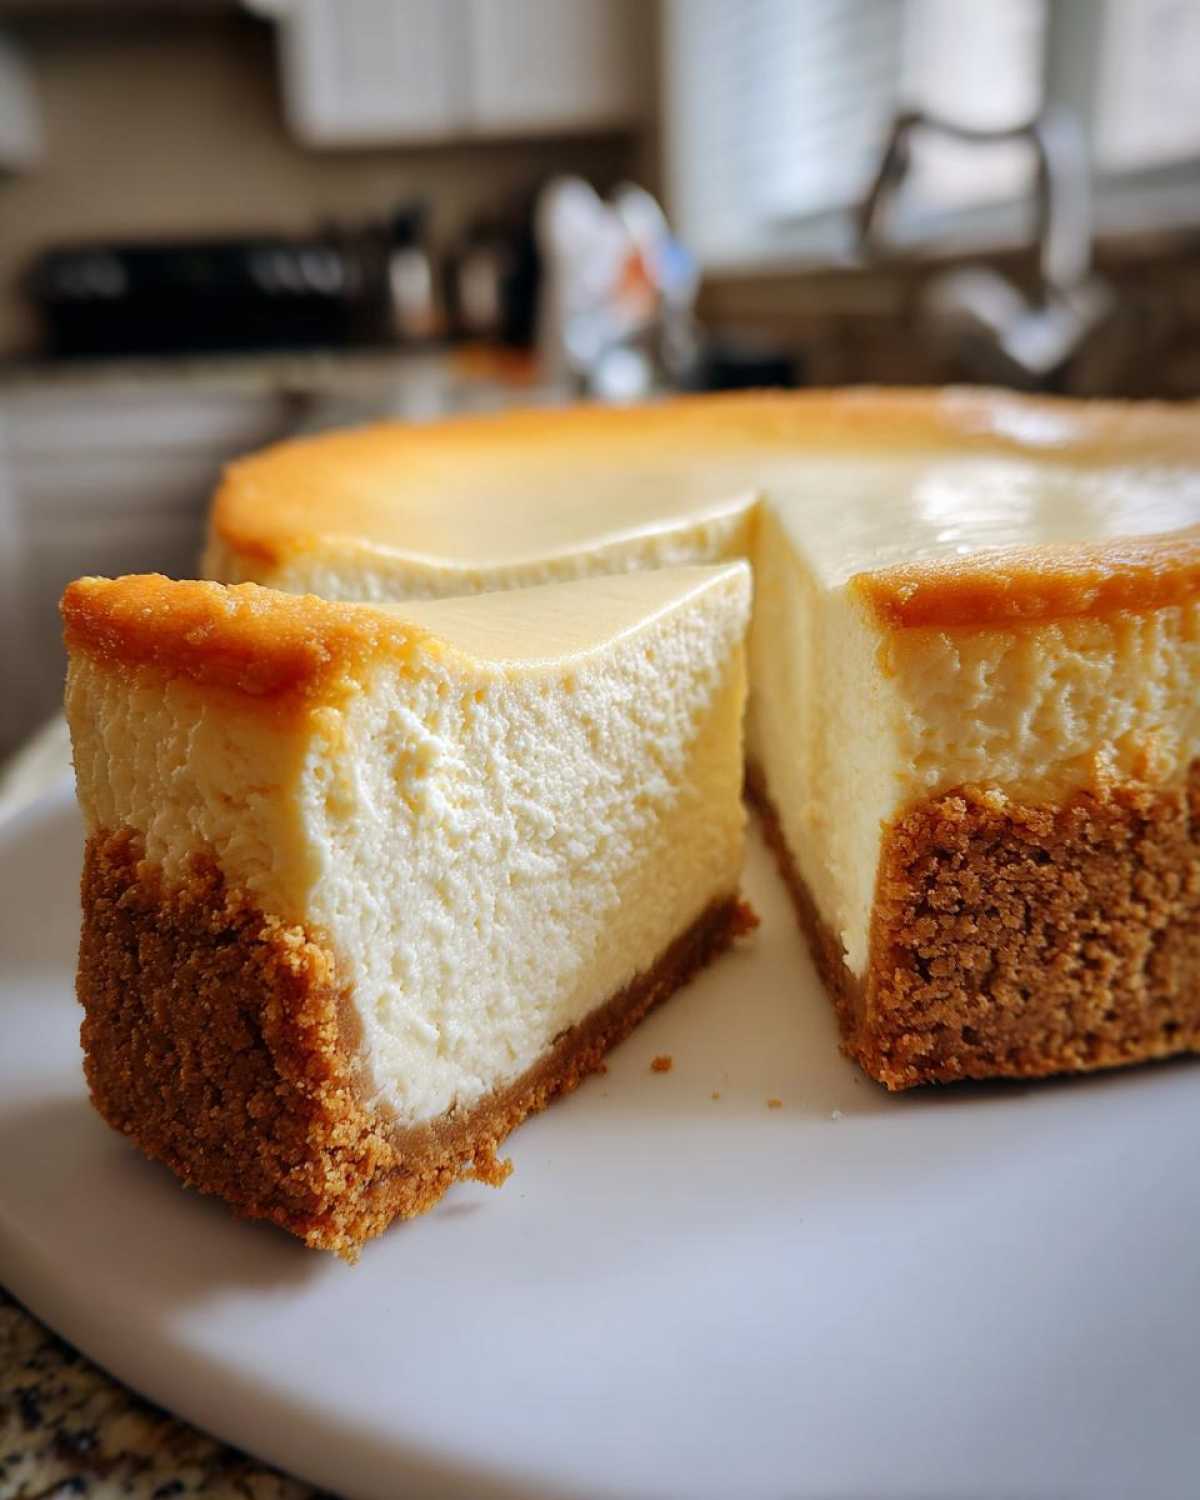
Now that we’ve conquered the baking and the slow cooling (which, honestly, feels like forever but it’s worth it!), let’s talk about the final secrets. These little pointers are what elevate your bake from great to, well, the kind of cheesecake you order out and pay way too much for! We’re getting into the real Ultimate Cheesecake Baking Secrets now. A perfect texture doesn’t just happen; you have to treat the batter right.
Ingredient Temperature Check for Your Cheesecake Recipe
I know I sound like a broken record around here, but you have to hear me one more time! If you skip prepping your ingredients beforehand, you’re inviting lumps into your beautiful structure. Cold ingredients fight each other in the bowl! When the cream cheese, eggs, and sour cream are all nice and uniformly room temperature, they blend seamlessly. This is the simplest step you take, but it makes the biggest difference in achieving that flawless, smooth look.
Chilling Time: Essential for Any Great Cheesecake Recipe
Resist the urge to slice into it right after it cools down! This cheesecake needs time to firm up properly. I always insist on at least six hours, but honestly, if you can wait overnight, that’s even better. That chill time allows the starches and fats to fully set, giving you that amazing, clean slice—the kind you see served in the fanciest places. Waiting is hard, especially when that rich, tangy smell fills your kitchen, but this step is crucial for that perfect Restaurant Style Cheesecake feel.
Variations on the Classic New York Cheesecake Recipe
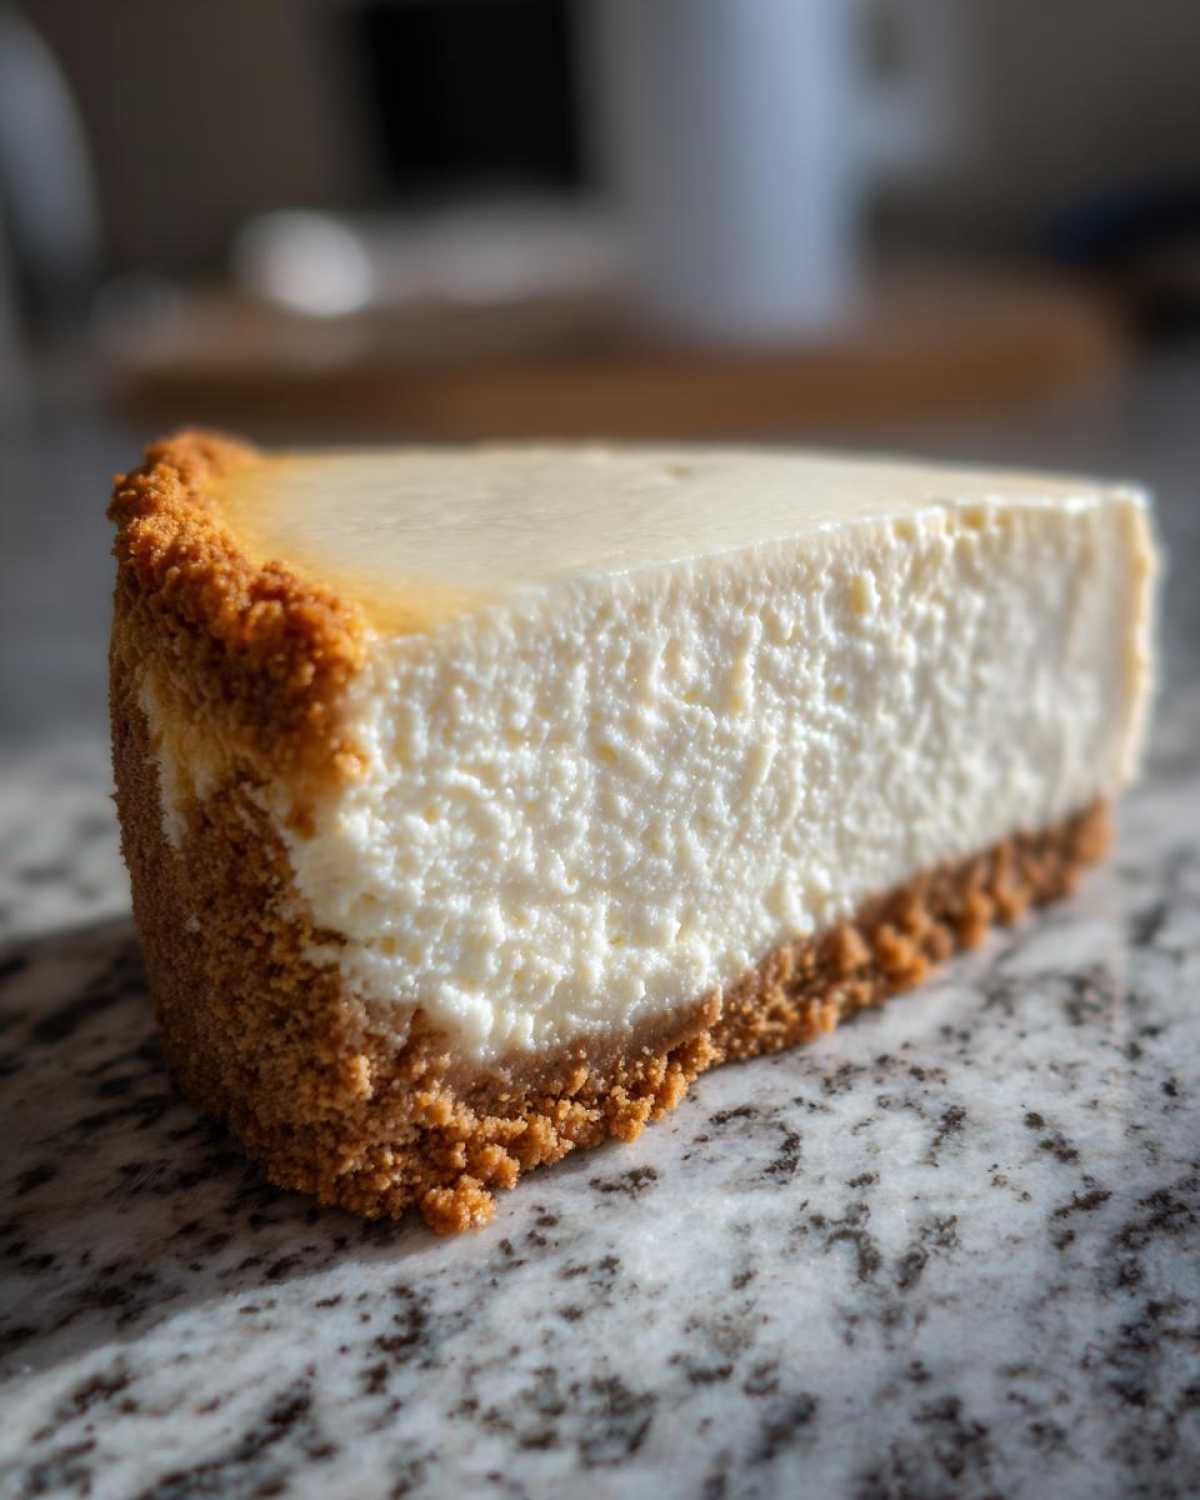
While this **cheesecake recipe** stands proudly on its own as a perfect, classic dessert, sometimes you just want to dress it up a little, right? I get it! It’s so sturdy and reliable that it takes on new flavors beautifully, making it perfect for holidays or just surviving a Tuesday night craving. You don’t have to change the filling much at all to get a completely different vibe.
Flavor Swirls for Your Cheesecake Recipe
If you want to add some visual flair or a little extra tang before you bake, this is the time! I love swirling in some good quality raspberry preserves right before it goes into the oven—it looks stunning against the pale filling. You could use good dark chocolate ganache, too, but make sure your batter is still soft enough to gently swirl it in with a butter knife. Don’t mix too deep; we want defined ribbons in this Holiday Cheesecake Ideas bake!
Topping Ideas for Your Cheesecake Recipe
The best part about leaving the top plain (no crust) is that you can dress it up after it’s fully chilled. My favorite is a simple topping of fresh, slightly sweetened strawberries or blueberries—nothing beats that fresh pop of fruit flavor against the rich cream cheese. If you want a slight tang back on top, mix a little sour cream with a tablespoon of sugar and spread that over the top once it’s cold. It cools things down beautifully and adds a wonderful texture contrast!
Check out my red velvet cheesecake brownies if you need an even bigger, bolder variation next time you bake!
Storage and Make Ahead Cheesecake Tips
This is honestly the most wonderful thing about this **cheesecake recipe**: it is truly a champion when it comes to making it ahead of time! I always plan to bake mine the day before any party or holiday gathering because, frankly, it tastes better the next day once those flavors have really melded together. Once your cheesecake is fully chilled—and I mean rock solid after that overnight rest—you need to cover it carefully. I wrap the top loosely with plastic wrap and then cover the whole chilled pan loosely with foil to protect it in the fridge. It keeps beautifully for nearly a week!
Because it’s such a fantastic Make Ahead Cheesecake option, you never have to stress on the day of your event. That slow chill time is just as important as that slow cool-down time!
Frequently Asked Questions About This Cheesecake Recipe
I always get so many questions after sharing this **cheesecake recipe** because people are nervous about getting that perfect, smooth result. That’s totally normal! It’s intimidating, but I promise that once you nail this version, you’ll be making it all the time. Here are the things I get asked most often when people are diving into their first **Classic Cheesecake Recipe** attempt.
Can I use a different crust for this cheesecake recipe?
Oh, absolutely! While the graham cracker is the gold standard for this New York style bake, you can totally switch it up. If you want a little warmth, try using gingersnap crumbs instead—they pair wonderfully with the tangy filling! You could even use crushed shortbread cookies. Just remember that if you change the thickness or the type of crumb, you might need to slightly adjust that initial 10-minute pre-bake time. But for the most authentic result, I always stick to the classic Graham Cracker Crust Recipe we detailed above!
What is the best way to slice a perfect cheesecake recipe?
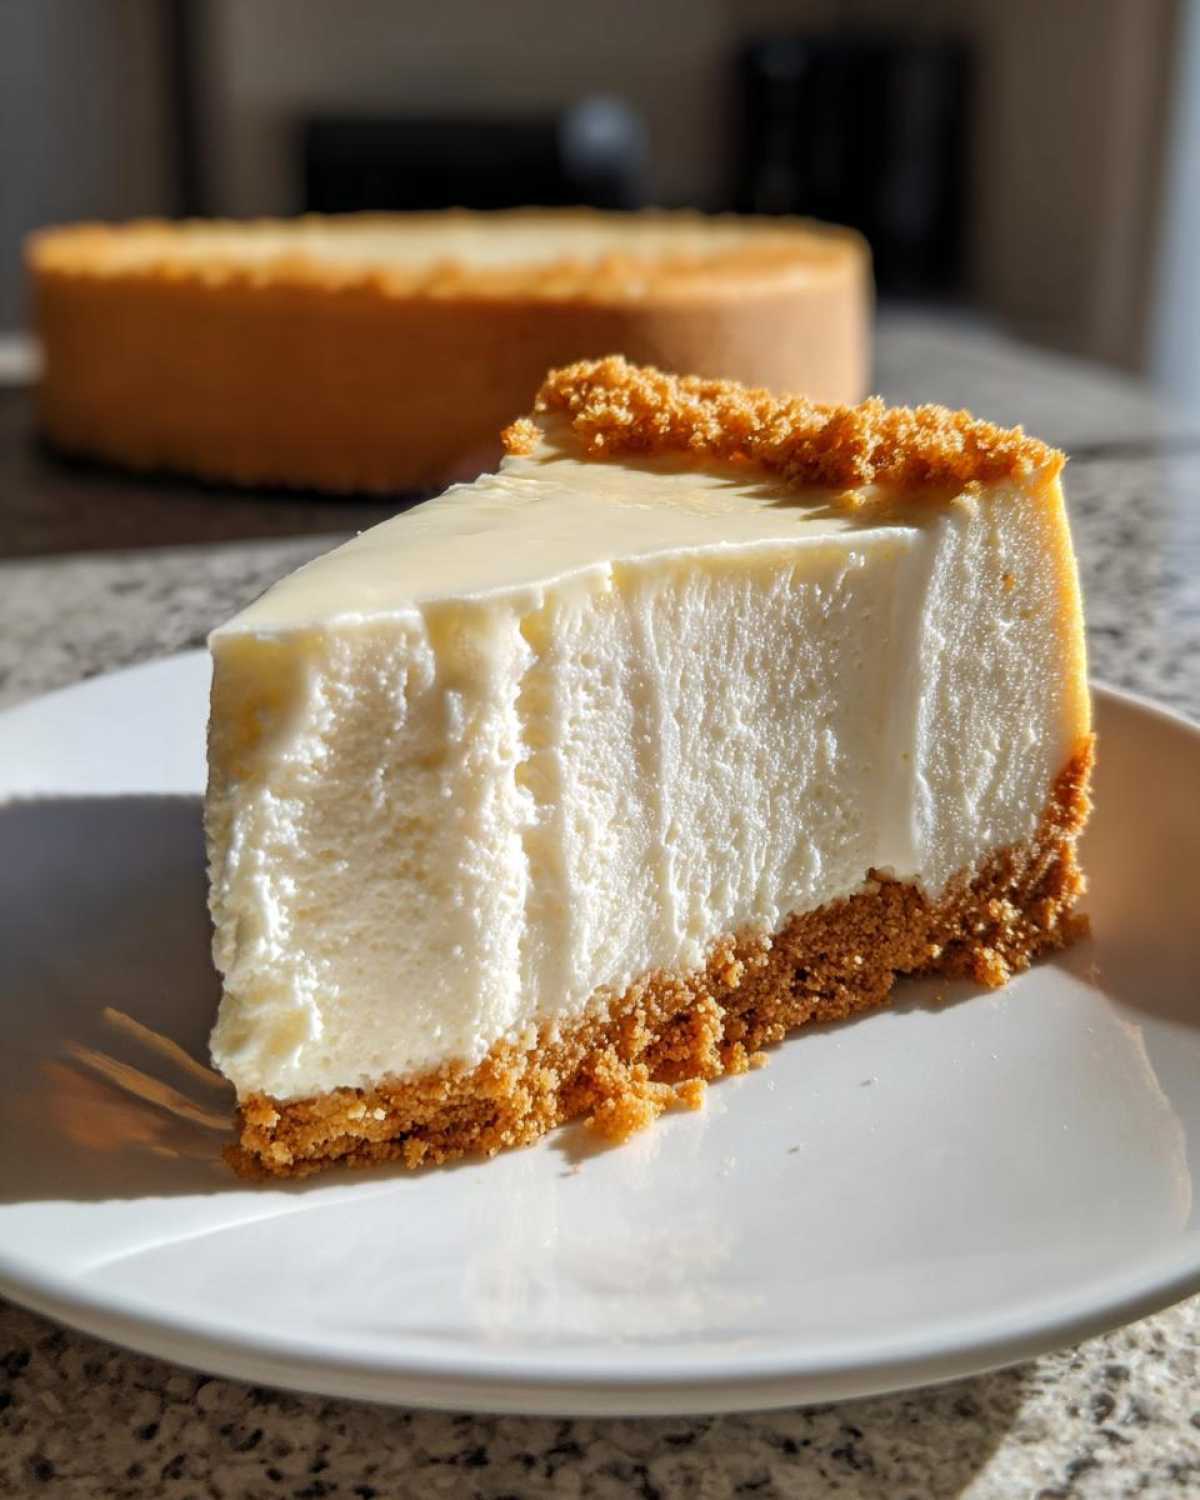
This is such a great question because a messy slice can make the whole thing look less than perfect, even if the bake was flawless. Don’t try to slice this firm, cold dessert with a regular knife! You need heat. Grab a long, thin, sharp knife—the kind you use for carving meat works great. Dip that knife completely into a tall glass of really hot water. Wipe it perfectly dry with a clean cloth, and then make your first slice. Dip, wipe, slice. Dip, wipe, slice. It glides right through, leaving behind these beautiful, clean edges on your slice. It’s the best trick for serving up a beautiful piece of this Rich and Creamy Dessert.
Is this a beginner cheesecake recipe?
You bet it is! This is why I’m so passionate about this specific technique. By skipping the fussy water bath and instead relying on wrapping the pan well and then using that slow, two-stage cooling method in the oven, we take out the biggest stressor for newcomers. If you focus on using room temperature ingredients and mixing gently, then yes, this is absolutely the best entry point for anyone wanting to try that authentic baked cake texture. We’ve built in all the safety mechanisms to make this a successful Beginner Cheesecake Recipe!
Estimated Nutritional Data for This Cheesecake Recipe
Now, let’s be real—this cheesecake recipe is definitely a rich and decadent treat, not exactly a light snack! But if you’re going to indulge, you might as well know what’s going into it, right? This information is an estimate only, based on the ingredients we listed earlier, and of course, it will vary slightly depending on the exact brands of cream cheese or graham crackers you pick up. Don’t let the numbers scare you too much; this is a special occasion dessert, and it’s worth every glorious bite of that creamy texture!
Here’s a quick peek at what one generous slice of this Classic Cheesecake Recipe stacks up to:
- Calories: 450
- Fat: 30g (It needs that fat for richness, folks!)
- Carbohydrates: 40g
- Protein: 8g
Keep in mind that the fat content is high because we used full-fat cream cheese and real butter—and that’s absolutely essential for that signature New York style! If you were looking for a lighter option, you might want to check out some of my No Bake Cheesecake Options later on, but for this truly satisfying bake, expect these rich numbers!
Share Your Classic Cheesecake Recipe Experience
And just like that, we’ve done it! We’ve conquered the terrifyingly wonderful world of baked cheesecakes, and you’ve made the absolute best version possible. I sincerely hope you treat yourself to that first slice—maybe warmed slightly, maybe topped with those fresh berries we talked about. Now, I really, really want to hear about it!
Did you try the no-water-bath trick? Did it stay smooth? Did the slow cooling work its magic? Please, please drop a comment below and tell me how your cheesecake recipe turned out. If you feel it deserves it, give it a proper five-star rating right above the comments! I thrive on community feedback; it helps me know which Easy Homemade Cheesecake methods I should focus on next.
For those of you who snapped photos of your beautiful, crack-free, creamy creation, I’d be thrilled if you shared them on social media and tagged me! Seeing your successes reminds me why I obsess over these little baking details. Happy eating, everyone, and enjoy that slice of pure, classic New York magic!
Print
Classic New York Style Cheesecake Recipe
- Total Time: 100 min
- Yield: 12 servings
- Diet: Vegetarian
Description
A straightforward recipe for a rich, creamy, classic New York style cheesecake with a graham cracker crust, designed to minimize cracking without a water bath.
Ingredients
- 1 1/2 cups graham cracker crumbs
- 1/4 cup granulated sugar (for crust)
- 6 tablespoons unsalted butter, melted
- 3 (8 ounce) packages full-fat cream cheese, softened to room temperature
- 1 1/2 cups granulated sugar (for filling)
- 1/4 cup all-purpose flour
- 1 teaspoon vanilla extract
- 1/4 teaspoon salt
- 4 large eggs, room temperature
- 1/2 cup sour cream, room temperature
Instructions
- Preheat your oven to 325 degrees F. Wrap the outside bottom of a 9-inch springform pan tightly with heavy-duty aluminum foil to prevent water seepage, even if you skip the water bath.
- Prepare the crust: Mix graham cracker crumbs, 1/4 cup sugar, and melted butter until combined. Press the mixture firmly and evenly into the bottom of the prepared springform pan. Bake for 10 minutes. Remove and let cool slightly.
- Prepare the filling: In a large bowl, beat the softened cream cheese with an electric mixer on medium speed until completely smooth, about 3 minutes. Scrape down the sides.
- Add the 1 1/2 cups sugar, flour, vanilla extract, and salt. Beat until just combined, mixing on low speed. Do not overmix.
- Add the eggs one at a time, beating only until each egg is incorporated. Mix in the sour cream last, mixing just until the batter is smooth.
- Pour the filling over the cooled crust. Gently tap the pan on the counter a few times to release large air bubbles.
- Bake for 60 to 75 minutes. The edges should look set, but the center 2 inches should still jiggle slightly when the pan is gently nudged.
- Turn off the oven, but leave the cheesecake inside with the oven door propped open about 2 inches for 1 hour. This slow cooling prevents rapid temperature change and cracking.
- Remove the cheesecake from the oven and let it cool completely on a wire rack at room temperature.
- Once cool, cover the pan loosely with plastic wrap and refrigerate for at least 6 hours, or preferably overnight, before serving.
Notes
- Use room temperature ingredients for the cream cheese, eggs, and sour cream; this prevents lumps.
- Do not overbeat the batter once the eggs are added; incorporating too much air causes the cake to rise too fast and then fall/crack.
- If you must use a water bath, place the foil-wrapped pan inside a larger roasting pan and fill the outer pan with hot water halfway up the side of the springform pan before baking.
- Prep Time: 25 min
- Cook Time: 75 min
- Category: Dessert
- Method: Baking
- Cuisine: American
Nutrition
- Serving Size: 1 slice
- Calories: 450
- Sugar: 35
- Sodium: 250
- Fat: 30
- Saturated Fat: 18
- Unsaturated Fat: 12
- Trans Fat: 0.5
- Carbohydrates: 40
- Fiber: 1
- Protein: 8
- Cholesterol: 120