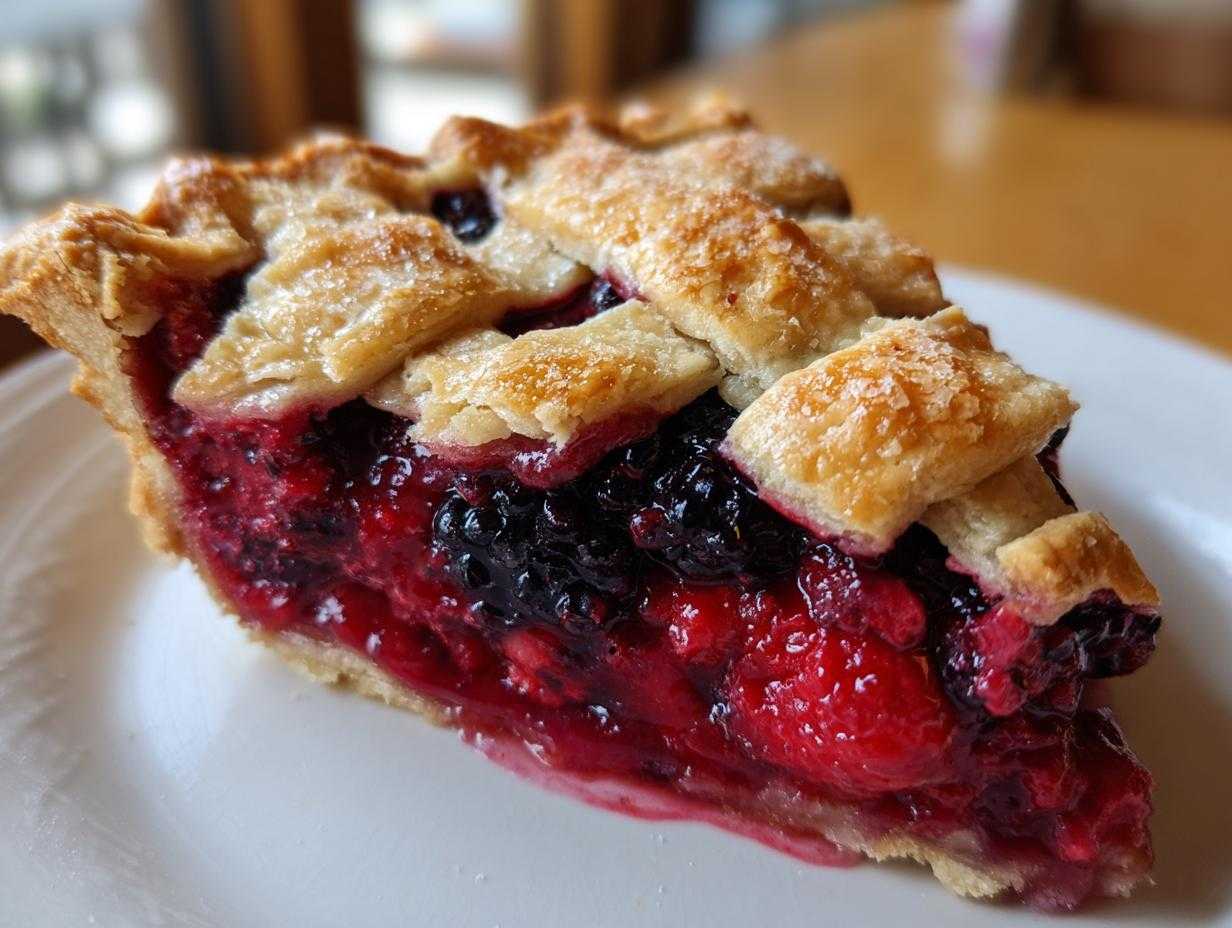
Oh my gosh, summer isn’t truly summer until you’ve sliced into a show-stopping **berry pie**, right? Forget those sad, watery slices you sometimes get—we’re aiming for bakery-worthy perfection here! This recipe is my absolute go-to, and honestly, it took me years to nail down, especially getting that gorgeous, flaky crust just right. Trust me when I say this method is foolproof for achieving that shatteringly crisp texture every single time. The best part? It doesn’t matter if you’re using the brightest strawberries from the market or pulling a bag of frozen mixed fruit from the deep freeze; this recipe handles it all beautifully. We’re making a truly stunning **berry pie** today!
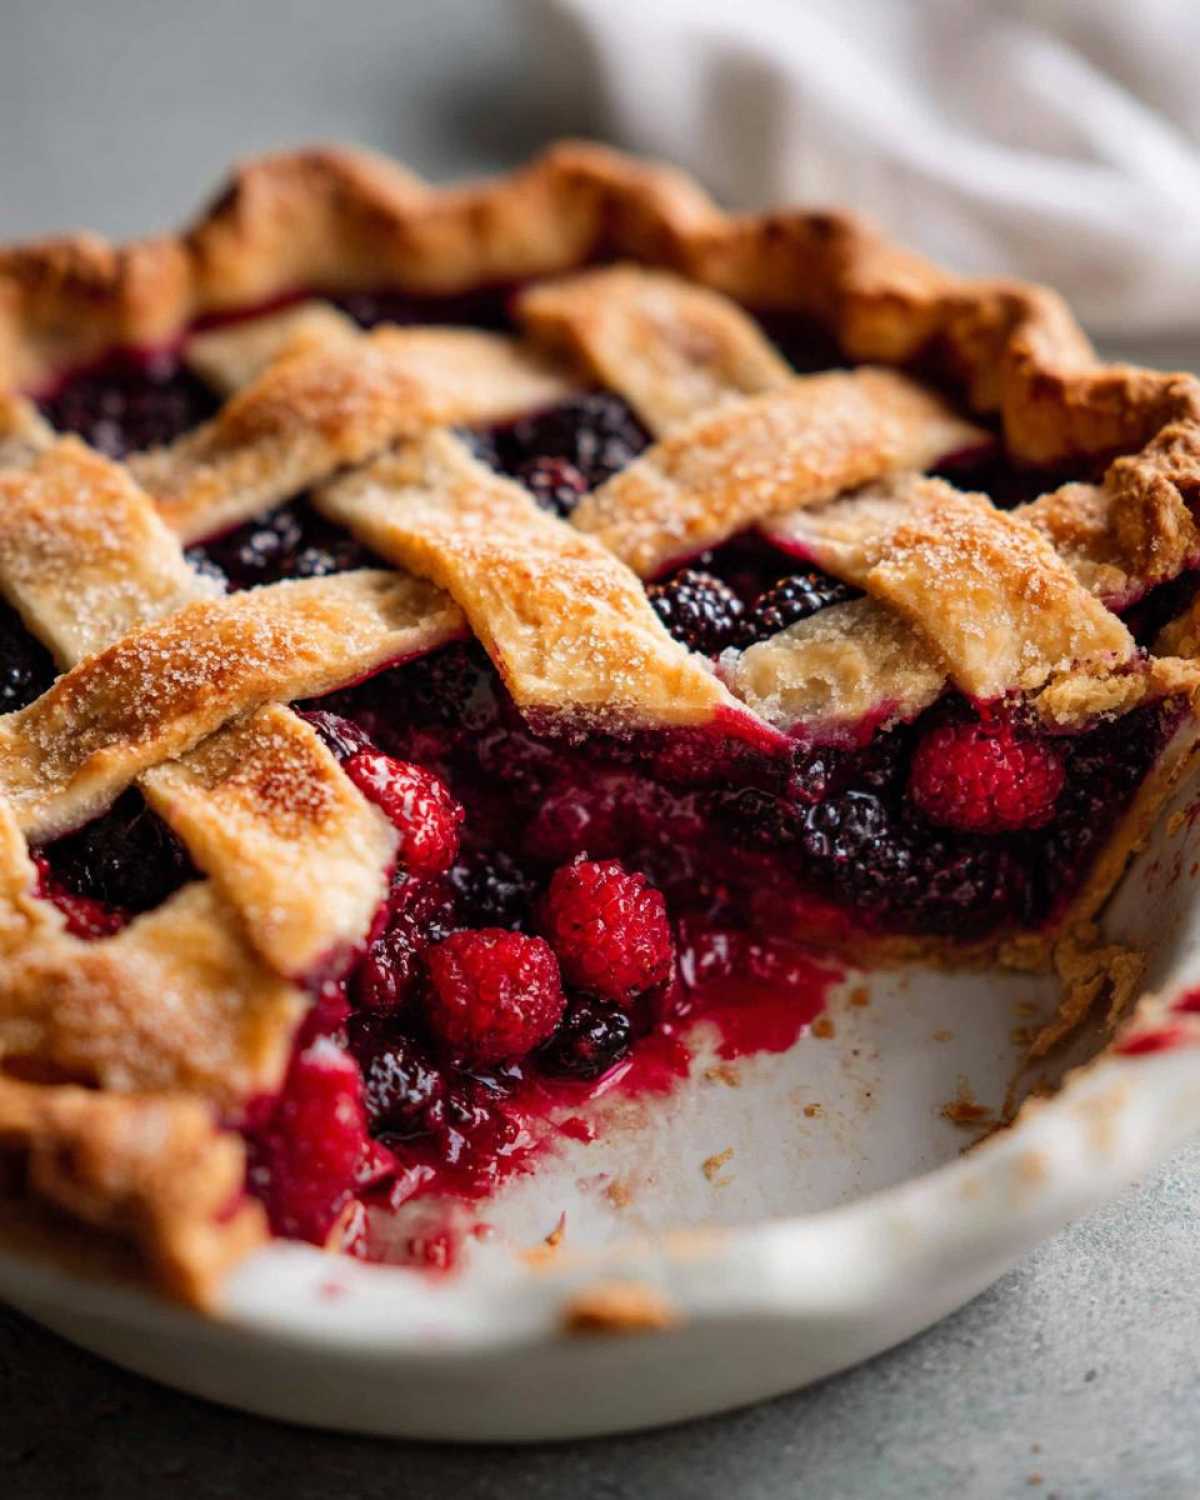
Why This is the Best Berry Pie Recipe You Will Ever Make
I’ve made a lot of fruit pies in my time, believe me, and this particular **berry pie** really separates itself from the others. It’s not just about throwing fruit into a dish; it’s about technique that guarantees success. If you’re tired of soggy bottoms or filing that runs all over the plate, you need this method. Plus, I’ve learned how to make it work even when I’m running late! If you want to see a great topping alternative, you might want to check out my post on the triple berry crisp, but for pie, read on!
- Flaky Perfection: We use an all-butter crust technique that results in those unbelievable layers you see in professional bakeries.
- Set Filling Guaranteed: Thanks to a calculated thickener measurement, that runny mess is a thing of the past.
- Fruit Flexibility: Whether your berries are fresh from the garden or frozen solid, this recipe adjusts perfectly.
Achieving the Perfect Flaky Pie Crust Recipe
Listen, the crust is everything. If you want a true *flaky* crust, remember this: keep everything ice cold! I mean it. Your butter needs to be cut into small cubes and kept in the freezer until the very last second before it hits the flour. Seriously, I keep my mixing bowl in the freezer too! This whole process is an all butter pie crust tutorial in disguise. The key to the flaky layers is handling the dough as little as possible. You want those visible, pea-sized pieces of butter to stay intact; those bits create steam and puff up the dough when they bake. Gentle mixing equals flaky bliss—don’t fight me on this!
The Secret to a No Runny Berry Pie Filling
If you’ve ever cut into a beautiful pie only to have the filling ooze out like soup, I feel your pain. I’ve done it! The secret here is using just the right amount of cornstarch relative to the amount of fruit we use—6 cups total! It’s calculated perfectly to thicken that glorious, sweet-tart juice. But even more important than the starch is the cooling time. You absolutely must let this **berry pie** cool for a minimum of four hours on the rack after it comes out of the oven. That time lets the starch gel completely. Don’t rush it; patience is what stops that runny **berry pie** filling!
Ingredients for Your Foolproof Triple Berry Pie
Okay, let’s get down to business! Ingredients. This is where we build the foundation for that incredible texture and flavor combination. Remember, for the best results, you need to stick to the measurements, especially for the thickener. While you’re gathering things, if you’re looking for simpler fruit bakes, I’ve got a fantastic easy berry cobbler recipe too, but for this pie, precision matters!
For the Flaky All-Butter Pie Crust
This is the structure, so keep it frigid! I always make sure my butter is straight from the deepest, coldest part of the freezer right before I start cutting it in.
- 2 1/2 cups all-purpose flour
- 1 teaspoon salt
- 1 cup (2 sticks) unsalted butter, very cold and cubed
- 1/2 cup ice water, plus more if needed
For the Sweet and Tart Berry Pie Filling
This combination of strawberry, blueberry, and raspberry is just magic together—that perfect sweet and tart balance! If you find your berries are super tart (like some early-season raspberries), feel free to sneak in an extra tablespoon or two of sugar, but start with the recipe amount first!
- 6 cups mixed berries (I use 2 cups strawberries, 2 cups blueberries, 2 cups raspberries)
- 3/4 cup granulated sugar (adjust based on berry sweetness)
- 1/4 cup cornstarch (Our anti-runny magic!)
- 1 tablespoon lemon juice
- 1 teaspoon vanilla extract
- 1 large egg, beaten (for egg wash)
- 1 tablespoon coarse sugar (for sprinkling)
Top tip: When using frozen berries, just dump them right into the bowl with the other dry filling ingredients—no thawing needed! They release moisture slowly, which the cornstarch handles like a champ.
How to Make Berry Pie with Frozen Berries
I get asked all the time if you can pull frozen fruit straight from the freezer for this **berry pie**. The answer is a resounding YES! This flexibility is one reason I call this recipe foolproof. When you’re using frozen strawberries, blueberries, or raspberries, please, please do not bother thawing them first. Thawing them just releases all that gorgeous berry juice and makes your filling watery before it even sees the oven!
Just toss those icy berries right into the bowl with the sugar and cornstarch. They might make the filling look a little colder and stiffer when you mix it, but don’t worry about that. Because they start colder, you might need to add an extra 5 to 10 minutes onto that initial high-heat baking time. Keep an eye on that crust color, and you’ll be just fine! It’s such a wonderful way to have a summer **fruit pie** when berries aren’t quite in season yet.
Step-by-Step Instructions for Classic Berry Pie
Alright, strap in! Following the instructions precisely here means you are locking in that flaky crust and that perfectly set filling—no more runny **berry pie** disasters! We start by getting the oven ready, because timing is everything with pastry, you know? If you want to see my favorite tutorial for that amazing base, check out the details on the all-butter pie crust tutorial I linked earlier. This recipe works in two main stages: getting the dough and filling ready, and then the assembly and bake.
Preparing the Dough and Filling
First up, the crust dough. In a big bowl, whisk your flour and salt. Now, take that super cold, cubed butter and use a pastry blender or just your fingertips—and I mean *quickly*—to cut it in. You are looking for coarse crumbs with some definite pea-sized butter chunks left! Don’t overwork it! Then, drizzle in the ice water, one tablespoon at a time, just until the dough barely holds together. Don’t knead it! Divide that messy ball into two flat discs, wrap them up tight, and pop them in the fridge for at least an hour. While that chills, gently mix your berries, sugar, cornstarch, lemon juice, and vanilla to make the filling. If you’re using frozen fruit, remember: do not thaw!
Assembling and Baking Your Berry Pie
Time to preheat the oven to 400°F (200°C). Lightly flour your surface and roll out one disc into a 12-inch circle. Carefully lay this into your pie dish, trim the overhang, and pour in all that gorgeous berry filling. Now, for the top: roll out the second disc. You can cut vents in a solid top crust or go fancy with a lattice—either way, seal the edges well! Brush the top with one beaten egg and sprinkle that coarse sugar on top for sparkle. Bake it hot for 20 minutes at 400°F. Then, without opening the oven door too much, drop the temp to 375°F (190°C) and bake for another 35 to 45 minutes. Cover the edges with foil if they start looking too dark. The *most* crucial final step is cooling it completely—at least 4 hours—so that **berry pie** sets beautifully!
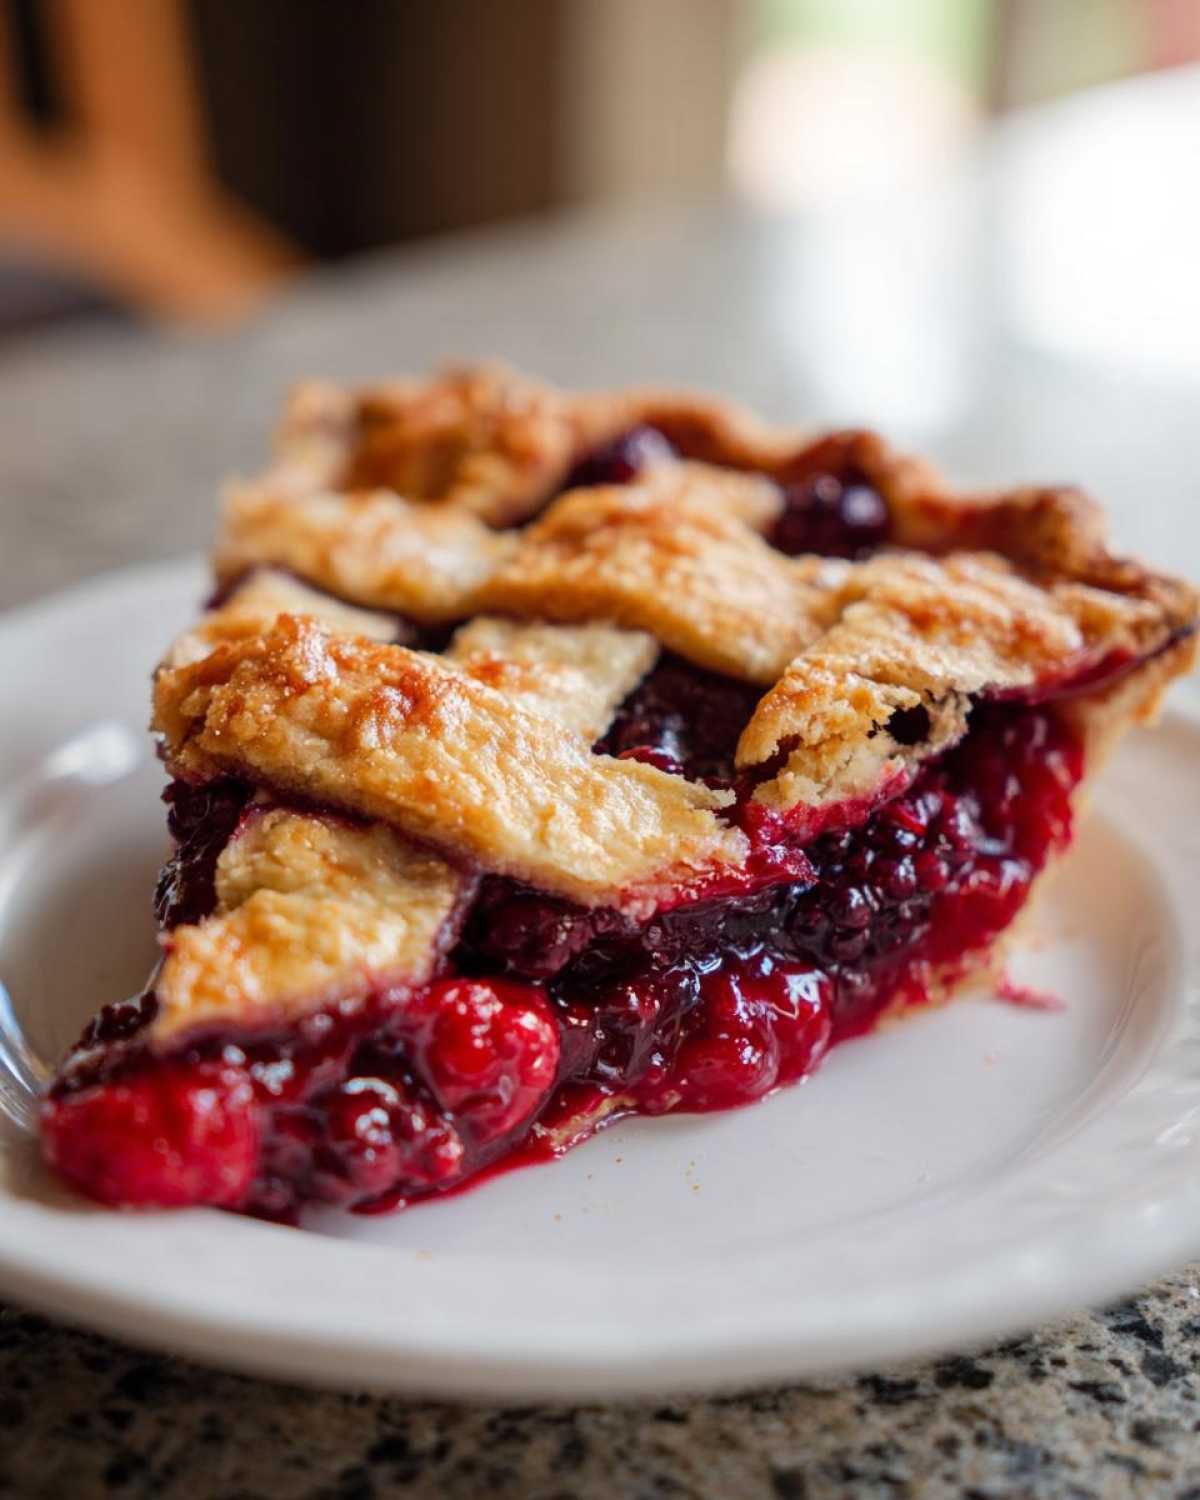
Topping Variations for Your Homemade Triple Berry Pie
So you’ve mastered the crust and the filling—congratulations! Now comes the fun part: choosing what goes on top of your **berry pie**. In the instructions above, I walked you through the classic options: the simple, full pastry top (make sure you cut vents!) or going all out with a beautiful lattice woven top. Both look amazing and taste perfect with that sweet and tart filling.
But if you’re looking for something a little more rustic, maybe something that feels extra cozy for a holiday gathering, you have to try the crumb topping! It’s so easy, and it adds this incredible, buttery crunch that contrasts beautifully with soft berries. If you love a good crunch, you might also enjoy the details on making a crumb topping pie recipe over on that link!
To get that perfect texture, you just mix up the following ingredients until they look like coarse sand:
- 1 cup flour
- 1/2 cup brown sugar
- 1/2 cup granulated sugar
- 1/2 cup cold cubed butter
Sprinkle that right over your berry mixture instead of a top crust. It bakes up golden and delicious! Honestly, sometimes I just can’t choose between the fancy lattice and the easy, comforting crumb topping.
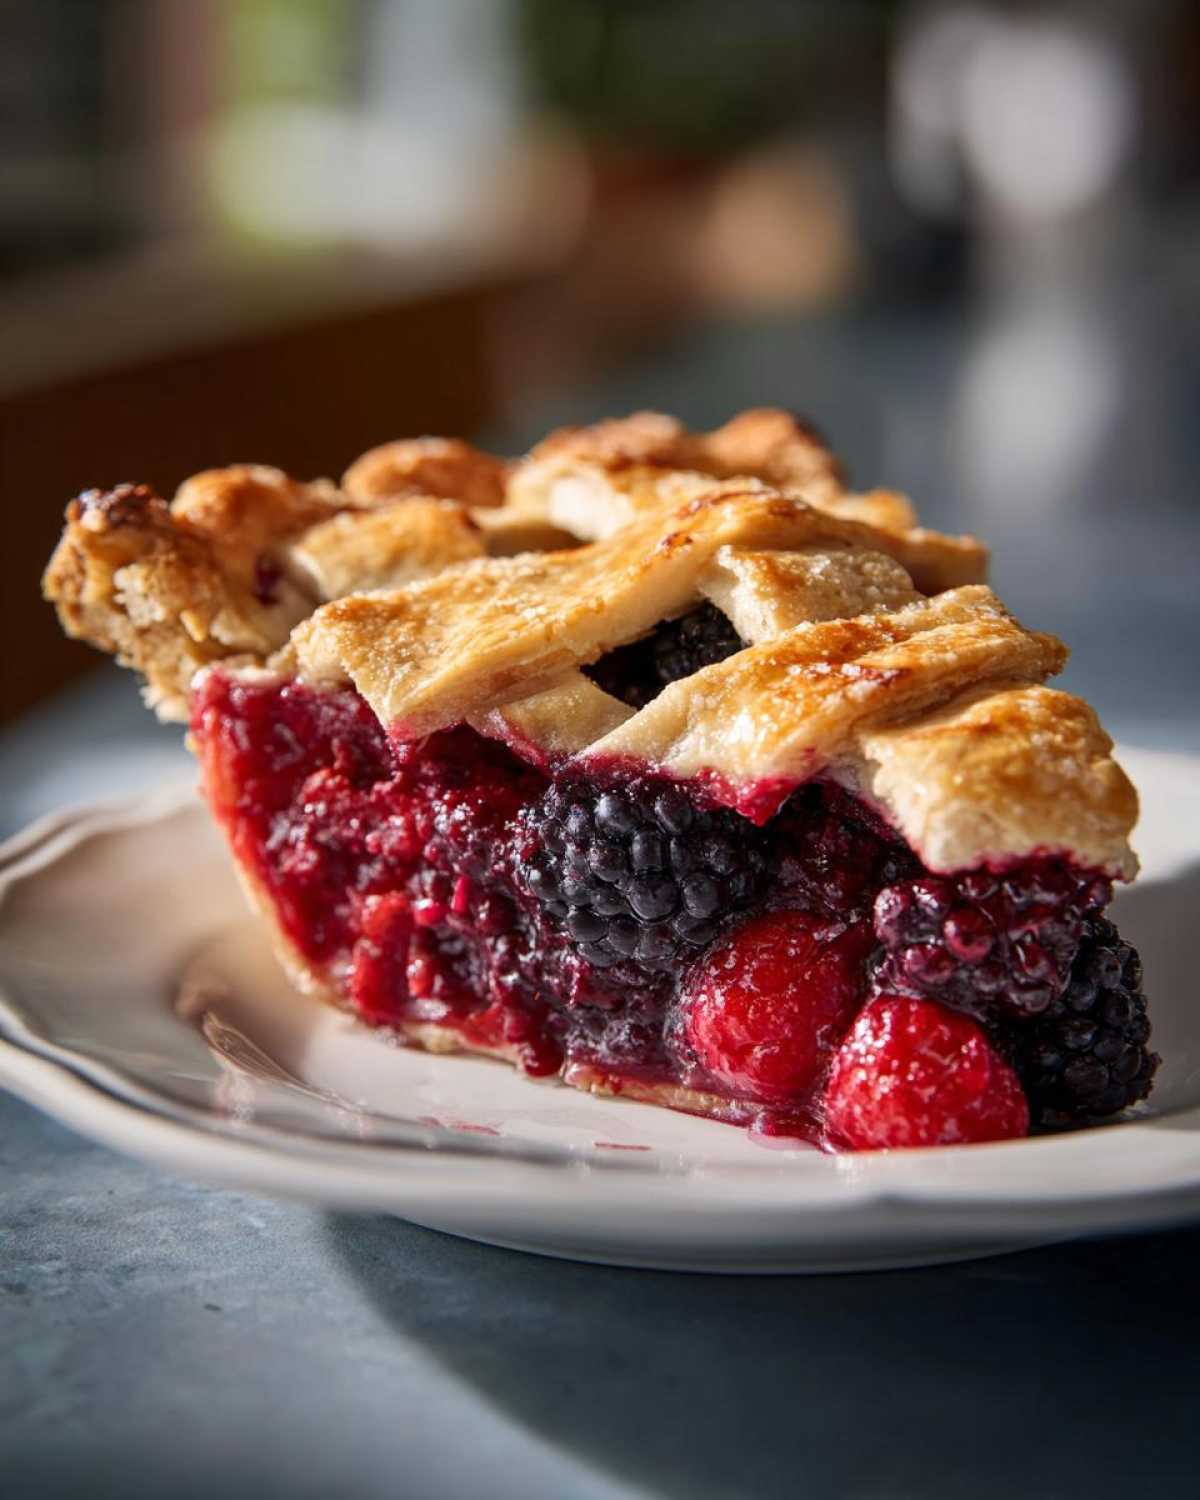
Tips for Success with Every Berry Pie
I’ve been baking this **berry pie** for years, and I still have moments where I mess up—usually because I get impatient! But these few little habits I’ve adopted have completely transformed my success rate, especially when I’m in a rush for a summer gathering.
The biggest game-changer? Reconfirming that cold butter rule. I once tried to sneak this dough together when my kitchen was warm, and, oh boy, the crust turned out tough and oily, not flaky! Now, I make sure my butter is practically frozen and my water is full of ice. If you feel the dough getting warm while you’re rolling, scrap it, wrap it, and stick it back in the fridge for 15 minutes before you try again. It’s worth the pause!
Here are my must-do steps for your next **homemade triple berry pie**:
- Keep your butter COLD. I can’t say it enough.
- Watch the edges! That lovely golden glow happens fast. If the crust edges are getting dark brown before the center is bubbling thickly, just tear off a strip of foil and loosely tent it over the crust. It’s a quick fix!
- Don’t you DARE cut that pie until it has cooled completely. If you try to slice it early, you’ll end up with that runny mess we hate. For a perfectly set filling, you need that four-hour pause. For more on keeping things runny at bay, I wrote about that here: how to prevent watery pie filling.
Follow these simple checks, and you’ll have a bakery-worthy **berry pie** every single time. Happy baking!
Storage and Reheating Instructions for Berry Pie
So, you’ve successfully waited the grueling four hours, and your **berry pie** is finally perfectly set! Now you need to know how to keep that beauty fresh. Generally, because this has so much fruit and sugar, you can certainly leave a covered pie on the counter for a day if your kitchen isn’t too warm. But honestly, for the best results, I always tuck mine into the fridge! You want to cover it loosely with foil or plastic wrap—just make sure it’s not totally airtight so the crust doesn’t get soggy.
When you’re ready for a slice, please skip the microwave if you can! The microwave laughs in the face of a flaky crust. If you want that crust to sing again, reheat individual slices in a toaster oven or a regular oven set to about 300°F (150°C) for about 10 minutes. That warms the filling through but mostly crisps up the crust again. It takes just a tiny bit longer than the microwave, but trust me, it’s worth it for that **classic berry pie** texture!
Frequently Asked Questions About Berry Pie
Can I substitute the berries in this easy mixed berry pie?
Absolutely, this is an easy mixed berry pie recipe at its heart! You can use any combination you love, like blackberries, marionberries, or even just a simple blueberry pie. Just remember that every berry holds a different amount of water. If you substitute with something really juicy like blackberries, you might want to add an extra teaspoon of cornstarch just to be perfectly safe against a runny filling. And taste them first! If they are super sweet, pull back a touch on the sugar.
How long does this homemade triple berry pie last?
Because we worked so hard to get that filling to set properly, this **homemade triple berry pie** does pretty well! If it’s covered lightly and kept at cool room temperature (say, under 70°F), it should be fine for about 24 hours. After that, I always move it to the fridge where it keeps wonderfully for up to four days. It’s delicious cold the next morning, though!
Can I freeze this berry pie before baking?
Yes, and this is a lifesaver when you’re prepping for a big holiday! You can assemble the whole **berry pie**, crust and all, wrap that unbaked pie tightly in plastic wrap twice, and then wrap it again in foil. Pop that right into the freezer. When you’re ready to bake, unwrap it but keep it frozen. You’ll need to add about 15 to 20 minutes to the total baking time, and you might want to start it at the lower temperature (375°F) before bumping it up.
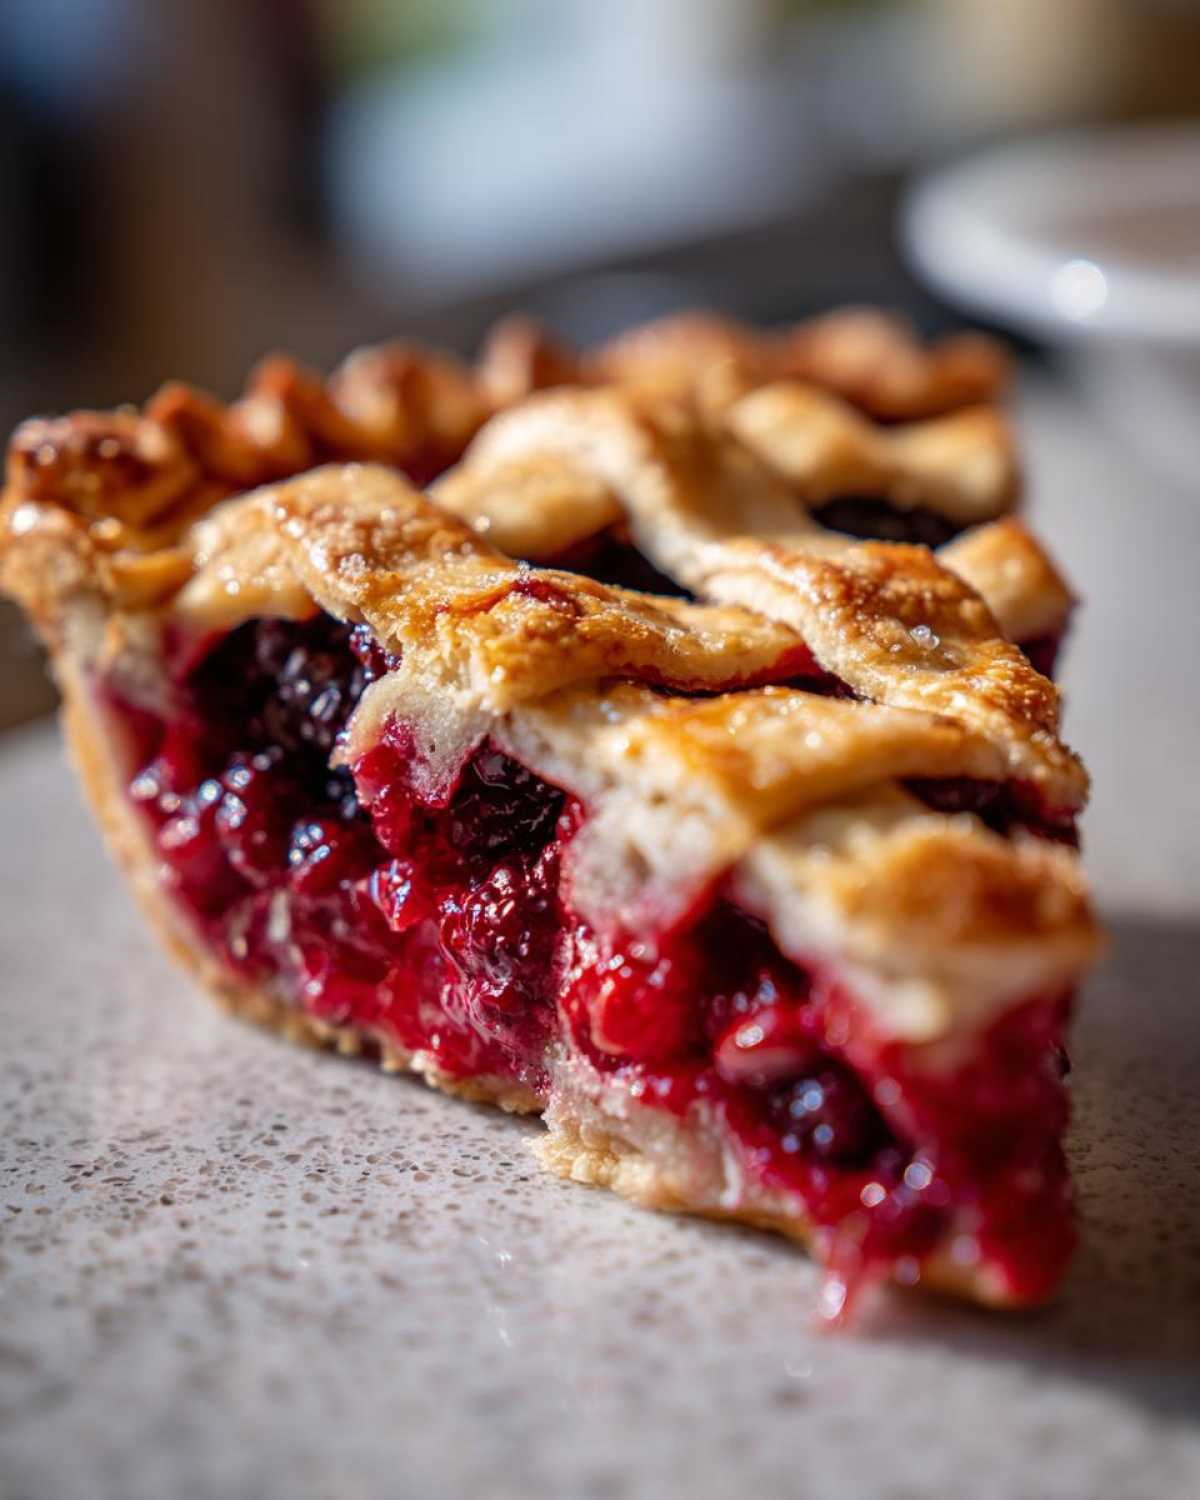
Share Your Perfect Berry Pie Experience
Now that you have successfully pulled a gorgeous, perfectly set **berry pie** out of your oven, I need to know everything! Seriously, I live for the feedback. Did you go for the classic, elegant lattice top, or did you lean into the easy, crunchy goodness of the crumb topping? Let me know which one you chose in the comments below because I’m always curious about what everyone likes best!
If this recipe saved your summer dessert plans—or maybe even a last-minute holiday party—please give it a rating! Five stars makes my day, but even just telling me you tried it is wonderful. If you snapped a photo of that flaky crust or that thick, un-runny filling, please tag me on social media! I try to share everyone’s beautiful creations.
And hey, if you’ve got **easy summer desserts** hiding in your own rotation, I’d love to hear about it! If you’re already planning your next bake, maybe you need a new cookie obsession? You can wander over and check out my must-have recipe for chewy deliciousness here: soft, chewy chocolate chip cookies. Happy baking, everyone!
Print
Foolproof Triple Berry Pie with Flaky Crust
- Total Time: 110 min
- Yield: 8 servings
- Diet: Vegetarian
Description
Make a bakery-worthy triple berry pie using strawberries, blueberries, and raspberries. This recipe features a flaky all-butter crust and a thick, set filling, working well with both fresh and frozen fruit.
Ingredients
- 2 1/2 cups all-purpose flour
- 1 teaspoon salt
- 1 cup (2 sticks) unsalted butter, very cold and cubed
- 1/2 cup ice water, plus more if needed
- 6 cups mixed berries (2 cups strawberries, 2 cups blueberries, 2 cups raspberries)
- 3/4 cup granulated sugar (adjust based on berry sweetness)
- 1/4 cup cornstarch
- 1 tablespoon lemon juice
- 1 teaspoon vanilla extract
- 1 large egg, beaten (for egg wash)
- 1 tablespoon coarse sugar (for sprinkling)
Instructions
- Prepare the crust: In a large bowl, whisk together the flour and salt. Cut in the cold butter using a pastry blender or your fingers until the mixture resembles coarse crumbs with some pea-sized pieces of butter remaining.
- Gradually add the ice water, one tablespoon at a time, mixing until the dough just comes together. Do not overmix. Divide the dough in half, form two flat discs, wrap them in plastic, and chill for at least 1 hour.
- Prepare the filling: In a separate bowl, gently combine the berries, granulated sugar, cornstarch, lemon juice, and vanilla extract. If using frozen berries, do not thaw them first. Toss lightly to coat.
- Preheat your oven to 400°F (200°C).
- Roll out one dough disc on a lightly floured surface into a 12-inch circle. Carefully transfer it to a 9-inch pie dish. Trim the edges, leaving a 1-inch overhang.
- Pour the berry filling into the crust. Dot the top of the filling with a few small pieces of reserved cold butter, if desired.
- Roll out the second dough disc. You can either place it over the filling as a solid top crust (cutting vents) or cut strips to create a lattice top. Crimp the edges of the top and bottom crusts together to seal.
- Brush the top crust or lattice with the beaten egg wash and sprinkle evenly with coarse sugar.
- Bake for 20 minutes at 400°F (200°C). Then, reduce the oven temperature to 375°F (190°C) and continue baking for another 35 to 45 minutes, or until the crust is golden brown and the filling is bubbling thickly.
- If the edges brown too quickly, cover them loosely with aluminum foil.
- Cool the pie completely on a wire rack for at least 4 hours before slicing. This allows the filling to set properly and prevents a runny pie.
Notes
- If you prefer a crumb topping instead of a top crust, mix 1 cup flour, 1/2 cup brown sugar, 1/2 cup granulated sugar, and 1/2 cup cold cubed butter until crumbly. Sprinkle this mixture over the filling before baking.
- For the flakiest crust, keep all ingredients cold and handle the dough as little as possible.
- If your berries are very tart, increase the sugar slightly. If they are very sweet, reduce the sugar to 1/2 cup.
- Prep Time: 45 min
- Cook Time: 65 min
- Category: Dessert
- Method: Baking
- Cuisine: American
Nutrition
- Serving Size: 1 slice
- Calories: 410
- Sugar: 35g
- Sodium: 210mg
- Fat: 24g
- Saturated Fat: 15g
- Unsaturated Fat: 9g
- Trans Fat: 0g
- Carbohydrates: 50g
- Fiber: 4g
- Protein: 5g
- Cholesterol: 60mg