

Oh my gosh, when summer hits and the humidity just *clings* to you, what is the absolute first thing you crave? Something cold, something tangy, and honestly, something that doesn’t require me to turn on the screaming-hot oven! I swear, my search for the ultimate quick, tart treat ended the day I finally nailed these No-Bake Key Lime Pie Jars. Seriously, they are a total lifesaver.
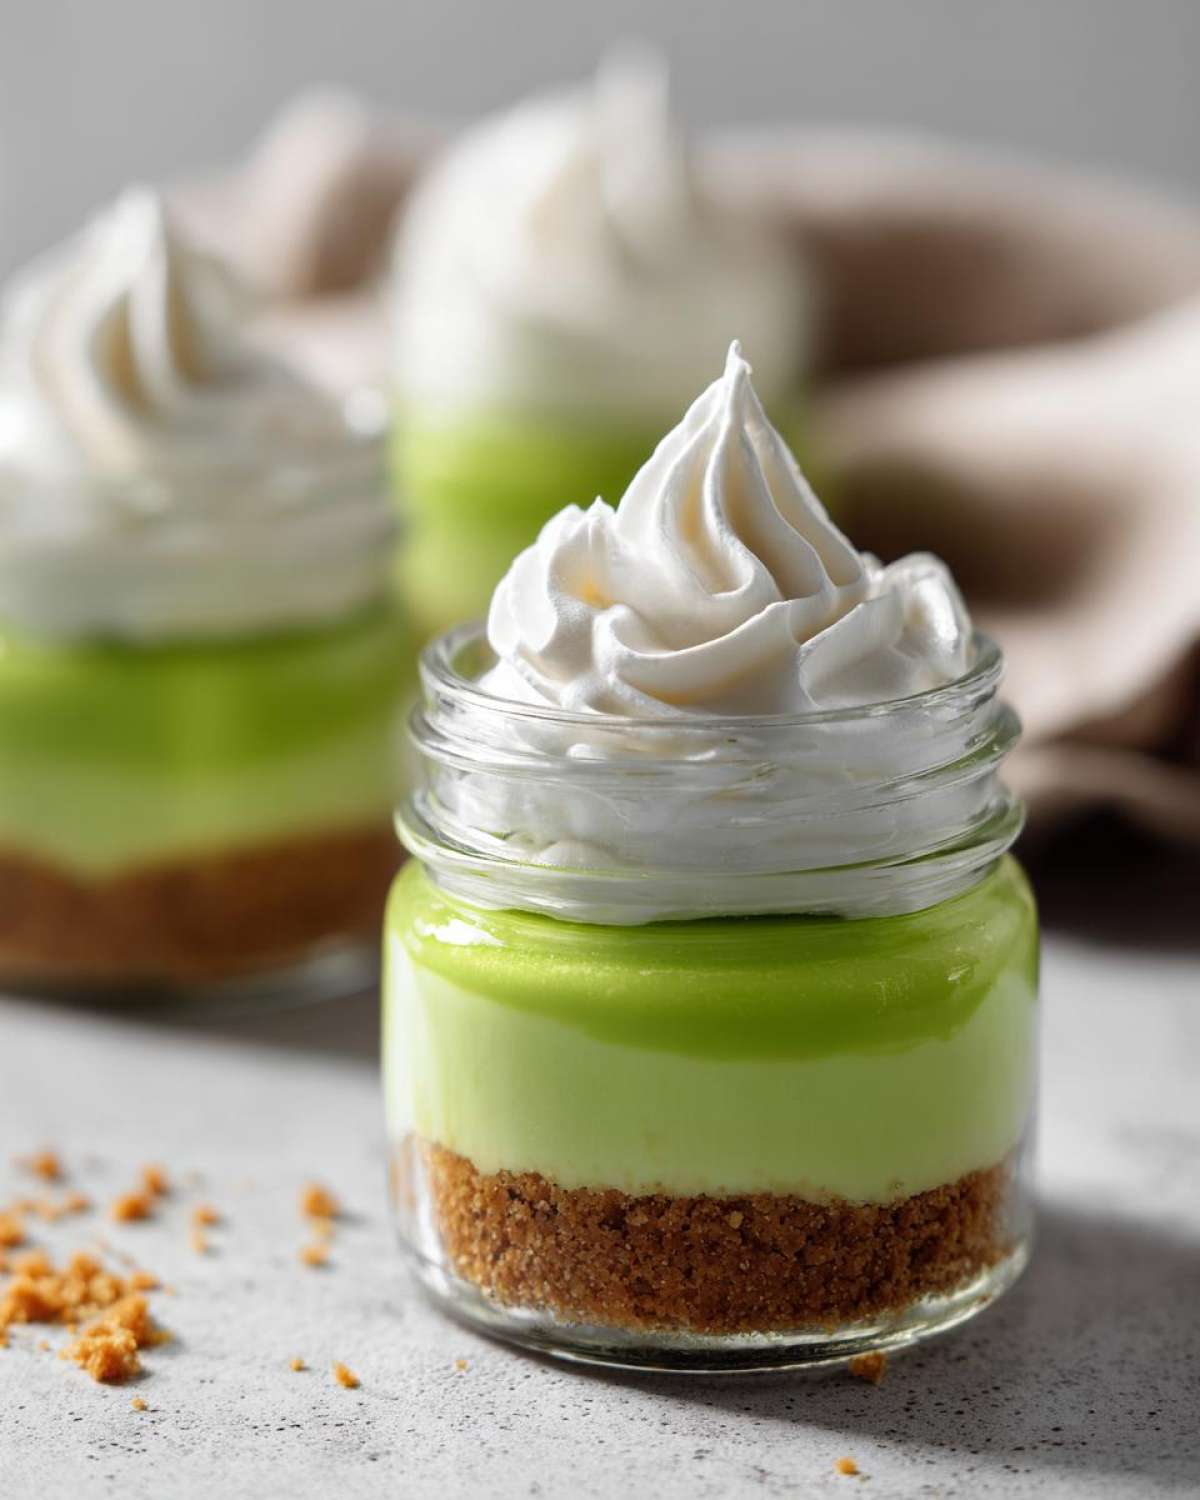
We’re talking about a perfectly layered, individual dessert built right in little jars. It’s all crust, creamy filling, and cloud-like topping, ready to grab right out of the fridge. I spent ages trying to get that no-bake filling just right—you know, where it’s firm enough not to slosh everywhere when you carry it around, but still melt-in-your-mouth creamy? I finally figured out the secret is making sure your cream cheese is perfectly room temperature before you even look at the mixer. Trust me on this one!

Why You Will Love These No-Bake Key Lime Pie Jars
Honestly, these are the perfect little bright spot on a dull day. You get all that amazing, tangy key lime punch without even turning the oven on—which is my favorite thing ever in July. Think speedy assembly, perfect portability, and just the right amount of creamy indulgence.
- No oven means no heating up the kitchen! Super quick prep.
- Portability is key—just pop a lid on and go!
- The layers look gorgeous right inside the jar.
- They are perfectly portioned, so you never accidentally eat half the pie.
It’s a true winner when you need a dessert fast, and you can even bring them along to potlucks. If you want to see my equally amazing main dish recipes, check out this quick and easy butter chicken, but trust me, you have to make the jars first!
Essential Ingredients for Your No-Bake Key Lime Pie Jars
Okay, since we aren’t baking anything, every ingredient really needs to pull its weight. It’s super important that you measure correctly, especially with the lime juice. This isn’t the time to eyeball things, or your filling might not set up into that dreamy, thick texture we want!
I’ve broken down exactly what you need below, divided by layer. If you’re looking for other easy no-bake wonders, these no-bake protein bars are great for grabbing on the way out the door too, but right now, we focus on the lime!
For the Graham Cracker Crust Jars
This is the foundation, and we need it sturdy because we are pressing it down in jars! You’ll need 1 and 1/2 cups of graham cracker crumbs—and if you’re buying the crumbs pre-made, even better for speed. Mix those crumbs with 1/4 cup of granulated sugar, and then 6 tablespoons of butter that you’ve already melted completely. It should look like wet sand when you’re done mixing it up.
For the Creamy Key Lime Filling
This is where the magic happens for that rich, vibrant flavor. We absolutely need 8 ounces of cream cheese, and I can’t stress this enough—it must be softened completely to room temperature! If it’s cold, you’ll get lumps, and nobody wants a lumpy pie. Next, grab that 14-ounce can of sweetened condensed milk. The star, of course, is the juice: you want 1/2 cup of fresh key lime juice, which usually takes about six to eight of those tiny key limes. Don’t forget the 1 teaspoon of lime zest and 1 teaspoon of vanilla extract to round out this amazing Creamy Key Lime Filling.

For the Whipped Cream Topped Jars
This part is strictly for serving, so we do it last! You just need 1 cup of heavy whipping cream and 2 tablespoons of powdered sugar. That’s it! We’re whipping this up until we hit those firm, gorgeous stiff peaks. It needs to hold its shape right on top of that tart filling.
Step-by-Step Instructions for Your No-Bake Key Lime Pie in a Jar
Putting these together is exactly like layering tiny little perfect cheesecakes, but with way more zest and way less stress! Since we skip the oven, timing is just about chilling. Follow these steps closely, and you’ll have gorgeous No Bake Key Lime Pie ready to chill in under 25 minutes of active work. Make sure you have your 8-ounce jars ready to go! If you’re thinking about making a baked dessert later, maybe give my easy berry cobbler recipe a peek, but right now, we keep it cool!
Assembling the Graham Cracker Crust Jars
First up is the base! Grab those graham cracker crumbs, the 1/4 cup of sugar you set aside for the crust, and your 6 tablespoons of melted butter. Mix it all up really well until every crumb is coated—it should feel moist. Then, you need to gently divide that mixture evenly between your six jars. Use the back of a small spoon or a tiny measuring cup to really press that crust down firmly into the bottom. We need a solid base! Once pressed, pop those jars in the fridge while you work on the filling.
Preparing the Creamy Key Lime Filling
This is where the patience with the cream cheese pays off! Get that softened cream cheese (remember, nice and room temp!) into a big bowl and beat it until it’s totally smooth and no lumps remain. Now, slowly pour in the sweetened condensed milk while you keep mixing. Once those two are one happy, thick mixture, you can add in that fresh key lime juice, the zest, and the vanilla extract. Beat it until the mixture thickens up a bit—it will look looser now, but it firms up when it chills, I promise!
Layering and Setting the Individual Key Lime Desserts
Time to build! Take your jars out of the fridge and spoon that creamy lime mixture right over the crusts you made earlier. Try to keep it neat, but don’t worry too much, the whipped cream will cover any messy tops later! You need to seal these up and get them chilling for a minimum of four hours. This resting time is vital so your No Bake Key Lime Pie truly sets up. I often leave mine overnight!

Finishing with Whipped Cream Topped Jars
You only want to do this step right before you plan to serve them, otherwise that beautiful topping will start to weep. In a separate, clean bowl, whip your heavy cream and powdered sugar until stiff peaks form. Use a piping bag if you want fancy swirls, or just a spoon if you’re feeling rustic! Top each set jar with a generous dollop of whipped cream. You could even dust it lightly with extra lime zest if you’re feeling fancy. We want to serve these looking their absolute best!
Tips for Success with Your No-Bake Key Lime Pie Jars
I learned the hard way that while this recipe boasts zero bake time, it demands respect in fresh ingredient quality! My biggest tip for that incredible tartness is to skip the bottled concentrate whenever possible. Fresh key lime juice is totally brighter and zingier. If you can’t find tiny key limes, regular limes work, but you might need a tiny bit less juice overall. It’s all about balancing that shocking tartness with the sweetness of the condensed milk.
Also, think about your jars! I prefer the standard 8-ounce canning jars because they give you plenty of room for the crust, a thick slab of filling, and a generous final swirl of topping. Make sure those jars are squeaky clean before you start layering, because they become the serving vessel, right? If you’re making these ahead, don’t top them with the cream yet! Keep them chilled plain, and whip the cream fresh. Speaking of perfection, check out how I get my chocolate chip cookies perfectly chewy—the same dedication to quality makes these jars shine!
Storage and Making Ahead for Your Portable Key Lime Treat
This is truly where these little jars shine—they are my go-to for picnics or just having a delightful dessert waiting for me after a busy day. Because we didn’t bake anything, storage is super simple, but you do need to treat the whipped topping right.
If you need to make these ahead of time, which I highly recommend for easiest entertaining, you can absolutely assemble the crust and the creamy key lime filling up to two days in advance! Just don’t put the whipped cream topping on yet. Seal those jars tightly with their lids and keep them nestled in the back of the fridge where it’s coldest. That filling gets even better and firmer after a full 24 hours.
The best instruction for portability is this: make sure you use tight-sealing lids. If you’re taking these to the park or a friend’s backyard BBQ, they travel beautifully, but you must keep them chilled! The minute before you serve them, pull them out, top them with that fresh whipped cream, and hand them out. That’s what makes them the perfect Portable Key Lime Treat!
If you haven’t seen them yet, I also have a guide on mason jar layered salads—same principle, just way less sugar involved! But for dessert portability, these key lime jars beat everything.
Variations for This Easy Key Lime Dessert Recipe
The beauty of keeping things no-bake is how easily you can tweak them without worrying about oven performance, right? This Easy Key Lime Dessert Recipe is so foundational that honestly, you can play around with the layers a bit without messing up that perfect set structure. It keeps the tart flavor but gives you a fun little twist!
My favorite way to switch things up is totally in the crust. If you’re not a huge fan of graham crackers, don’t sweat it! You can absolutely swap them out for vanilla wafers—they lend this lovely, buttery cookie flavor that pairs surprisingly well with the sharp lime. You’ll use the same amount of crumbs and the same amount of melted butter, just the cookie base changes. Easy peasy!
Another thing I sometimes do when I’m feeling a bit more decadent is adding a warm spice note right into that lime filling mixture. Just a tiny pinch—maybe 1/4 teaspoon—of cardamom or even cinnamon when you add the vanilla extract can provide this subtle warmth that really contrasts beautifully with the chill of the pie. It sounds wild, but trust me, it elevates the whole flavor profile!
If you want to jazz up the topping, instead of just plain whipped cream, try folding in a teaspoon of coconut extract before you whip the cream. It gives you a hint of tropical flavor that just screams summer. Or, for a decorative touch, sprinkle a little extra lime zest right on top of the whipped cream right before serving. It looks professional, but it took literally zero extra effort!
For savory side dishes that can balance out all this sweet goodness, you absolutely have to look at my recipe for easy crunchy cabbage salad with zesty vinaigrette. You need something sharp and healthy after all that creamy lime!
Frequently Asked Questions About No Bake Key Lime Pie
You know, when I publish a recipe like this, especially a no-bake one, my inbox just floods with questions! It tells me people are excited to try it, which is the best feeling. Since these are Individual Key Lime Desserts, people often wonder about the logistics of getting them perfectly set without an oven. Here are the ones I hear most often about making this recipe work!
If you want something savory to go with your dessert prep, check out this easy cheesy rice recipe—it only takes 30 minutes!
Can I use bottled lime juice instead of fresh key lime juice in this No Bake Key Lime Pie?
Look, I know bottled juice is convenient—I totally get it when life is hectic! But here’s my honest opinion: for key lime pie, bottled juice tastes… well, it tastes like bottles. The fresh tartness from real key limes is really what makes this pie sing. If you absolutely have to use bottled, use it, but just know your final dessert won’t have that intense, bright zing we’re aiming for. Flavor-wise for this No Bake Key Lime Pie, fresh is the only way to go, truly!
What is the best type of jar to use for these Individual Key Lime Desserts?
I use standard 8-ounce canning jars, the simple ones you can find anywhere. They give you the perfect ratio of crust to filling to topping. You want jars that have a reliable two-piece lid system (the flat disc and the screw band). That reliable seal is what makes them the best Jar Desserts for portability—you can pop that lid on tight, stash them in the cooler, and they don’t leak at all. Just make sure the inside edges of the jar are totally clean before you layer everything up so the filling sticks nicely where it should!
Can I freeze the No-Bake Key Lime Pie Jars?
This is a fantastic question, especially if you’re meal prepping for a party! Good news: you absolutely can freeze the crust and the lime filling together. Once they are set in the fridge, seal those jars tightly and tuck them into the freezer for up to a month. However, you MUST thaw them in the fridge overnight before serving. And the big warning? Do not freeze the whipped cream topping! It just doesn’t thaw nicely; it gets watery and sad. Always whip your cream fresh in the morning you plan to serve them!
Estimated Nutritional Data for Single Serving Key Lime Pie
Now, I’m not a nutritionist, so please take these numbers with a big grain of salt—or maybe a big dollop of whipped cream! This data is just an estimate based on the standard ingredients I use, especially that wonderful sweetened condensed milk that gives us that creamy texture. If you swap out the crust or use lower-fat cream cheese, your numbers are going to shift, naturally. But for a standard serving of this rich protein cheesecake alternative (oops, I mean our lime pie!), here’s the general breakdown per jar:
- Serving Size: 1 jar
- Calories: 450
- Sugar: 40g
- Sodium: 250mg
- Fat: 28g
- Saturated Fat: 17g
- Carbohydrates: 45g
- Protein: 7g
Remember, this is a treat! It’s meant to be intensely flavorful and satisfying, so those numbers reflect a wonderfully decadent dessert. Don’t feel bad indulging in one of these! They’re worth every delicious, tart bite.
Share Your Perfect No-Bake Key Lime Pie Jars
Whew! We did it! We took simple ingredients and zipped them up into the tartest, creamiest, most portable summer magic you can imagine. Now that you have your beautiful Single Serving Key Lime Pie masterpieces chilling in the fridge, I really, *really* want to see them!
When you pull these out and top them with that glorious whipped cream, snap a picture! Tag me, share a story, tell me if you ended up using vanilla wafers instead of graham crackers, or if you managed to squeeze an extra lime in there for extra tartness. Your feedback helps everyone else who is nervous about making their first batch of Jar Desserts.
If you found this recipe helpful—if it saved you from turning on the oven or solved your dessert dilemma for the week—please leave a rating right down below! Five stars means the world to me because it tells me I succeeded in sharing a truly easy and satisfying lime dessert.
If you’re looking for another amazing make-ahead treat, I just perfected my recipe for the best sour cream coffee cake—it’s not an individual jar, but it is fantastic for sharing (or eating all week long!). Let me know your thoughts in the comments!
Print
No-Bake Key Lime Pie Jars
- Total Time: 25 min
- Yield: 6 servings
- Diet: Vegetarian
Description
Prepare individual servings of creamy, tart key lime pie without using your oven. This recipe layers a simple crust, a no-bake filling, and a whipped topping inside jars for easy serving and storage.
Ingredients
- 1 1/2 cups graham cracker crumbs
- 1/4 cup granulated sugar (for crust)
- 6 tablespoons unsalted butter, melted
- 1 (14 ounce) can sweetened condensed milk
- 1/2 cup fresh key lime juice (about 6-8 limes)
- 1 teaspoon lime zest
- 8 ounces cream cheese, softened
- 1 teaspoon vanilla extract
- 1 cup heavy whipping cream
- 2 tablespoons powdered sugar (for topping)
Instructions
- Prepare the crust: In a medium bowl, mix the graham cracker crumbs, 1/4 cup granulated sugar, and melted butter until fully combined.
- Divide the crust mixture evenly among 6 small (8-ounce) jars, pressing the mixture firmly into the bottom of each jar to form the base. Chill the jars for 10 minutes.
- Make the filling: In a large bowl, beat the softened cream cheese until smooth. Gradually beat in the sweetened condensed milk until fully incorporated.
- Add the key lime juice, lime zest, and vanilla extract to the cream cheese mixture. Beat until the filling is smooth and slightly thickened.
- Spoon or pipe the key lime filling evenly over the chilled crusts in the jars.
- Refrigerate the filled jars for at least 4 hours, or until the filling is set.
- Prepare the topping: In a separate bowl, beat the heavy whipping cream and powdered sugar until stiff peaks form.
- Spoon or pipe the whipped cream topping onto the set filling in each jar just before serving.
Notes
- For the best flavor, use freshly squeezed key lime juice instead of bottled concentrate.
- You can substitute vanilla wafers for graham crackers if you prefer a different crust flavor.
- These jars are portable; seal them tightly with lids and keep them refrigerated until ready to eat.
- Prep Time: 25 min
- Cook Time: 0 min
- Category: Dessert
- Method: No-Bake
- Cuisine: American
Nutrition
- Serving Size: 1 jar
- Calories: 450
- Sugar: 40
- Sodium: 250
- Fat: 28
- Saturated Fat: 17
- Unsaturated Fat: 11
- Trans Fat: 0
- Carbohydrates: 45
- Fiber: 1
- Protein: 7
- Cholesterol: 85

