Listen, if you think soft, chewy, restaurant-style naan is impossible to make at home without a giant, fiery tandoor oven, I’m here to set you straight! I used to think that too, honestly. Every time I tried making it, I ended up with something closer to thick pita bread than that pillowy goodness they serve in Indian restaurants. But oh boy, have I cracked the code!
This **naan bread recipe** is my absolute ticket to curry night success. It’s shockingly easy because we are ditching yeast completely—yes, you read that right! We’re using simple baking power and yogurt to get that gorgeous lift. This is my go-to, quick, stovetop method, and I’ve made it hundreds of times perfecting it for beginners just like you.
Why This Stovetop Naan Bread Recipe Delivers Soft Fluffy Naan
The real secret to getting that perfect, slightly charred, pillowy texture without a tandoor is all about harnessing the right chemical reaction quickly. That’s why this specific **naan bread recipe** shines! We skip the long proofing time yeast demands, which means you can have fresh bread on the table in about thirty minutes total. Trust me, once you nail this stovetop method, you’ll never want to order takeout naan again.
When I first started baking, I always felt intimidated by anything flatbread related, but this recipe removes all the guesswork. It guarantees a bread that is fluffy on the inside and has those beautiful smoky bubbles on the outside that look just like they came from a professional clay oven.
- No yeast required—it’s fast!
- Soft, chewy texture every single time.
- Requires only a basic cast-iron skillet.
- Perfectly tender for scooping up all your curry.
Achieving Chewy Flatbread Texture Without Yeast
So, how do we get that lift without yeast? It’s actually super simple: baking powder and plain yogurt are your best friends here. The baking powder is a chemical leavener, meaning it reacts immediately when it hits the liquid ingredients, creating those essential air pockets right when you mix the dough. That’s what gives you the volume.
But the yogurt is the real MVP for that beautiful chew. Yogurt has acidity, which tenderizes the gluten in the flour as you knead. The result? A **chewy flatbread** that isn’t tough or cracker-like. It keeps the final product wonderfully soft, which is what everyone wants from a great **naan bread recipe**.
Essential Ingredients for Your Easy Naan Bread Recipe
Alright, let’s talk about what you actually need for this killer **homemade naan bread recipe**. The beauty of this simple flatbread is that it uses pantry staples, so you probably have everything on hand right now! No specialty flours or weird imported items needed, which keeps this recipe fast and beginner-friendly.
I’ve listed everything out below. Pay close attention, because the quality of just a couple of these items makes a huge difference in how fluffy your final naan turns out. It’s not just about *what* you use, but *how* you prepare it!
- 2 cups all-purpose flour
- 1 teaspoon baking powder (make sure it’s fresh!)
- 1 teaspoon sugar (this helps feed the leavening reaction)
- 1 teaspoon salt
- 1/2 cup plain yogurt (and yes, full fat is highly recommended for the best results!)
- 1/4 cup milk (needs to be slightly warm, just lukewarm to the touch)
- 2 tablespoons oil or melted butter, plus more for brushing later
Ingredient Notes and Substitutions for Soft Fluffy Naan
Okay, now for the insider scoop on these ingredients. Don’t skip these little details; they are what elevate this from ‘okay bread’ to ‘amazing **soft fluffy naan**’!
First, the yogurt. You absolutely want full-fat yogurt if you can swing it. The higher fat content helps keep the final texture from getting tough or rubbery when you cook it on the skillet. Reduced-fat just doesn’t tenderize the dough the same way.
Second, check your baking powder! Since this **easy naan recipe** relies on it for all its lift, if your baking powder is old, your naan will be flat. If you are ever unsure if your baking powder is active, drop a teaspoonful into a little hot water; if it fizzes eagerly, you’re good to go. If it doesn’t react, toss it out and grab a new can.
Also, warm your milk just slightly, barely warm—not hot! Too-hot milk can actually kill the reaction from the leavening agents. If you wanted to try adding some extra flavor right into the dough itself, you could swap the 2 tablespoons of oil/melted butter for 2 tablespoons of olive oil when mixing in the wet ingredients. If you’re looking for other bread ideas that use dairy but in a different way, check out this Italian Herb and Cheese Bread Recipe—it’s another favorite!
Step-by-Step Instructions for Stovetop Naan Bread Recipe
Okay, buckle up, because this is where the magic happens! While the ingredient ratios are important in any **naan bread recipe**, the real payoff comes from how you handle the dough. Don’t worry if this feels a little different than making regular sandwich bread; the steps are quick and surprisingly straightforward. The entire active process flies by, which is why I love it for a weeknight!
We are going to mix, knead until it feels just right, let it relax for a moment, and then hit the hot skillet. Keep your pan nearby and ready to go before you finish rolling out your last piece of dough, because naan waits for no one!
Preparing the Quick Naan Dough Tutorial
First things first, grab that big bowl with your dry stuff—flour, baking powder, salt, and sugar. Whisk it all up really well. Now, you’re going to add your wet ingredients: the yogurt and the barely warm milk.
Mix it until it’s a shaggy mess. Don’t try to make it smooth in the bowl; that’s not its job! Dump that shaggy dough onto a lightly floured surface. Here’s where you need to put in a little elbow grease—knead it for about five to seven minutes. You are looking for it to transform from sticky and rough into something wonderfully smooth and elastic. You want that perfect feel before moving on! This texture is key to success in this **naan bread recipe**.
Once it’s smooth, divide it right away into six equal clumps. Roll each one into a little ball, cover them up with a clean kitchen towel—I use a dedicated pastry cloth—and let them rest for just ten minutes. That short rest lets the gluten relax, which is essential for the next step. You can find my full deep dive on creating the perfect dough texture in my naan dough tutorial!
Cooking the Skillet Naan Bread Perfectly
Time to heat up the pan! This is non-negotiable: use a heavy skillet—cast iron is dreamy here—and get it screaming hot over medium-high heat. I mean hot! Do NOT put oil in the pan; we need dry heat for that lovely blistering.
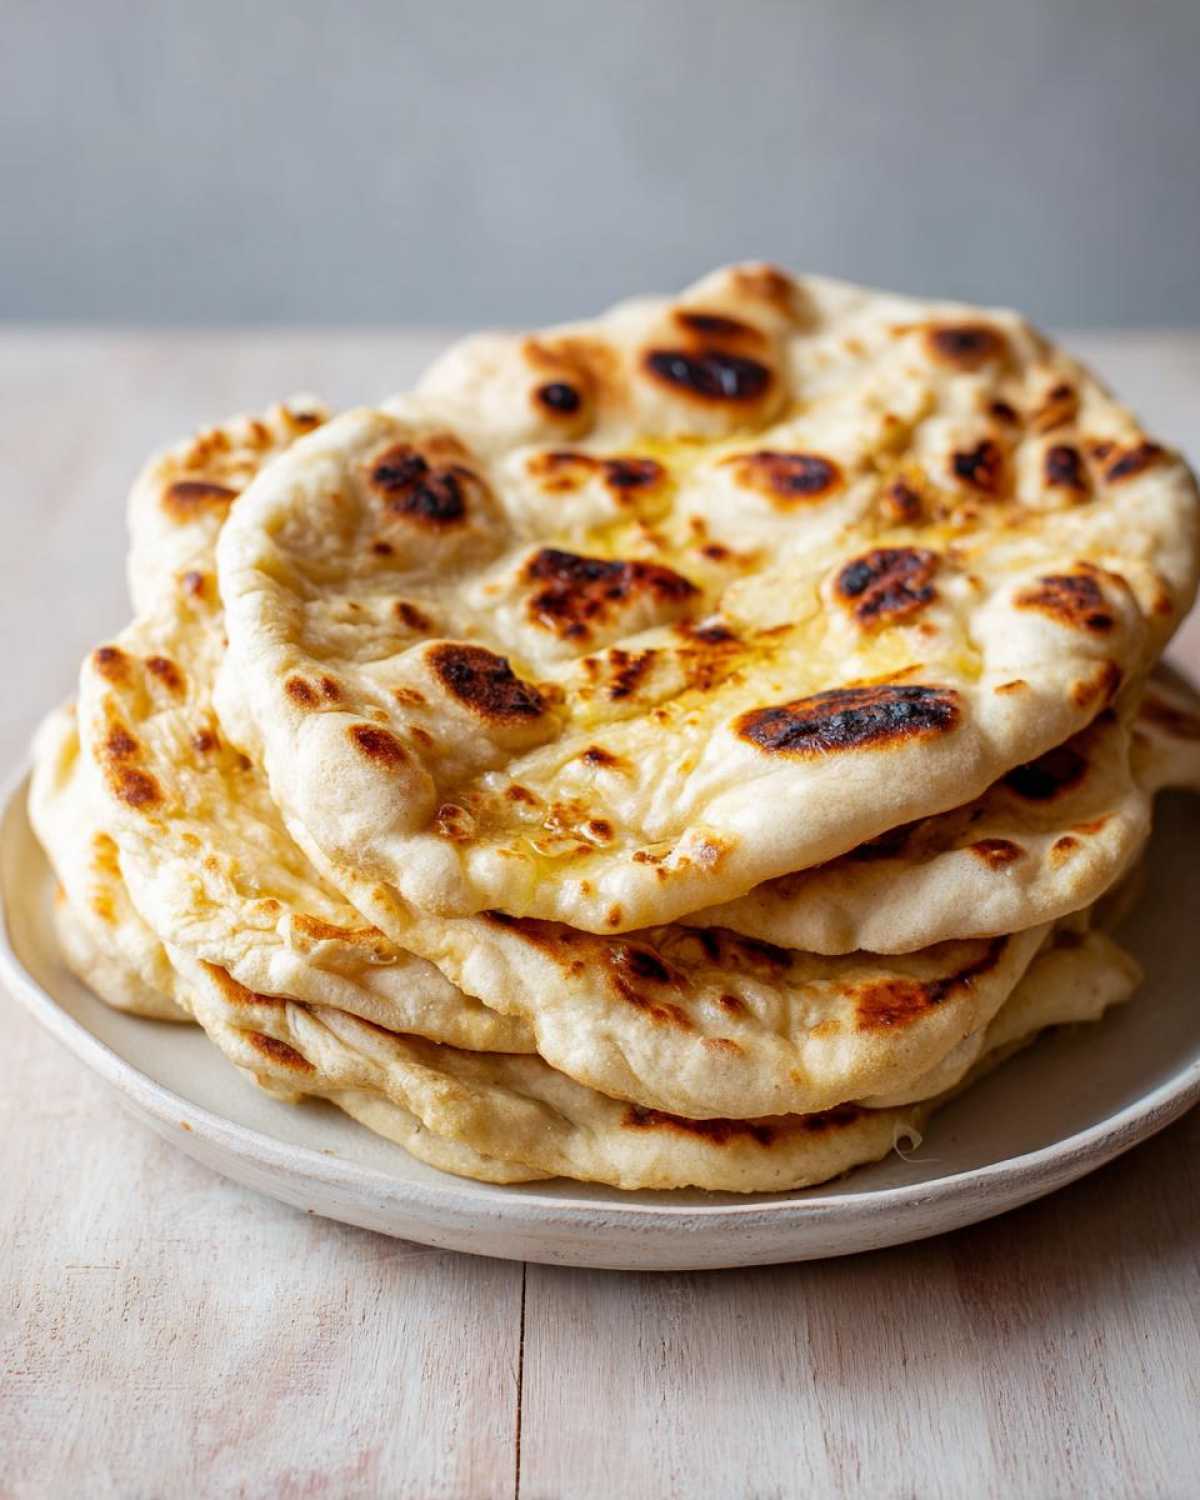
Take one dough ball and roll it out into an uneven oval or teardrop shape, keeping it thin—think about 1/8 of an inch thick. Lay that flatbread right onto the sizzling dry skillet. Wait about a minute to a minute and a half. You should see bubbles popping up all over the surface, and when you peek underneath, you want to see gorgeous brown spots appearing. That’s your cue!
Flip it over and cook the second side for just one minute more. If you get one gigantic air pocket, don’t panic! Just gently press it down with your spatula. This helps the heat distribute so the center cooks without drying out. Once browned, yank it off the pan immediately and brush it with melted butter. We want that **stovetop naan bread** to stay super soft, so stack them up and cover them lightly while you work on the next one. If you are aiming for quick results, I also have a guide for easy no-bake protein bars when you need speed!

Tips for Making the Best Homemade Naan Bread
I know you followed the steps, but I want to make sure you get the absolute *best* result possible on your **homemade naan bread** attempt! It’s all about the fine-tuning once you know the basics. The cooking surface makes a huge difference, so if you have one, pull out that cast-iron skillet. Cast iron holds heat better than anything else, which gives you those characteristic high-heat spots needed to puff the naan just right.
Once the naan comes off the skillet, time is crucial! You need to keep it warm and pliable so it doesn’t seize up and become stiff. I always stack the cooked pieces on a plate and cover them loosely with a clean kitchen towel. You can even wrap the whole stack loosely in foil. This gentle steaming keeps the exterior from drying out while you cook the rest of the dough.
If your dough was slightly too sticky when you were kneading, don’t automatically dump in a ton of extra flour when you roll it out later. That flour on the board will just make the naan tough. Instead, try just lightly dusting your hands and the rolling pin. If it’s still fighting you, let the dough balls rest an extra five minutes—that little break goes a long way!
For super chewy results, I always brush my naan with butter right after it comes off the heat. If you’re interested in other chewy baked goods, I swear by the technique in my best soft chewy chocolate chip cookies recipe!

Variations: Turning Your Naan Bread Recipe into Garlic Naan Recipe
You know I wouldn’t let you leave here without knowing the ultimate way to elevate this **naan bread recipe**, right? Plain naan is great for soaking up rogue sauce from your plate, but when you want that restaurant magic, you gotta go Garlic Naan. It’s so easy, and honestly, it smells incredible while you’re making it!
The key to making phenomenal **garlic naan recipe** versions is timing. You don’t want to mix the garlic into the dough; you want that fresh, sharp blast of flavor hitting the hot bread right when it comes off the skillet! This ensures you get that wonderful, **buttery naan** finish without burning the garlic while the bread cooks.
To get started, mince up about two cloves of fresh garlic—and I mean mince them until they are almost a paste. Melt four tablespoons of butter until it’s liquid gold. Now, mix that minced garlic right into the melted butter. That’s it! That’s your topping mixture.
As soon as a piece of naan comes off the hot cast iron—while it is still sizzling hot—take a pastry brush and generously coat the top surface with that garlic butter. The heat from the bread instantly warms the garlic and melts the butter deep into the porous surface, giving you incredible aroma and flavor. If you’re feeling extra fancy, sprinkle on some dried parsley or a light pinch of chili flakes before brushing! It’s heaven.
If you happen to love garlic in your main dishes too, you have to check out this Garlic Parmesan Chicken Bake Easy Recipe—it pairs perfectly with a stack of this fresh bread.
Serving Suggestions for Your Naan Bread for Curry
Now that you have a giant stack of **soft fluffy naan** sitting on your counter, the real fun begins: deciding what to eat it with! This bread was truly designed to be the vehicle for soaking up amazing sauce, and that means pairing it with the best of Indian cuisine. If you’re making a big pot of curry, this **indian bread recipe** is non-negotiable. It should be served warm, right off the heat, so it’s ready to tackle whatever deliciousness you put in front of it.
My absolute favorite companion is a rich, creamy Butter Chicken or maybe a slow-cooked Lamb Rogan Josh. The soft folds of the naan scoop up that thick sauce perfectly, and the slightly buttery flavor complements the spices so beautifully. Don’t be shy about using it to grab every last bit of sauce from the bottom of the bowl—that’s literally what naan is for!
But let’s not limit ourselves just to curry! This **quick flatbread recipe** is so versatile. If you make a simple lentil dal, this bread is absolutely mandatory for dipping. For something lighter, try using your warm naan as a base for homemade gyros or wraps. You can pile on leftover grilled chicken, some fresh onion, and a smear of yogurt sauce.
And here’s a little secret I learned when I made a massive batch of naan and couldn’t finish it all: it’s amazing for dipping into things that aren’t Indian too! Think about hummus, baba ghanoush, or even a creamy spinach dip. It’s just a fantastic, simple bread base. If you’re looking for a completely different, but equally cozy dish to serve alongside your bread, check out this Creamy Old-Fashioned Rice Pudding Recipe—it’s a great way to end a spicy meal!

Storage and Reheating Instructions for Chewy Flatbread
So, what happens when you manage to have leftovers of this incredible **homemade naan bread**? That’s a high-class problem to have, friend! The only tricky thing about leftover naan is that it can tend to get a little stiff or lose that super soft pliability it had when it was fresh off the skillet. We definitely want to maintain that **chewy flatbread** texture, so storing it correctly is important.
First, let the bread cool down completely. Don’t stick warm bread into an airtight container, or you’ll end up with a steamy, soggy disaster—nobody wants that! Once they are fully cool, stack them up and wrap them tightly in plastic wrap, and then place that stack inside a sturdy zip-top bag. Storing them this way keeps the ambient moisture locked in, preventing them from getting hard.
This **naan bread recipe** keeps really well on the counter for about two days when stored properly. If you are making a huge batch and you know you won’t eat it all within 48 hours, I highly recommend freezing whatever you won’t eat right away! Wrap individual pieces tightly in plastic wrap, then in foil, and toss them in the freezer for up to two months. They freeze beautifully, honestly!
Now, for the best part: reheating! You have two simple options, and I’ll tell you right now, the microwave is usually my last resort because it can sometimes steal that chewiness if you overdo it.
The stovetop method is superior for reviving that fresh texture. Just take the cooled naan, put it on that same hot, dry skillet you cooked it on before—no need to oil it—and heat each side for about 30 seconds. It warms right up, gets those little bubbles back, and regains its softness. If you are in a real rush (and I totally get it!), you can microwave a piece for just 10 to 15 seconds. Any longer than that, and I find it starts to get rubbery instead of delightfully chewy.
Frequently Asked Questions About This Naan Bread Recipe
I tried to cover everything in the recipe above, but I know when you’re trying out a new **naan bread recipe**, you always have a few burning questions. Don’t stress! These are the exact questions I got when I first shared this with my family. I’ve pulled together the most common ones so you can feel totally confident pulling off restaurant-quality flatbread right on your stovetop.
If you’re looking for something fast and don’t want to wait around for yeast to do its thing, this is definitely the way to go—it’s truly my favorite **quick flatbread recipe** for spontaneous snack times. And yes, you absolutely do not need yeast for this! We rely on that lovely baking powder magic here.
Can I skip resting the naan dough?
You totally *can* skip the resting time after kneading your **homemade naan bread** dough, but I really, really advise against it! Remember how much work you put into kneading it until it was smooth and elastic? Resting for just ten minutes allows the gluten network you just built to relax a bit. If you skip resting and try to roll it immediately, the dough will fight you every step of the way. It will shrink back constantly, making it super hard to get that thin rolled shape we need. You’ll end up with small, thick discs instead of lovely, thin naan, and the texture won’t be as tender!
What is the secret to restaurant style naan?
This is my favorite question because the answer is so accessible! The secret to getting that **restaurant style naan** isn’t some rare imported spice; it’s all about high, direct heat and the ingredients. You need a very hot, dry skillet—that’s why I push cast iron so hard! That intense heat causes rapid steam inflation, creating those signature bubbles before the bread has time to dry out.
The other two secrets, which we covered but are worth repeating, are the yogurt for tenderness and the quick cook time. You only cook each side for a minute or two! If you cook it too slowly, it dries out and becomes a cracker. Quick heat creates glorious blisters and keeps the center soft and chewy for the ultimate **naan bread for curry** accompaniment!
If you are really struggling with getting bubbles, sometimes people try adding a splash of club soda to the milk measurement—it adds extra CO2! For other easy baked treats, always check out my easy berry cobbler recipe with biscuit topping when you want a fruity dessert!
Estimated Nutrition for This Naan Bread Recipe
Just a friendly heads-up, these values are estimates based on the ingredients listed above, using standard white flour and full-fat yogurt. Homemade bread recipes can vary a tiny bit based on how much flour cling to your hands during kneading, but this should give you a good baseline for planning your meal!
- Serving Size: 1 piece
- Calories: 210
- Fat: 5g
- Saturated Fat: 2g
- Carbohydrates: 37g
- Protein: 6g
- Fiber: 1g
- Sugar: 1g
- Sodium: 350mg
Estimated Nutrition for This Naan Bread Recipe
Just a friendly heads-up, these values are estimates based on the ingredients listed above, using standard white flour and full-fat yogurt. Homemade bread recipes can vary a tiny bit based on how much flour cling to your hands during kneading, but this should give you a good baseline for planning your meal!
- Serving Size: 1 piece
- Calories: 210
- Fat: 5g
- Saturated Fat: 2g
- Carbohydrates: 37g
- Protein: 6g
- Fiber: 1g
- Sugar: 1g
- Sodium: 350mg

Easy Stovetop Soft & Fluffy Homemade Naan Bread (No Yeast Required)
- Total Time: 30 min
- Yield: 6 servings
- Diet: Vegetarian
Description
Make soft, chewy, restaurant-style naan bread quickly on your stovetop without using yeast. This simple recipe yields fluffy flatbread perfect for serving with curry.
Ingredients
- 2 cups all-purpose flour
- 1 teaspoon baking powder
- 1 teaspoon sugar
- 1 teaspoon salt
- 1/2 cup plain yogurt (full fat recommended)
- 1/4 cup milk (warm)
- 2 tablespoons oil or melted butter, plus more for brushing
Instructions
- In a large bowl, whisk together the flour, baking powder, sugar, and salt.
- Add the yogurt and warm milk to the dry ingredients. Mix until a shaggy dough forms.
- Turn the dough onto a lightly floured surface and knead for 5 to 7 minutes until the dough is smooth and elastic.
- Divide the dough into 6 equal pieces and roll each piece into a ball. Cover the balls and let them rest for 10 minutes.
- Heat a heavy-bottomed skillet or cast-iron pan over medium-high heat until hot. Do not add oil to the pan.
- Working with one ball at a time, roll it out into an oval or teardrop shape, about 1/8 inch thick.
- Place one rolled naan onto the hot, dry skillet. Cook for about 1 to 2 minutes until bubbles form on the surface and the underside has brown spots.
- Flip the naan and cook the second side for about 1 minute until lightly browned. If you see large bubbles, gently press them down with a spatula to help the bread cook through.
- Remove the cooked naan from the skillet and immediately brush the top surface with melted butter or oil.
- Repeat with the remaining dough balls, stacking the cooked naan and covering them lightly to keep them warm and soft.
Notes
- For Garlic Naan, mix 2 cloves of minced garlic with 2 tablespoons of melted butter and brush this mixture onto the naan immediately after cooking.
- If your dough seems too dry, add milk one teaspoon at a time. If it is too sticky, add flour one teaspoon at a time.
- Use a cast-iron skillet for the best heat retention and browning results.
- Prep Time: 15 min
- Cook Time: 15 min
- Category: Side Dish
- Method: Stovetop
- Cuisine: Indian
Nutrition
- Serving Size: 1 piece
- Calories: 210
- Sugar: 1
- Sodium: 350
- Fat: 5
- Saturated Fat: 2
- Unsaturated Fat: 3
- Trans Fat: 0
- Carbohydrates: 37
- Fiber: 1
- Protein: 6
- Cholesterol: 5