
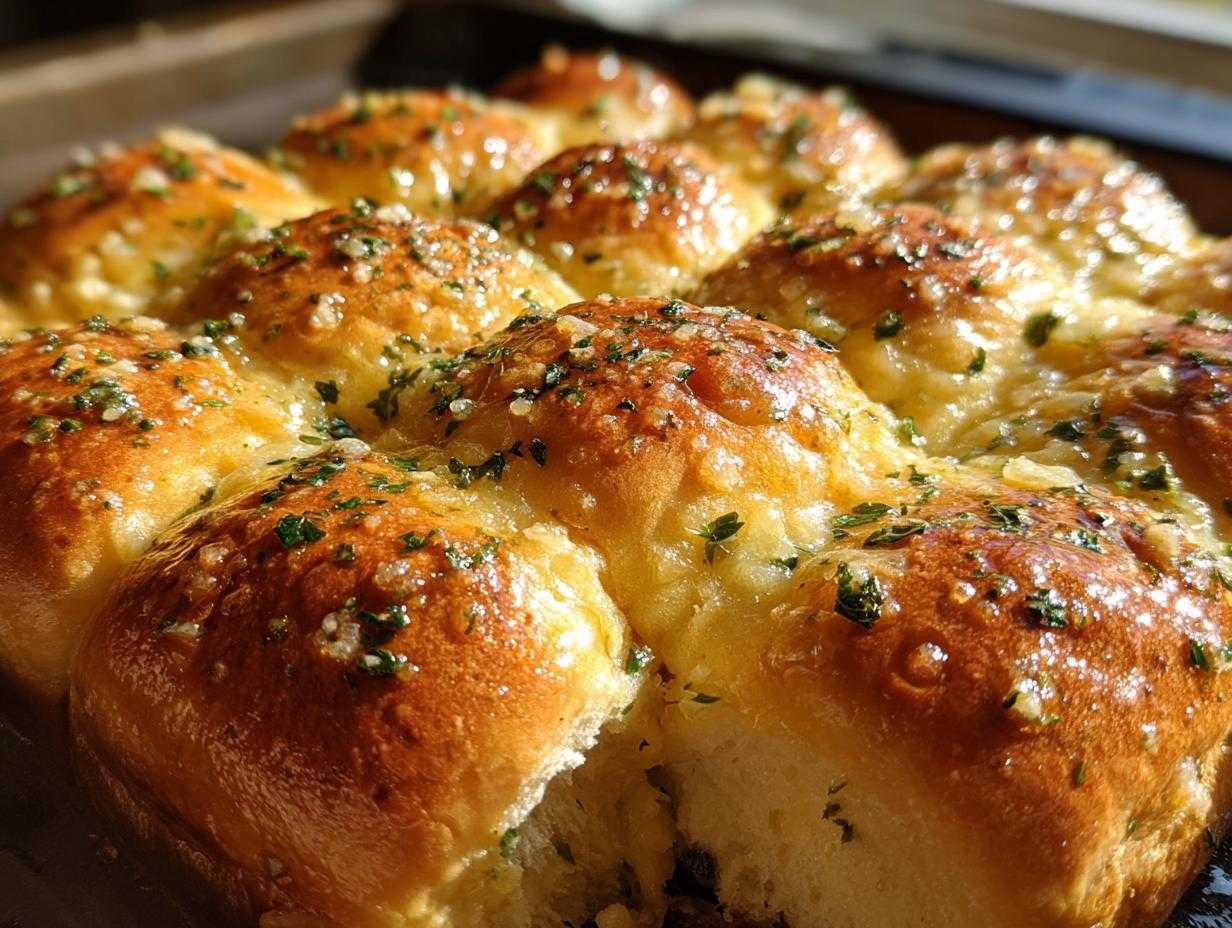
Listen, game day is coming, or maybe it’s just Tuesday and you need dinner on the table in thirty minutes flat, but you want it to *feel* special. That is when you need the magic touch of Pull-Apart Ham and Cheese Sliders. Seriously, these things vanish faster than free appetizers at a wedding reception! This recipe has become my go-to secret weapon for feeding a crowd without breaking a sweat. I swear, every time I pull that foil off the pan, the whole room just gravitates toward the warm, cheesy smell.
What makes them unbeatable? It’s the combination: those slightly sweet dinner rolls—you know the ones I mean—loaded up with salty ham, gooey cheese, and then drowned in the most savory, garlicky butter you can imagine. They are simple, they are fast, and they are dangerously cheesy. Trust me, bookmark this one right now because you are going to be using it all year long.
Why You Will Love These Easy Ham and Cheese Sliders
Honestly, I don’t know why I ever made individual sandwiches before figuring out this slider hack. Once you try making these, you’ll never look back. They are just pure, customizable comfort food delivered in one easy pan. If you’re looking for the best appetizer that everyone asks for again and again, these Easy Ham and Cheese Sliders are it.
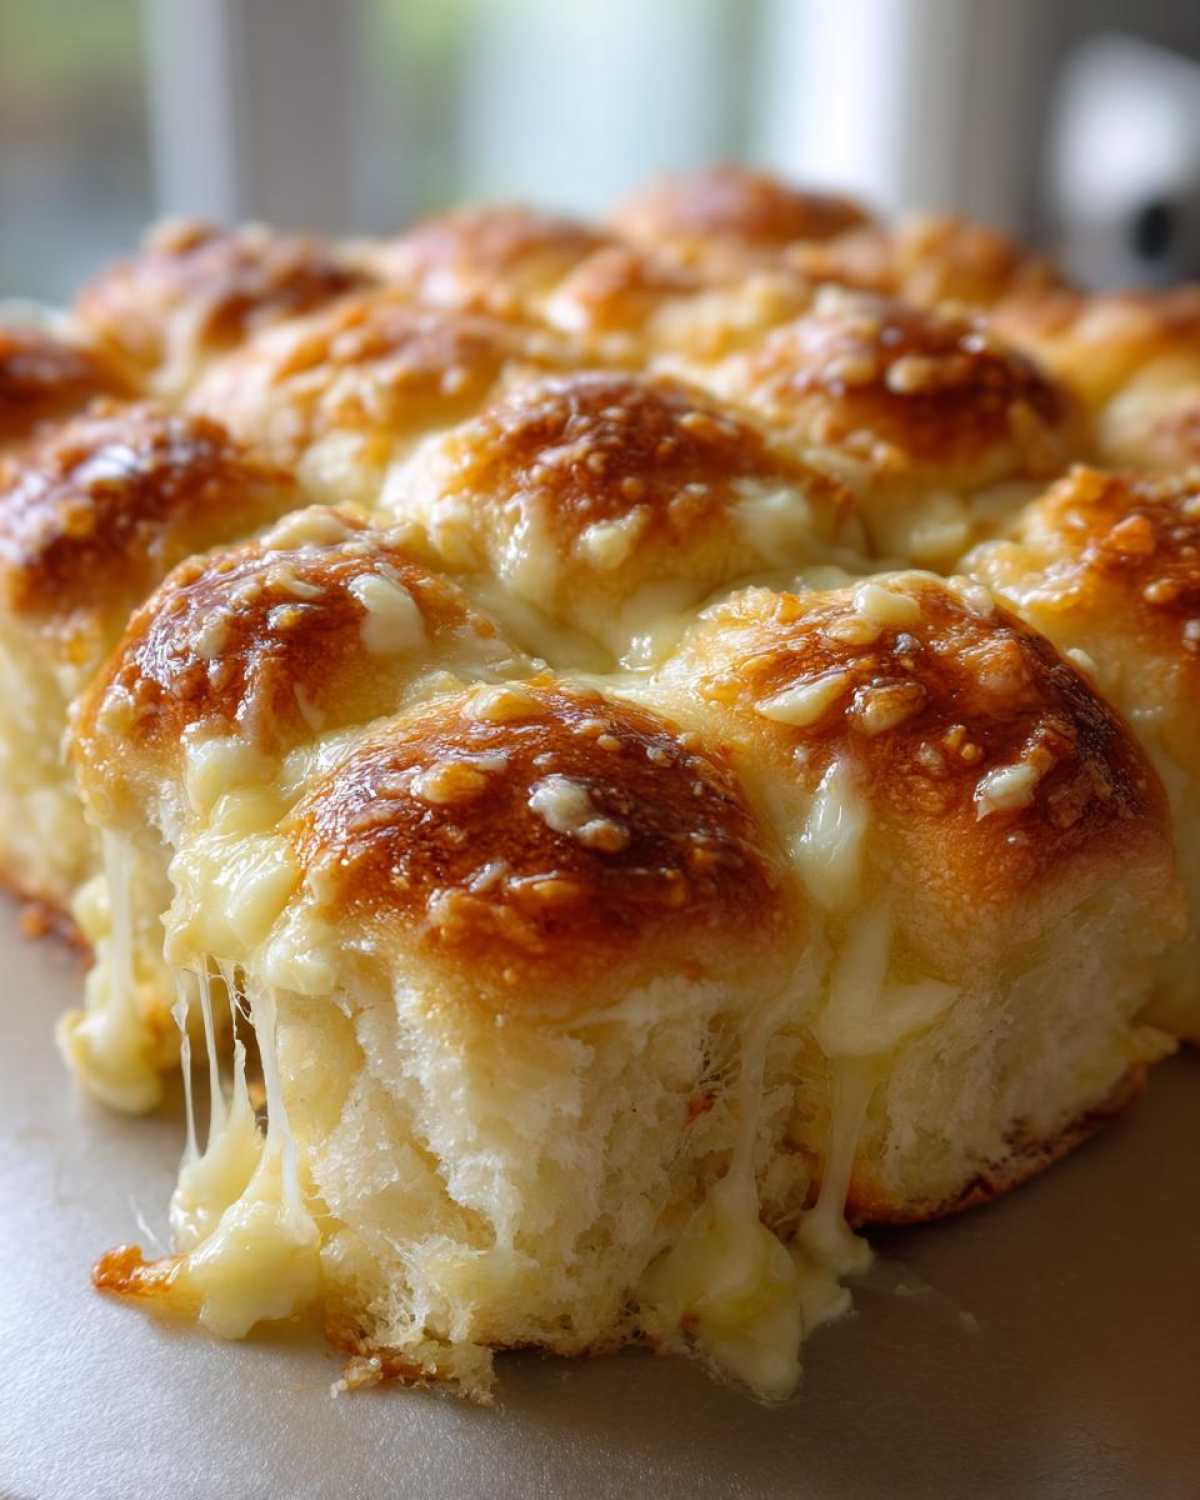
- They are incredibly fast! Prep is literally less than ten minutes if you’re moving quickly. We’re talking hot, bubbly cheese in under half an hour total.
- Talk about a crowd-pleaser! These are required reading for any successful Game Day Food Ideas spread. They are always the first things gone.
- The flavor profile is just addictive—the savory ham and salty cheese perfectly balance the sweetness of the rolls. It’s that contrast that gets you hooked!
- Cleanup is a one-pan job! Seriously, just toss the baking dish in the sink; no individual assembly required here.
- They hold up beautifully. If you need something that can sit out (or even warm gently on a slow cooker) during a party, these are your MVP.
- They are so easily customizable. You can swap the cheese, dollop on some extra mustard, or add a light layer of mayo underneath the ham if you want even more moisture.
If you need more quick game-time inspiration once you’ve mastered these, make sure you check out my list of 18 Easy Summer Appetizers Everyone Will Enjoy—a few of those would look great right alongside these sliders!
Gathering Ingredients for Perfect Pull-Apart Ham and Cheese Sliders
Okay, this is the best part—the ingredient list is so short, you probably have most of this stuff sitting in your fridge right now. That’s why I call this the ultimate emergency party food! When you are assembling your Pull-Apart Ham and Cheese Sliders, remember that simplicity means the quality of what you use really shines through, especially with the rolls.
For the absolute best texture, you want those sweet dinner rolls, like King’s Hawaiian, or a similar brand. Don’t skimp on the rolls! They are the base, and their slight sweetness turns absolutely heavenly when baked under that garlic butter. Make sure your meat and cheese are thinly sliced; it helps everything melt evenly and keeps the sliders from getting too tall and messy.
Here is what you need to grab for a full 12-pack of cheesy perfection:
- One 12 count package of those sweet dinner rolls—you need the whole package!
- About one pound of thinly sliced deli ham. Don’t grab chunks; thin slices layer up so much better.
- One whole pound of sliced cheese! I usually use Swiss because it melts like a dream, but Provolone is fantastic too.
- For the topping magic: 1/2 cup (that’s one full stick) of unsalted butter that you’ll melt down.
- Two tablespoons of Dijon mustard—I love that little bit of tang!
- One small splash of Worcestershire sauce—don’t skip this, it adds serious depth.
- One teaspoon of dried minced onion.
- One teaspoon of garlic powder. It’s essential for that “garlic butter” flavor profile.
- And optionally, just a half teaspoon of poppy seeds sprinkled on top at the very end. They give the crust a little something extra!
See? That’s it! We’re not boiling anything or making complex sauces. Just pure, concentrated cheesy goodness waiting to happen.
Mastering the Garlic Butter Ham Sliders Preparation
Alright, let’s get down to business! This is where the magic truly happens for our Pull-Apart Ham and Cheese Sliders. We’re going from a pile of rolls to a fully assembled, ready-to-bake masterpiece in about ten minutes flat. Don’t rush the layering, because that’s what makes sure every single slider is equally delicious when the time comes to pull them apart.
Prepping the Rolls and Baking Dish
First things first, crank that oven up to 350 degrees Fahrenheit and lightly grease your 9×13 dish—you don’t want *any* sticking happening! The key move here is slicing the entire block of rolls right down the middle horizontally, top half separating from the bottom half. Keep them connected at the sides though! That connected structure is what makes them the beautiful pull-apart creation we want them to be.
Layering Ham and Cheese for Your Pull-Apart Ham and Cheese Sliders
Gently set the bottom half of those connected rolls into your prepared dish, cut-side up. Now, take your beautiful stacks of ham and arrange them evenly right over those bottom rolls. Don’t clump it up! Then cover the ham completely with all of your cheese slices. We want perfectly Cheesy Baked Rolls all the way across, so spread that ham and cheese edge-to-edge. Next, pop the top half right back on like a little sandwich lid.
Creating the Flavorful Garlic Butter Topping
This topping transforms everything, honestly. Grab a small bowl and whisk together your melted butter, that Dijon mustard, the splash of Worcestershire sauce, the garlic powder, and the dried onion. You need to whisk it well so those flavors emulsify a bit. My trick—and this is where you earn your baker’s badge—is to evenly brush *every single square inch* of the top roll surface with this mixture. I mean every corner! If you miss a spot, that piece will be dry at your party. Once it’s totally saturated, go ahead and sprinkle on those optional poppy seeds. Before covering, I love to sneak a peek at what I’m making and think about how good the Garlic Butter Sausage Bites taste—this topping is just as good!
Baking Instructions for Tender Pull-Apart Ham and Cheese Sliders
Now we get to watch the magic happen! Baking is what turns a pile of ingredients into the ultimate Pull-Apart Ham and Cheese Sliders. The secret here is a two-stage process. We trap the steam first, which means the rolls get soft and soak up all that garlic butter goodness, and then we finish with a burst of heat to get that gorgeous golden crust.
The Covered Bake Stage
This is critical for tenderness! Take that foil you already got out and cover the entire baking dish tightly. Pop the whole thing straight into the 350-degree oven and let it bake for about 15 minutes. This covered time is what steams the rolls just enough so they aren’t dry or hard. It melts all that cheese deep down so you get those gooey pockets inside your Pull-Apart Ham and Cheese Sliders!
Finishing the Baked Ham and Cheese Sandwiches
After 15 minutes, carefully take the aluminum foil off—watch out for hot steam! We need a little color now, right? Bake them uncovered for another 5 to 10 minutes. You are looking for two things: the cheese must be totally liquidated and bubbly, and the tops of the rolls should be lightly golden brown and crisping up nicely. Don’t just yank them out when the cheese melts, give them that extra time! After they come out, let these gorgeous Baked Ham and Cheese Sandwiches rest for five minutes right on the counter. I know you want to dig in right away, but resting lets the cheese set up just slightly, so they pull apart cleaner instead of oozing everything out onto the platter.
If you love quick cooking methods like this, swing by my central hub for Quick and Easy Recipes—there are dozens of great meals waiting for you there!
Tips for the Best Pull-Apart Ham and Cheese Sliders
Okay, you’ve mastered the main bake, but I want to make absolutely sure your Pull-Apart Ham and Cheese Sliders are legendary the next time you serve them. A good recipe is great, but an unforgettable one comes from those little insider secrets, you know? I always tweak things based on what I have on hand or what kind of party I’m hosting. These little tips move the recipe from just ‘good’ to ‘why haven’t you made these sooner?!’ territory.
Ingredient Swaps and Flavor Boosts
While I’m loyal to Swiss or Provolone because they melt so perfectly—seriously, that stretch factor is impressive!—don’t be afraid to mix it up. If you’ve got sharp white Cheddar or creamy Monterey Jack, toss those in! They have less flavor impact than Swiss, but they bring a different kind of gooey texture. Also, if you’re out of Dijon mustard for the topping, plain yellow mustard works in a pinch, but you might want to add an extra pinch of salt to the butter mixture to account for the flavor difference.
Here’s another little trick I learned: before I layer my ham, I sometimes smear a super thin layer of mayonnaise on the bottom rolls. Don’t worry, you won’t taste the mayo once it bakes under all that cheese and garlic butter, but it adds a richness and extra barrier against any potential dryness. It’s truly a game changer for texture. If you like adding little fancy bites for guests, you should check out my recipe for my Burrata Prosciutto Crostini—it’s totally different but equally impressive!
Serving and Keeping These Party Appetizer Sliders Warm
The biggest problem with the best Party Appetizer Sliders is that they get cold too fast when you’re entertaining! If you are making these for a long football marathon, don’t just leave them sitting out on a plate getting tepid. Once these Pull-Apart Ham and Cheese Sliders are cooked, transfer the whole pan right into your slow cooker.
Set the slow cooker to the lowest ‘Warm’ setting. They will stay perfectly warm, the cheese will stay soft (not hardened rock), and they stay delicious for hours. Just make sure you don’t leave them on ‘High’ or you’ll end up with a slightly dried-out bottom layer, which is nobody’s fault but your own for rushing the process, right?
Serving Suggestions for Your Savory Pull Apart Bread
Once you pull these amazing rolls apart, you suddenly realize you need something to balance out all that savory, salty, buttery richness, don’t you? That’s where pairing comes in! These Savory Pull Apart Bread sliders can honestly stand alone as a meal, but they are way better with a crisp side dish to cut through the fat and cheese. Because they are so rich, I always lean toward something bright or acidic to keep things interesting on the plate.
If you’re serving these up for a weekend lunch or a big party spread, here are the things I always make to go alongside them—they complete the whole comfort food picture.
For something really hearty that soaks up any extra butter dripping from the pans, I absolutely adore a good potato salad. Forget those watery, gloppy versions; I make my famous Steakhouse Potato Salad Recipe which is loaded with herbs and a little tang. It feels substantial next to the sliders.
But if you want something lighter to offer contrast? You have to go green. I often whip up a super simple salad. Something like a Fennel and Orange Salad works miracles! The sweetness of the orange and the light crunch of the fennel completely wake up your palate after all that melted Swiss cheese.
And let’s not forget simple stuff! A bowl of crunchy dill pickles or some tangy, sharp coleslaw makes a fantastic side. Even just a big bowl of kettle-cooked sea salt chips for dipping into whatever sauce drips down onto the platter works perfectly well. Sometimes simple is best when the bread is already doing most of the heavy lifting!
Storage and Reheating Instructions for Leftover Pull-Apart Ham and Cheese Sliders
I hardly ever have leftovers of these Pull-Apart Ham and Cheese Sliders—seriously, they disappear—but when I do, it’s a glorious moment because reheat leftovers are almost as good as fresh!
First off, you need to store them properly. Once they are completely cool, don’t just wrap the whole baking dish; that traps moisture and makes them soggy later. Transfer any remaining sliders into an airtight container. You can separate them, but honestly, I usually just keep them together so they stay attached. They’ll be good in the fridge for about three to four days. Once you realize you have leftovers, all you need is a plan to revive that garlic butter crust!
And hey, if you are already planning ahead to avoid scrambling later, you should check out my tips on Make Ahead Party Food—these sliders definitely fall into that category if you prep them early!
When you are ready to bring them back to life, *do not* default to the microwave unless you are in a huge rush. The microwave heats them fast, but you get that rubbery texture which we absolutely want to avoid here.
Reheating the Leftovers
If you stored them in the fridge, pull out what you want to eat and let them sit on the counter for about 20 minutes just to take the chill off. Preheat your oven to a much lower temperature, maybe 300 degrees Fahrenheit. Place the leftovers (still connected if possible) on a small baking sheet or back in their original dish. Cover them loosely with foil.
Bake them covered for about 10 minutes. Then, take the foil off for the last 3 to 5 minutes. This gentle reheat warms the meat and melts the cheese again without burning the tops. If you are truly timing crunched and have to use the microwave, use short 15-second bursts, flipping the slider halfway through each burst. It’s not ideal, but it works in a pinch when you just need a quick, cheesy bite!
Frequently Asked Questions About Hawaiian Roll Sliders Recipe
I always get a ton of questions when people try this recipe for the first time, which I love! It means you’re taking the time to make sure they turn out perfect. These little sliders are so versatile, which means there are lots of ways people want to adapt them. Here are the main things folks ask when they are getting ready to make their first batch of Hawaiian Roll Sliders Recipe.
Can I prepare the Hawaiian Roll Sliders Recipe ahead of time?
Oh yeah, you absolutely can! I often feel like I’m running around right before guests arrive, so making things early is key. You can assemble the entire thing—rolls sliced, ham and cheese layered—in your baking dish. Just cover it tightly with plastic wrap instead of foil. Keep it in the fridge for up to 24 hours. When you are ready to bake, pull it out about 30 minutes beforehand to take the chill off before you cover it with the foil and bake. If you’re planning on using the slow cooker method, you can assemble them a bit closer to serving time, too! If you need more ideas on planning parties, check out my guides for make ahead party food.
What cheese is best for these Easy Ham and Cheese Sliders?
This is where some debate happens, but I stick to the classics for the best melt. Swiss and Provolone are my top recommendations for these Easy Ham and Cheese Sliders because they have a fantastic stretch factor and a relatively mild flavor that lets the garlic butter and ham shine. They melt creamy and smooth, which is exactly what you want holding those layers together.
However, if you like a sharper flavor, try sharp white Cheddar! It’s delicious, but you might need to nudge the baking time slightly longer to ensure it fully incorporates. You can even mix half Swiss and half Cheddar for the best of both worlds—gooey and zesty!
I often get asked about turkey instead of ham; yes, you can totally swap it for turkey breast! Just make sure you are using high-quality deli meat. We aren’t trying to make chewy bread with dry deli slices, remember!
Nutritional Estimates for Pull-Apart Ham and Cheese Sliders
Now, I hate to ruin the party-mood, but since you asked, I took the time to compile the basic nutritional breakdown for these incredible Pull-Apart Ham and Cheese Sliders. Please, take these numbers with a giant grain of salt—or maybe a big sprinkle of garlic powder, that’s more my style!
Because these are loaded with meats, cheeses, and those rich sweet rolls, they definitely lean towards being decadent. These estimates are based on exactly the recipe I wrote above—using the 12-count package and the specific amounts of ham and cheese listed. If you use leaner turkey or less butter, your numbers will change! This table is just a guide for my fellow data-loving friends.
Here’s what the numbers look like per single slider, based on the recipe yields:
- Serving Size: 1 slider
- Calories: About 280 (Yikes, but worth it!)
- Total Fat: 14g (That’s where the cheesy goodness lives!)
- Saturated Fat: 7g
- Carbohydrates: 25g
- Protein: 14g
- Sugar: 8g (Mostly from those beautiful rolls.)
- Sodium: 750mg (Ham and cheese are salty, so this makes sense.)
See? They are hearty! They are definitely more of a meal or a game-day powerhouse than a light snack. But honestly, when you bite into that warm, savory, gooey center of your Pull-Apart Ham and Cheese Sliders, you aren’t thinking about the carbs—you’re just planning on grabbing the next one!
Share Your Best Ham and Cheese Sliders Experience
Whew! We made it through the whole shebang! I gave you all my secrets for making these perfect Pull-Apart Ham and Cheese Sliders—from layering the cheese just right to turning off the heat exactly when you should. Now I want to hear all about what you’re going to do with yours!
Don’t keep all this deliciousness a secret! I truly love seeing your creations pop up online or hearing about how they saved your last party night. Did you stick strictly to my garlic butter recipe, or did you try that mayo trick I mentioned underneath the ham? Did Cheddar steal the show over Swiss?
Seriously, leave me a comment down below! Rate this recipe out of five stars if you loved how easy they were. Tell me what you served alongside your warm, cheesy rolls. Are you team Pickle Spear or team Creamy Coleslaw when it comes to balancing out the richness? I want all the details!
Go forth, bake some magic, and tag me in your photos so I can drool over your beautiful homemade batch of cheesy goodness!
Print
Baked Ham and Cheese Pull-Apart Sliders with Garlic Butter
- Total Time: 35 min
- Yield: 12 servings
- Diet: Vegetarian
Description
Make easy, cheesy ham and cheese sliders baked in a savory garlic butter sauce on sweet rolls.
Ingredients
- 1 (12 count) package sweet dinner rolls (like Hawaiian rolls)
- 1 pound thinly sliced deli ham
- 1 pound sliced Swiss cheese or Provolone cheese
- 1/2 cup (1 stick) unsalted butter, melted
- 2 tablespoons Dijon mustard
- 1 tablespoon Worcestershire sauce
- 1 teaspoon dried minced onion
- 1 teaspoon garlic powder
- 1/2 teaspoon poppy seeds (optional)
Instructions
- Preheat your oven to 350 degrees Fahrenheit. Lightly grease a 9×13 inch baking dish.
- Slice the entire package of rolls in half horizontally, keeping the rolls connected as much as possible. Place the bottom half of the rolls cut-side up in the prepared baking dish.
- Layer the ham evenly over the bottom half of the rolls. Top the ham with all the cheese slices.
- Place the top half of the rolls onto the cheese layer.
- In a small bowl, whisk together the melted butter, Dijon mustard, Worcestershire sauce, dried minced onion, and garlic powder.
- Spoon or brush the butter mixture evenly over the top of the assembled rolls. Sprinkle with poppy seeds if you are using them.
- Cover the baking dish tightly with aluminum foil.
- Bake for 15 minutes covered.
- Remove the foil and bake for another 5 to 10 minutes, or until the cheese is fully melted and the tops are lightly golden brown.
- Let the sliders rest for 5 minutes before pulling them apart and serving hot.
Notes
- You can substitute cheddar or Monterey Jack cheese for Swiss or Provolone.
- For extra flavor, add a thin layer of mayonnaise or yellow mustard to the bottom roll halves before adding the ham.
- These sliders hold well in a slow cooker on the ‘warm’ setting for serving at parties.
- Prep Time: 10 min
- Cook Time: 25 min
- Category: Appetizer
- Method: Baking
- Cuisine: American
Nutrition
- Serving Size: 1 slider
- Calories: 280
- Sugar: 8
- Sodium: 750
- Fat: 14
- Saturated Fat: 7
- Unsaturated Fat: 7
- Trans Fat: 0.3
- Carbohydrates: 25
- Fiber: 1
- Protein: 14
- Cholesterol: 35

