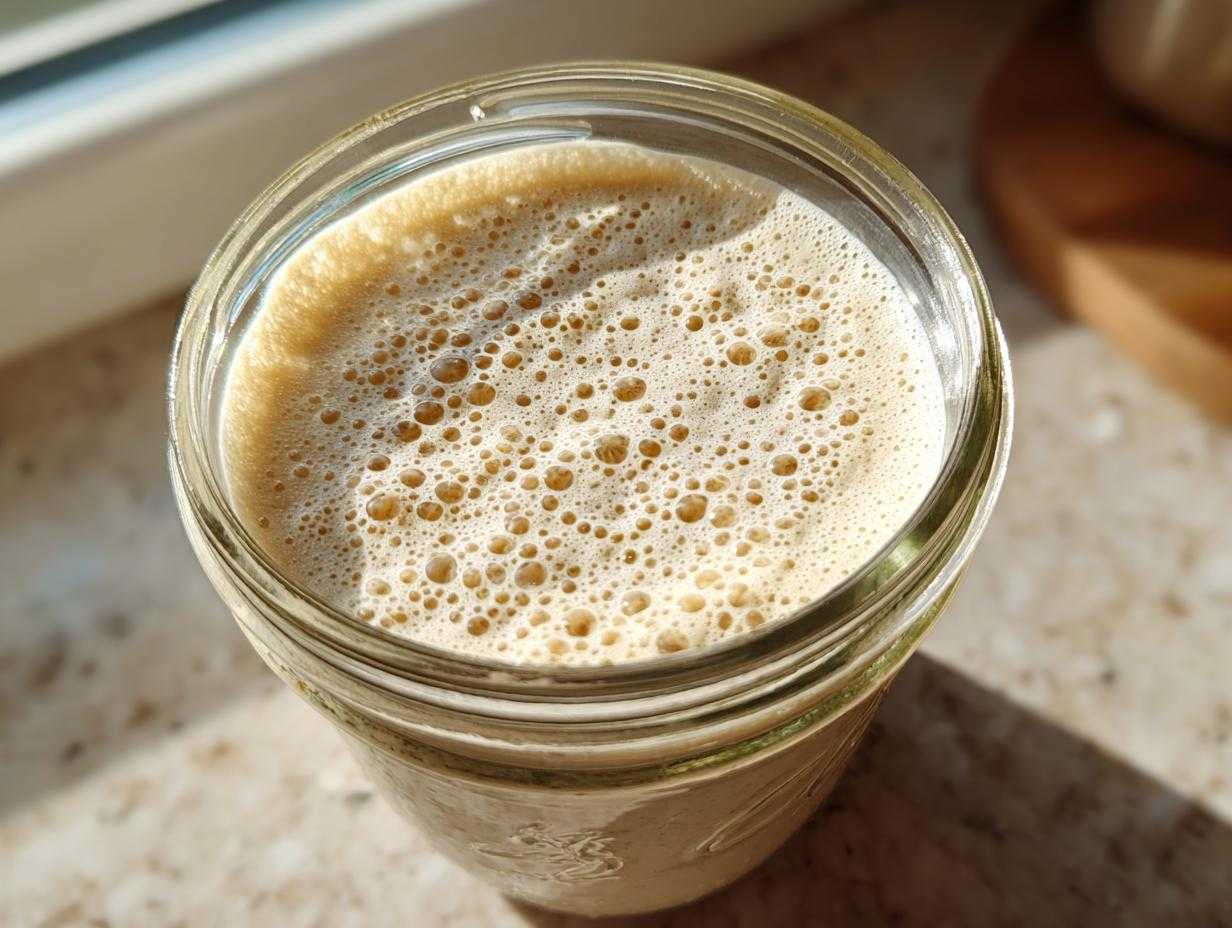
Forget those scary bags of commercial yeast! There is something truly magical happening inside a simple jar mixed with just flour and water—it’s wild yeast, breathing life into bread. When I first tried making my own sourdough starter, I thought I needed a science degree, but honestly, it’s so much easier than people make it sound. I messed up the first few attempts, I really did! But once I understood the rhythm, it was smooth sailing. Trust me, you absolutely do not need to be an expert baker to pull this off. This is my ultimate, foolproof, day-by-day guide to creating your very own healthy sourdough starter from scratch. By next week, you’ll be cultivating true, bubbly goodness!
Why This Sourdough Starter Guide for Beginners Works
I designed this routine specifically because I know how intimidating the whole process can look online. We keep things super simple, focusing on just daily attention rather than complex temperature control. You’re only locking into a solid 7-day routine, and then you’re set for life!
We work with the texture and needs of the wild yeast as they wake up:
Simple Ingredients for Your Sourdough Starter
Seriously, that’s it! Flour and water. The *only* thing you absolutely cannot skip is using unchlorinated or filtered water. Chlorine is sneaky and kills the wild yeast before they even have a chance to settle in. If you forget to buy bottled water, just boil tap water and let it sit out on the counter overnight to evaporate the chlorine—easy fix!
Essential Equipment for Sourdough Starter Creation
Don’t go running out to buy fancy gear! You only need three things to get this wild yeast culture going strong. You probably have them hiding in your kitchen right now. If you decide you are loving this, you can check out my favorite whole wheat bread starter recipe later.
- A clean glass jar (pint or quart size works great; clear is best so you can see the action!).
- A kitchen scale for accuracy—measuring by weight is a game-changer for starters.
- A rubber spatula or wooden spoon for mixing.
Ingredients for Your Homemade Sourdough Starter Instructions
Okay, let’s get down to what you actually need to mix together. I know, I know, the waiting part is the hardest, but having your ingredients measured out first makes Day 1 a breeze! We start with whole grain flour because it’s packed with the natural microbes our little yeast buddies love, and then transition once things get rolling.
If you have a digital scale, please use it! It makes the discarding and feeding process so much neater and ensures you are using the exact ratios needed to keep your wild yeast happy. Accuracy matters more here than in almost any other recipe!
- 100g Whole Wheat or Rye Flour (This is for the first few days only, trust me on this!)
- 100g Unbleached All-Purpose Flour (This is what we switch to once the initial action starts)
- 100g Unchlorinated Water (Room temperature is best—think bathwater, not scorching hot!)
That’s it! If you feel like you need a more in-depth look at why I choose these flours, I laid out all the details in my favorite flour guide. But for Day 1, just stick to the list above!
The 7-Day Sourdough Starter: How to Make Sourdough Starter Day by Day
This is it, the main event! I call this the most patient week of your life. But don’t worry, you’re not actually *baking* anything yet; you are just feeding your little wild yeast colony until it gets strong enough to bake a loaf worthy of taking a picture of. We are following the slow, steady process of how to make sourdough starter day by day, and I promise, if you stick to the discarding (which feels brutal at first, I know!), you will see results.
Remember when I said we love adding ingredients for texture? Well, when you’re ready for something truly delicious after this starter is done, you have to check out my Italian Herb and Cheese Bread—it’s the best savory loaf!
Days 1 & 2: Starting Your Sourdough Starter Culture
For the very first mix, grab that whole wheat or rye. We use 50 grams of flour and 50 grams of water. Mix it up in your clean jar until it looks like thick pancake batter. It’s going to smell… well, like flour paste. That’s normal! Now, cover it loosely. This is crucial: you need to let air in because those wild yeasts need oxygen to wake up and start multiplying! Don’t seal it tight, or you’ll crack your jar next week when the gas builds up.
On Day 2, you might see a few tiny bubbles, or nothing at all. If you see zero activity, don’t panic! It’s alive, but it’s just grumpy from being mixed up. We proceed the same way: scrape off about half of what’s left, and feed the rest exactly 50g flour (still whole wheat) and 50g water. Give it a good stir and let it relax for 24 hours.
Days 3 & 4: First Signs of Activating Sourdough Starter
Okay, this is where things get exciting! On Day 3, we ditch the heavy whole grain flour and switch over to the all-purpose, unbleached stuff. Repeat the discard-and-feed process: take out about half, then add 50g AP flour and 50g water. By Day 4, you should *really* start seeing some signs of life! You might see small bubbles working their way up, or maybe the whole thing just looks a little fluffier.
If you see real activity—meaning growth, not just a couple of surface bubbles—that’s a sign your starter is ready for more attention. You can switch to feeding it every 12 hours now, morning and evening. This is how we ramp up the strength so we have an incredibly activating sourdough starter culture. Remember to discard before every feed!
Days 5 & 6: Building a Strong Bubbly Active Sourdough Starter
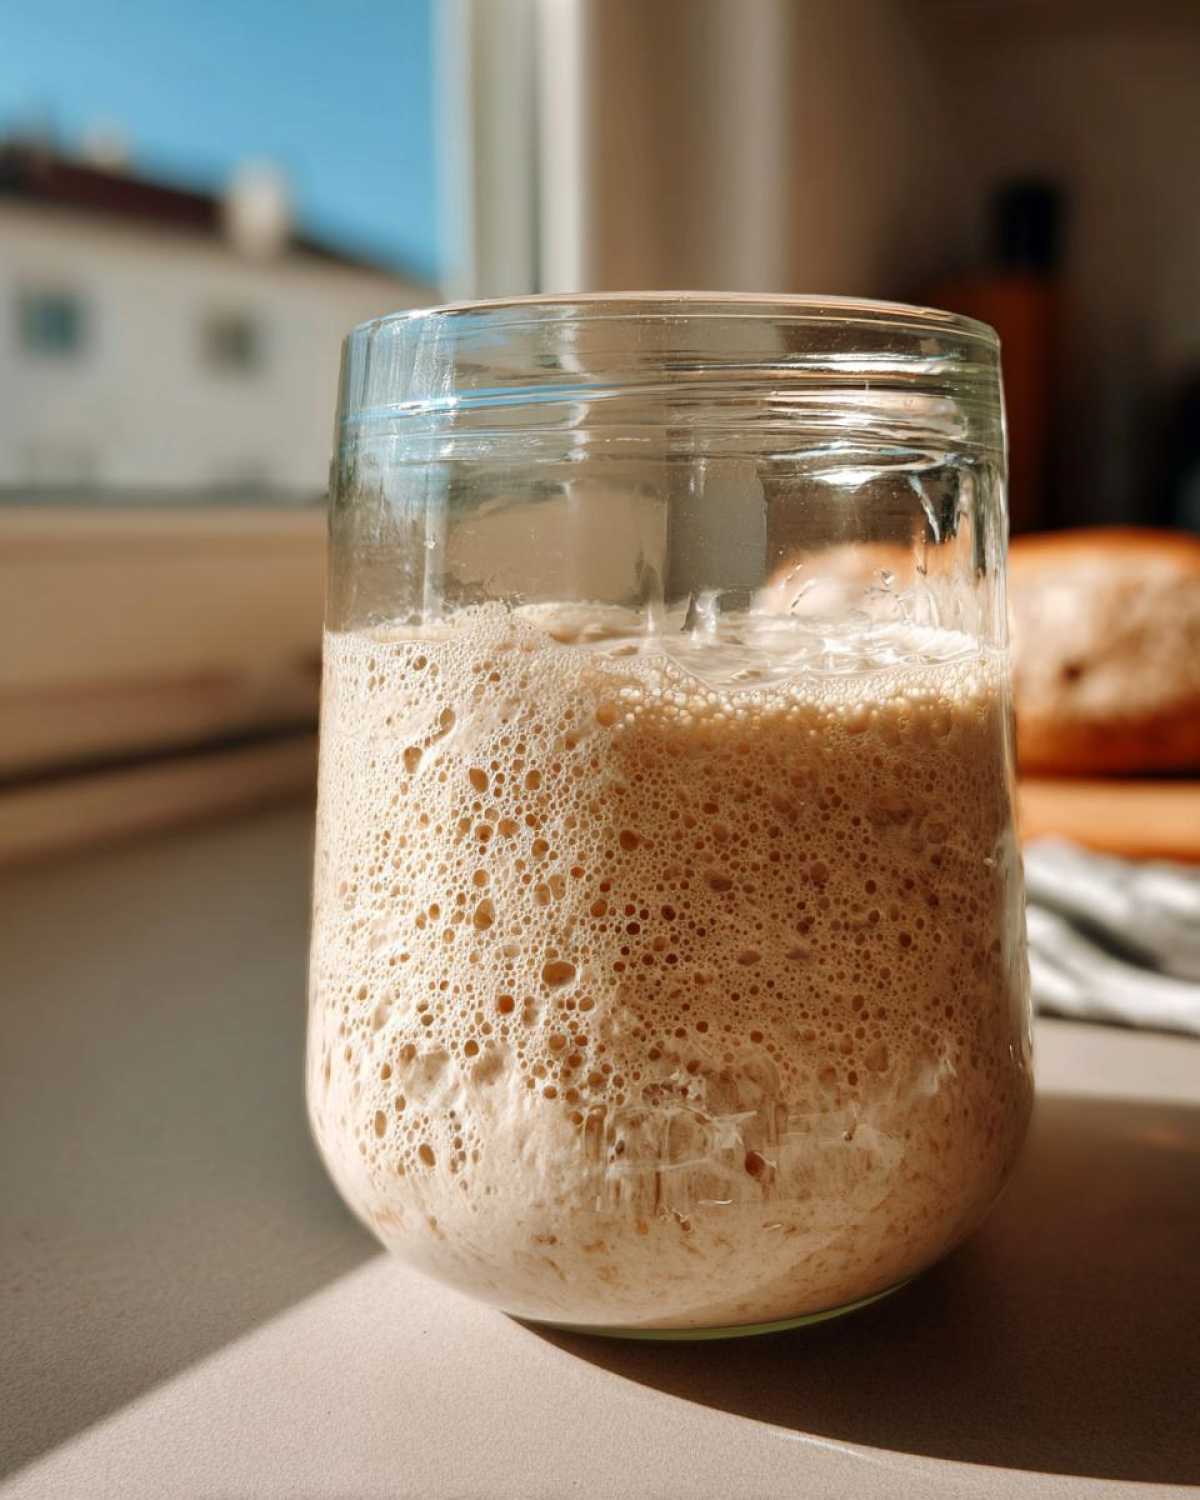
Consistency is your best friend during these days. We are sticking to the twice-a-day feeding schedule religiously. Discard half, feed 50g flour, 50g water. You are looking for that glorious, reliable doubling in size within a few hours of feeding. Your starter should look alive, robust, and full of little pockets of air—a truly bubbly active sourdough starter. Some people say it looks like foam, and that’s perfect!
If it smells a little stinky or vinegary, that just means it’s hungry. Don’t worry, that’s normal for this stage. Just feed it on time, and that sharp smell will mellow out into that classic pleasant sour aroma.
Day 7: Confirming Your Active Sourdough Starter is Ready
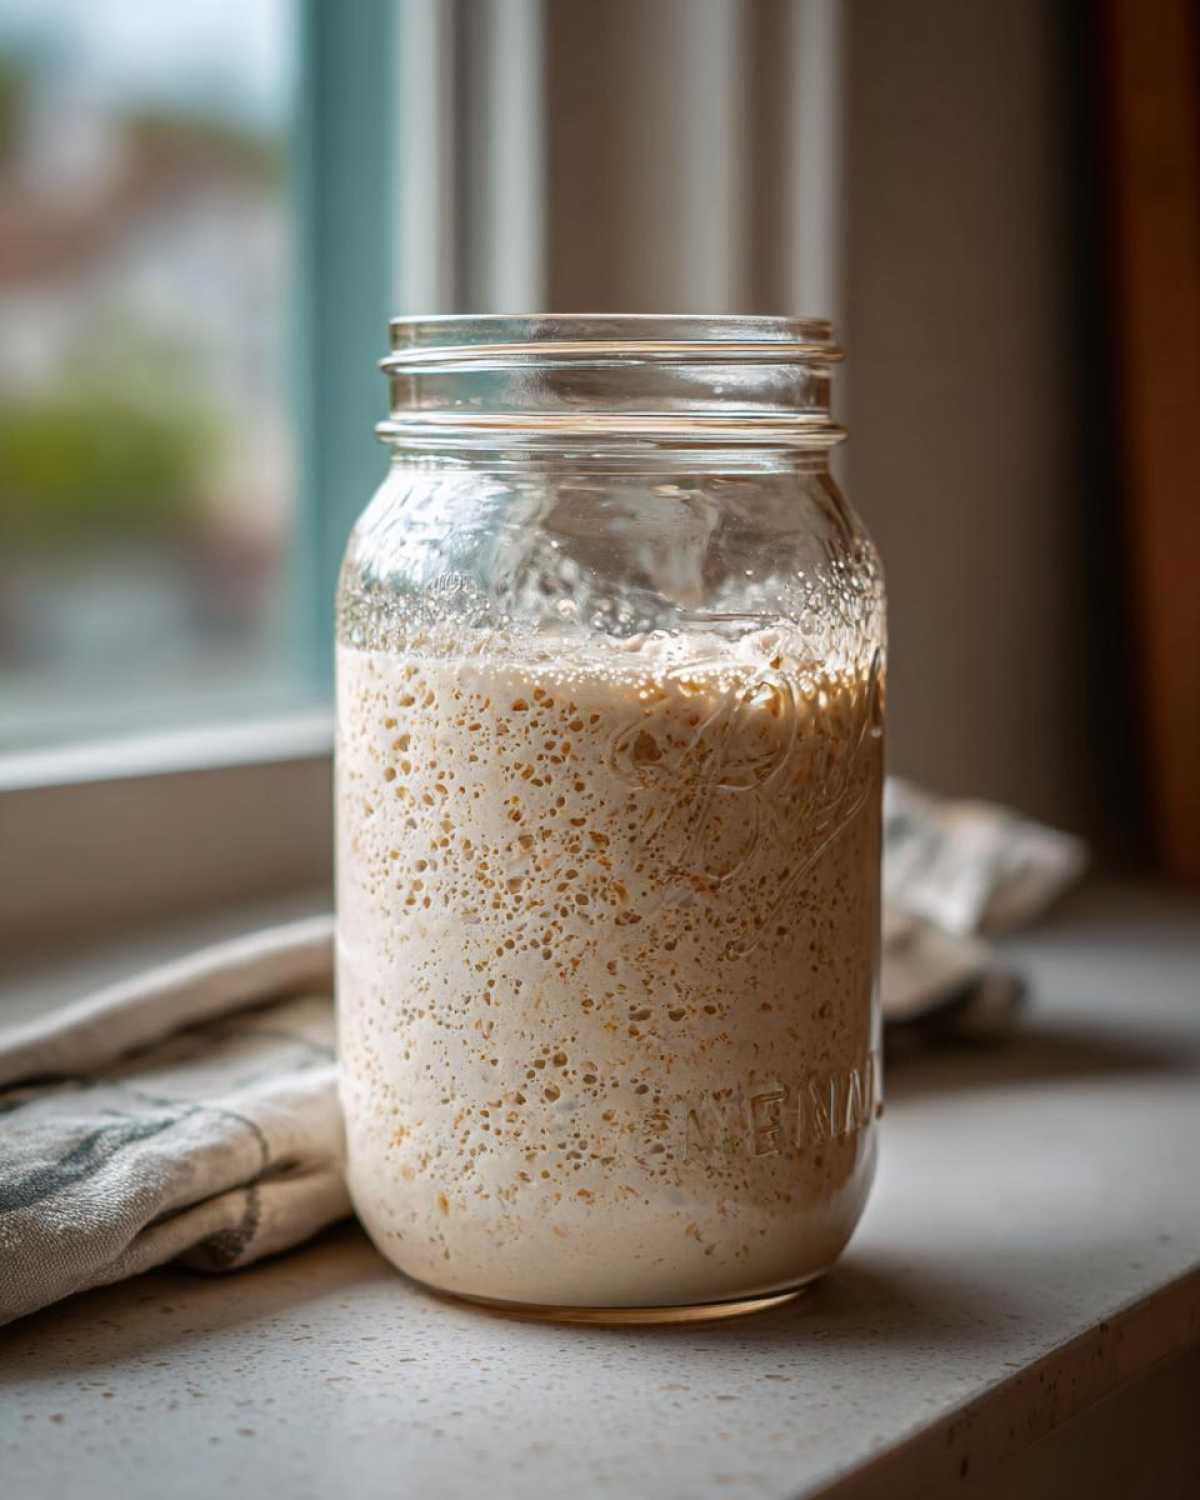
Congratulations! If your culture reliably doubles in volume between 4 and 8 hours after feeding, you’ve done it! You have successfully created a viable wild yeast bread culture. The smell should be pleasantly yeasty and sour, like yogurt or mild vinegar. If it doubles consistently under the same conditions, it’s ready to handle the heavy lifting of making real artisan bread. You can now stop this rigorous daily feeding, or you can learn to use it right away!
Maintaining Your Sourdough Starter: Feeding Schedule and Storage
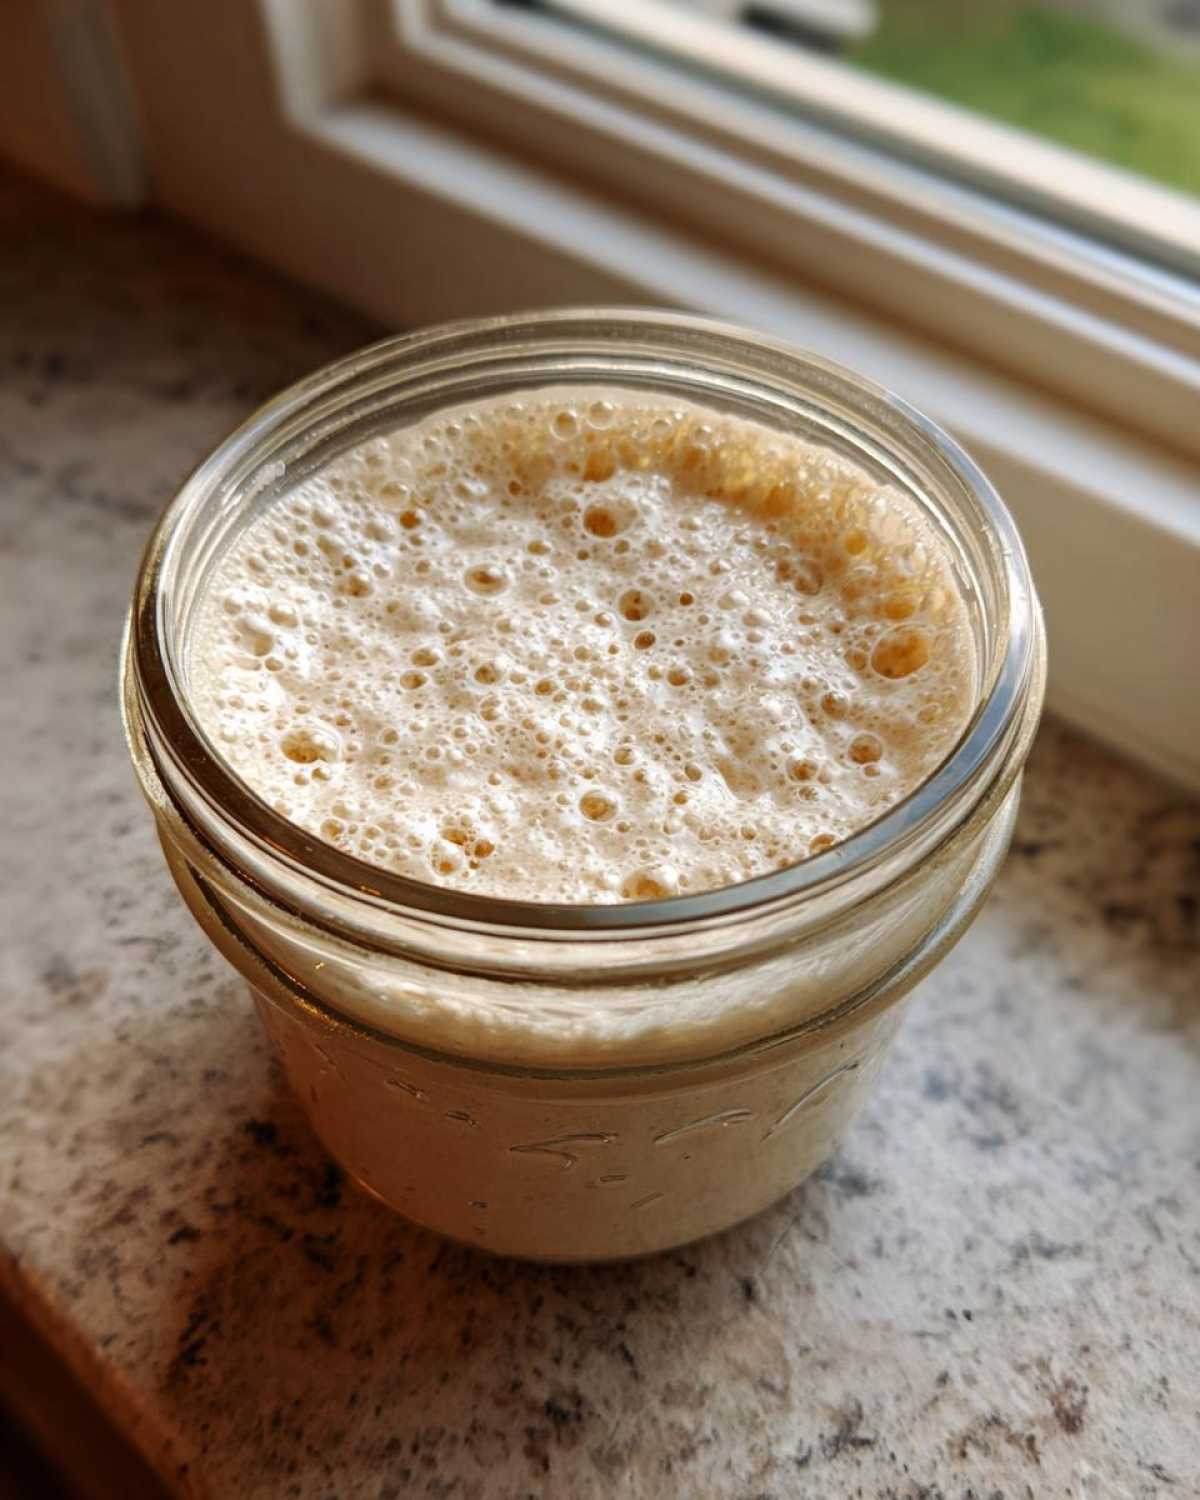
So, your beautiful bubbly creation has officially passed its test! Now you don’t have to hover over it every single hour, but you do need a plan, or it’ll go hungry and start smelling like nail polish remover again. The key to long-term success here is minimizing waste and scheduling your feedings around your life.
If you plan on baking frequently, like every couple of days, keeping your sourdough starter on the counter at room temperature is the way to go. If you’re only baking on weekends like I usually am, you need to put it to sleep in the fridge!
For daily baking consistency on the counter, stick to the 1:1:1 ratio we used in the final days. That means if you have 100g of active starter left after discards, you feed it 100g of flour and 100g of water. You can switch to whatever flour you love baking with most (like all-purpose or bread flour) now that it’s strong. It keeps things simple!
When you’re done feeding it for the day and it looks nice and mixed, just pop a loose lid on it, and that’s that until tomorrow. Oh, and don’t forget, if you end up with extra starter that you don’t want to waste, you have to try my pancakes! They are addictively fluffy thanks to the discard, and you can find the recipe here: sourdough pancakes.
How to Revive Old Sourdough Starter
Life happens, right? Maybe you forget to feed it for a couple of weeks, or you travel and someone forgets to check on it. Don’t throw that jar away! An old, sleepy starter is just thirsty. To revive it, find the jar, give it a good stir, and discard anything that looks truly awful or moldy.
You need to bring it back to life slowly. Forget the big 1:1:1 feeding at first. Start small. Take maybe 20 grams of that old starter and feed it 20g flour and 20g water. Do this every 12 hours. It might take two or three full feeding cycles before you see the bubbles return reliably. It’s like coaxing a sleepy puppy back into action—you start gently!
If you only feed it once a week from the fridge, that’s fine too! Just take it out, let it warm up to room temp for an hour, give it one good feed (again, I like honey bran muffins flavors mixed into those feedings if I’m feeling fancy), and let it sit on the counter for 4–6 hours before putting it back in the cold. That refresh is enough to keep those wild yeast happy for another week!
Ingredient Notes and Substitutions for Success
A lot of beginners get stuck worrying about getting the *exact* right flour, but honestly, flexibility is part of the fun of working with these wild cultures. However, there are a couple of non-negotiables that I learned the hard way. If you mess these two things up, you’re going to have a very long, slow seven days.
First, let’s talk about that initial whole grain kick. I start with rye or whole wheat because they have more natural microorganisms clinging to the bran and germ. They are basically the superfood that shocks the yeast into waking up fast. Once your culture is established around Day 3, we switch to a standard unbleached all-purpose flour because it’s milder. If you only have AP flour, just use it for all seven days, but I promise that initial rye flour boost makes a difference, especially in colder kitchens!
Now, water. I mentioned it before, but it bears repeating: chlorine is the enemy of my no yeast bread starter dreams! If you forget to treat your water, your starter will sit there confused, refusing to bubble or grow. Make sure it’s unchlorinated or just boil it and let it cool completely before mixing.
My biggest tip for accuracy, and this is pure baker’s gospel, is using a digital scale. Yes, you can measure flour in cups, but flour compacts differently based on how humid it is outside. If you want to bake consistently, you need to measure by weight. It removes all the guesswork. For more specifics on which flours give you the best results over the long term, check out my big flour breakdown here: best flour for sourdough starter.
Finally, aim for room temperature water, which I always approximate to about 70 to 75 degrees Fahrenheit. If your kitchen is cold, use slightly warmer water to give your baby culture a nice warm bath. If your kitchen is already toasty warm, use cooler water so you don’t accidentally cook the yeast!
Troubleshooting Common Sourdough Starter Issues
Look, I’m not going to lie to you; not every day of the starter creation process is going to be a beautiful, bubbly celebration. Sometimes, you look into the jar, and you just feel like you’ve failed. Trust me, I’ve been there! But starters are resilient, and most issues are simply signs that your little culture needs a change in environment or a different feeding schedule. Don’t panic, we’ll sort this out together!
The first few days are the hardest because the bad bacteria we are trying to outgrow are often louder than the good yeast. So, if things look… underwhelming, just keep that feeding schedule steady.
If you want a deeper dive into specific issues that pop up past Day 7, I wrote a super detailed guide on sourdough starter troubleshooting guide, but here are the three big ones that scare every beginner.
When Nothing is Happening: The Stalled Starter
If you’ve hit Day 4 or 5 and things look flat, and you either see no bubbles or very few, the number one culprit is temperature. These wild yeasts are little nature lovers, and they like it comfy! If your kitchen is chilly—say, under 68°F—they move in slow motion. Try moving your jar to a warmer spot, like near the pilot light on the stove, or even on top of the refrigerator where a little heat rises.
Another reason for stalling is the water. Did you skip boiling it? If you used chlorinated tap water, it can suppress the yeast activity. Give it one more feeding with perfectly treated water, and if it still doesn’t perk up, try switching back to rye or whole wheat flour for two feedings. That extra nutrition jump-starts the process again.
The Smell of Acetone: My Starter Smells Like Nail Polish Remover!
Oh, the acetone smell. It’s sharp, it’s overwhelming, and your first thought is probably, “It’s ruined!” I promise you, it’s not ruined. This smell means your starter has completely eaten through all the food you gave it and is now starving and producing acidic byproducts. It’s basically yelling at you, “FEED ME NOW!”
The fix here is easy: feed it immediately! But feed it heavier than normal for one cycle, just to give those hungry yeasts a big cushion of food. If you were feeding 50g starter + 50g flour + 50g water, try 50g starter + 75g flour + 75g water that one time. That extra food should stop the acetone production right away, and it will calm down by the next feeding.
Spotting Trouble: What to Do About Mold
This is the only time I will tell you to throw everything away. If you see any fuzzy growth—pink, orange, white, or black—on top of your starter, it’s mold, and it’s not salvageable. This almost always happens when the jar wasn’t clean enough or if the starter was left completely unattended for too long without feeding.
Mold means you need to start over from Day 1. But don’t let this discourage you! Before trying again, make sure you are using a completely clean glass jar and washing your spatula thoroughly between mixes. Cleanliness is major for keeping that beginner sourdough baking tips journey frustration-free!
Tips for Perfect Sourdough Starter Health
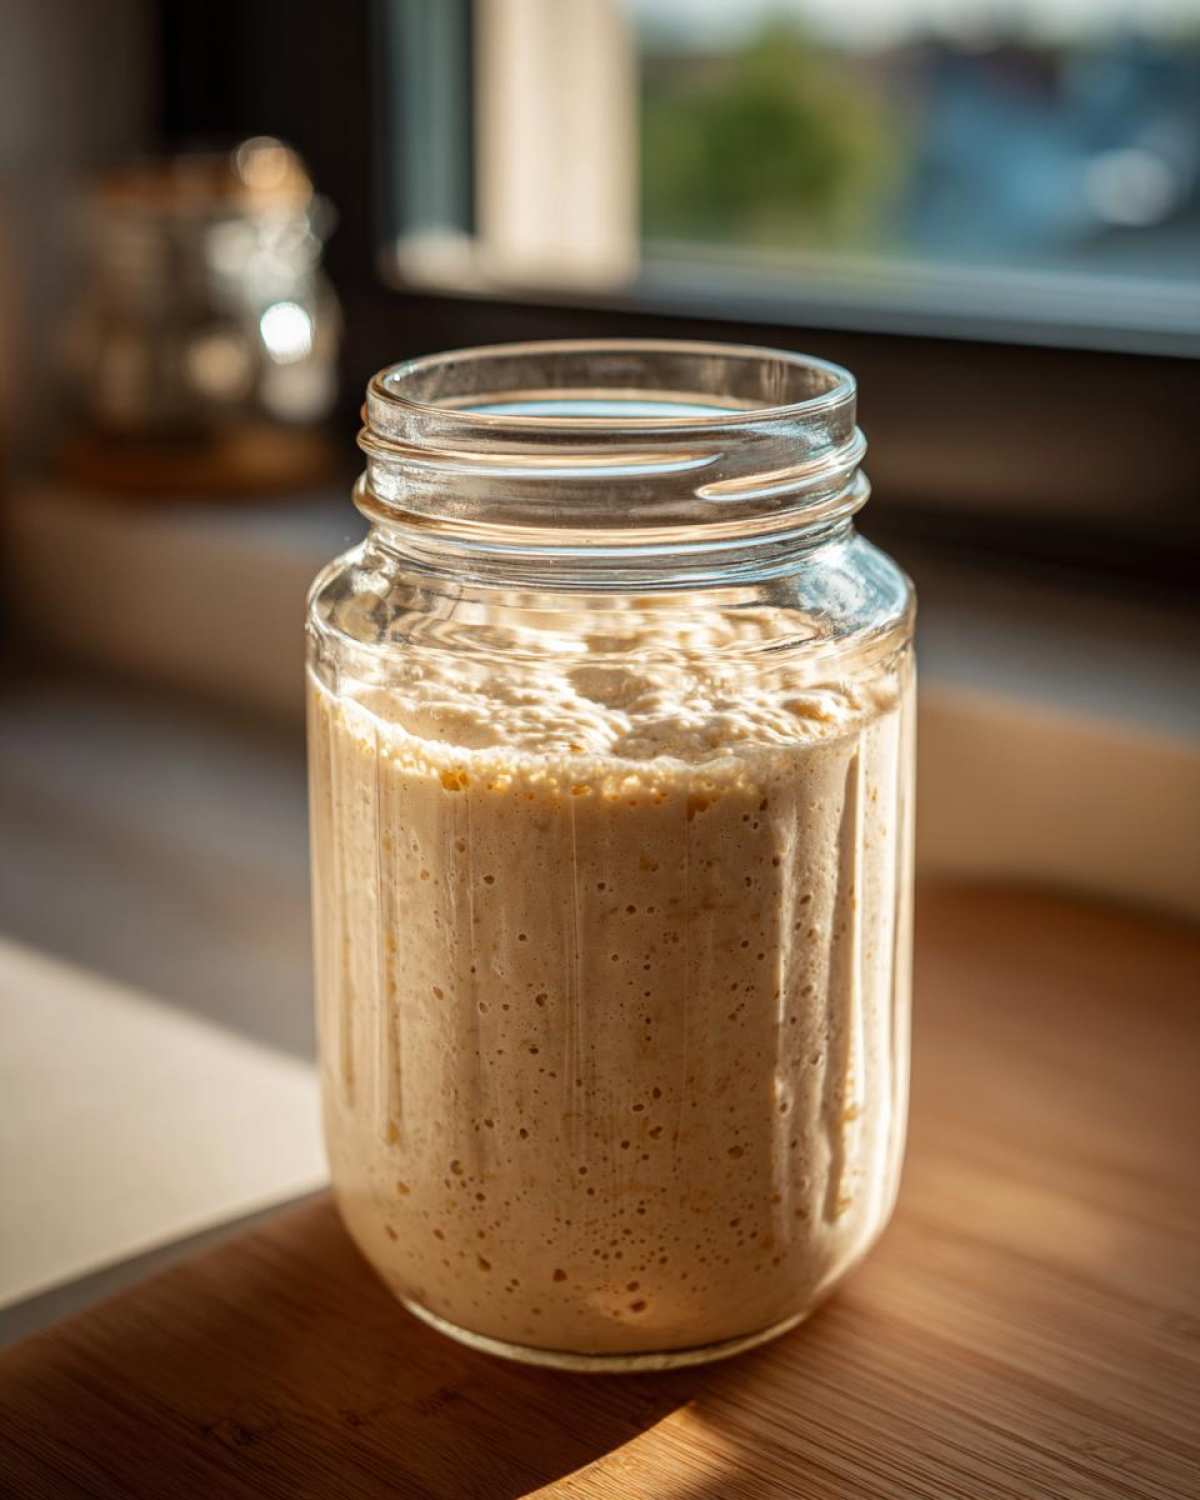
Now that you have this amazing active culture, I want to share a few little secrets that I only learned after my first few loaves came out a little… sad. These are the little things that separate a good starter from a truly robust, reliable one. Think of these as the advanced beginner sourdough baking tips that keep things running smoothly for months!
Mostly, it comes down to environment and consistency. Don’t overthink it, but do pay attention to these small details:
- Use Glass, Not Plastic (If You Can): I know plastic is easy to clean, but I find my starter behaves better in plain glass jars. Plastic can sometimes hold onto lingering soap residue or odors that the sensitive wild yeast don’t appreciate. Glass is inert, and you get to watch those beautiful bubbles rise, which is half the fun!
- Don’t Go Near the Oven Vent: I learned this the hard way—never place your starter on top of the refrigerator or near your oven vent if you are baking. That fluctuation between hot air bursts and cold air drafts stresses the culture out. Find a steady spot—a cupboard with the door slightly ajar, maybe? Consistency in temperature is king.
- The Jar Size Matters for Rise Watching: When you feed your starter, make sure the mixture only fills your jar about 1/3 of the way up. If you use too small a jar, when the starter reliably doubles (which it should now!), it will overflow everywhere. I keep my active starter in a jar twice the size of the actual volume of the mix. This way, when it peaks, you can actually see how high it climbed before it started to fall back down.
- Be Ruthless About the Discard: I still hate discarding, I really do, but you have to commit! If you leave too much old starter in the jar, you’re adding too much acid to the new food, which stresses the yeast and slows them down. Always stick to that ratio—no sneaking in extra starter “just in case.”
If you want to read more about what to watch for when you actually start baking—like checking for internal crumb structure—I laid out a lot of my favorite tips for first-time bakers right here: Beginner Sourdough Baking Tips. Happy bubbling!
Frequently Asked Questions About Your New Sourdough Starter
It’s totally normal to have questions after you’ve made this powerful, living thing! It seems a bit abstract at first, but I promise, after baking your first loaf, it’ll all click into place. Here are some of the big questions I always get whenever I’m explaining sourdough 101 for beginners.
Can I use instant yeast instead of making a sourdough starter?
You absolutely can, and that’s the shortcut! Instant commercial yeast is fast, reliable, and gives you a quick rise. But that’s not what we’re doing here. This entire guide is about creating a no yeast bread starter—a true wild yeast culture that ferments the flour over a long period. That slow fermentation is what gives sourdough its signature tang, its complex flavor, and its incredible keeping qualities. If you use commercial yeast, you get bread; if you use a starter, you get sourdough magic!
How long does it take to get an activating sourdough starter?
The goal here is seven full days, but I want you to use that as a guideline, not a strict law. Seven days is the average time I see in my own kitchen when the temperature is happy (around 72°F). If your house is colder, like during a winter spell, it might take closer to ten days before you see sustained doubling. If your kitchen is super hot, maybe five or six days!
The key indicator isn’t the calendar date, it’s the habit. Once your starter is reliably increasing twofold in size within about 4 to 8 hours of being fed, it’s ready. Don’t be afraid to give it an extra day or two if it seems sluggish. That patience pays off big time when you start baking. For all the foundational knowledge you need to get started without confusion, I broke down all the simple sourdough basics here: simple sourdough basics.
What part of the starter do I use for baking?
You always use the starter when it’s at its absolute peak—right when it has finished rising and before it starts collapsing back down. This peak moment is when the yeast is most active and ready to give your bread oven spring. If you wait too long and it smells strongly vinegary and has completely deflated, it’s just way too hungry. When in doubt, feed it and wait for the next peak! The starter is usually at its highest point about 4 to 8 hours after feeding, depending on the temperature.
What’s the best way to store my starter long-term?
Once you confirm your starter is super active (Day 7!), you can put it to sleep in the fridge! This is essential if you aren’t baking every day. Just give it a good, hearty feed (I usually go 1:2:2 ratio when refrigerating—more food for a long nap), let it sit on the counter for an hour or two to start bubbling, and then seal it up and tuck it away. You only need to wake it up and feed it once a week if you plan to keep it cold.
What to Bake Next with Your Active Starter
So, you’ve got a happy, bubbly, reliable culture sitting on your counter, and you’re finally ready to ditch the instant yeast forever! That moment is exhilarating! While your starter is now perfectly calibrated for making a beautiful, tangy country loaf, don’t forget you have a whole new ingredient base to play with. We don’t need to jump straight into a difficult artisan loaf if you’re feeling nervous. Keep it simple, keep it fun!
The first thing I always recommend new bakers try is using the discard. That part you remove during the discard process before feeding? That’s pure, active starter! It’s developed flavor but might be too weak or small to lift a full loaf of bread on its own. But for fast-cooking items? It’s absolutely perfect.
You wouldn’t believe how incredibly easy and fast it is to whip up a batch of starter pancakes or waffles using what you were planning to throw away. They come out tangy and surprisingly fluffy. If you’re interested in trying that right away, I have my go-to sourdough discard pizza dough recipe—it makes the best crispy crust for Friday night!
Once you’re comfortable with how your starter behaves—how fast it doubles, how it smells at its peak—then you can start thinking about that first big, beautiful, long-fermented loaf. But for now, celebrate your success by making something quick and delicious with the portions you’d normally toss out. You’ve earned it!
Estimated Nutritional Data for Flour and Water Starter
Okay, this is the fun one where we talk science, but let me be super clear right away: you aren’t generally eating a big bowl of starter all on its own! This data is based on the roughly 100g we use in one feeding cycle, which is mostly mixed, fed, and then the bulk of it is usually discarded or used in another recipe. Think of this as a little snapshot of the calories involved in keeping your culture alive, rather than a serving suggestion!
The numbers here are low because, fundamentally, this is just flour and water—the same basic stuff that goes into commercial bread. The magic ingredient here is the wild yeast, and that weighs basically nothing! Since we are using a mix of whole grain and all-purpose flour in the early stages, the fiber content is decent, which is certainly better than refined white flour alone.
Here is the rundown based on that initial 100-gram mixture. If you’re using this starter later in a recipe, you’ll need to calculate the nutrition based on the whole recipe, of course, but this gives you a baseline for the feeding process:
- Serving Size: 100g (This is just for reference; not a standard serving)
- Calories: 200
- Fat: 0.5g
- Saturated Fat: 0.1g
- Trans Fat: 0g
- Unsaturated Fat: 0.4g
- Cholesterol: 0mg
- Sodium: 1mg
- Carbohydrates: 40g
- Fiber: 2g
- Sugar: 0.5g
- Protein: 5g
See? Nothing scary in there! It’s all simple stuff. Just remember that once this starter ferments your bread dough, those carbohydrates and proteins change dramatically due to the long fermentation process. That’s why sourdough is so much easier on the digestion—the yeast and bacteria do a lot of the heavy lifting before it ever hits your oven!
Print
Beginner’s Guide: How to Make and Maintain a Sourdough Starter
- Total Time: 7 days (active creation)
- Yield: About 1 cup of starter
- Diet: Vegetarian
Description
Follow this simple, day-by-day guide to create an active sourdough starter using only flour and water.
Ingredients
- 100g Whole Wheat or Rye Flour (for initial days)
- 100g Unbleached All-Purpose Flour (for later days)
- 100g Unchlorinated Water (room temperature)
Instructions
- Day 1: Mix 50g of whole wheat or rye flour with 50g of room temperature water in a clean jar. Stir until fully combined. Cover loosely and let it sit at room temperature (68-75°F) for 24 hours.
- Day 2: You may see small bubbles or no change. Discard half of the mixture. Add 50g of whole wheat or rye flour and 50g of water to the remaining starter. Mix well, cover loosely, and wait 24 hours.
- Day 3: Discard half of the starter. Add 50g of all-purpose flour and 50g of water. Mix well. You should start seeing more activity. Wait 24 hours.
- Day 4: Discard half. Feed with 50g of all-purpose flour and 50g of water. If you see significant bubbles, you can switch to feeding twice a day (every 12 hours).
- Day 5 & 6: Continue discarding half and feeding with 50g all-purpose flour and 50g water twice a day (morning and evening). The starter should become very bubbly and increase in volume after feeding.
- Day 7: Your starter should reliably double in size within 4 to 8 hours after feeding. It smells pleasantly sour, not like acetone. It is now active and ready to use for baking.
- Maintenance: To maintain, feed your active starter daily if kept at room temperature (discard half, feed 1:1:1 ratio of starter:flour:water). If storing in the refrigerator, feed it once per week.
Notes
- Use a clear jar so you can watch the rise and fall of the starter.
- The best temperature for initial activity is between 70 and 75 degrees Fahrenheit.
- If your starter smells like nail polish remover (acetone), it is hungry. Feed it immediately.
- Always use unchlorinated water, as chlorine can inhibit wild yeast growth.
- Prep Time: 5 min
- Cook Time: 0 min
- Category: Baking Basics
- Method: Fermentation
- Cuisine: General
Nutrition
- Serving Size: 100g
- Calories: 200
- Sugar: 0.5
- Sodium: 1
- Fat: 0.5
- Saturated Fat: 0.1
- Unsaturated Fat: 0.4
- Trans Fat: 0
- Carbohydrates: 40
- Fiber: 2
- Protein: 5
- Cholesterol: 0