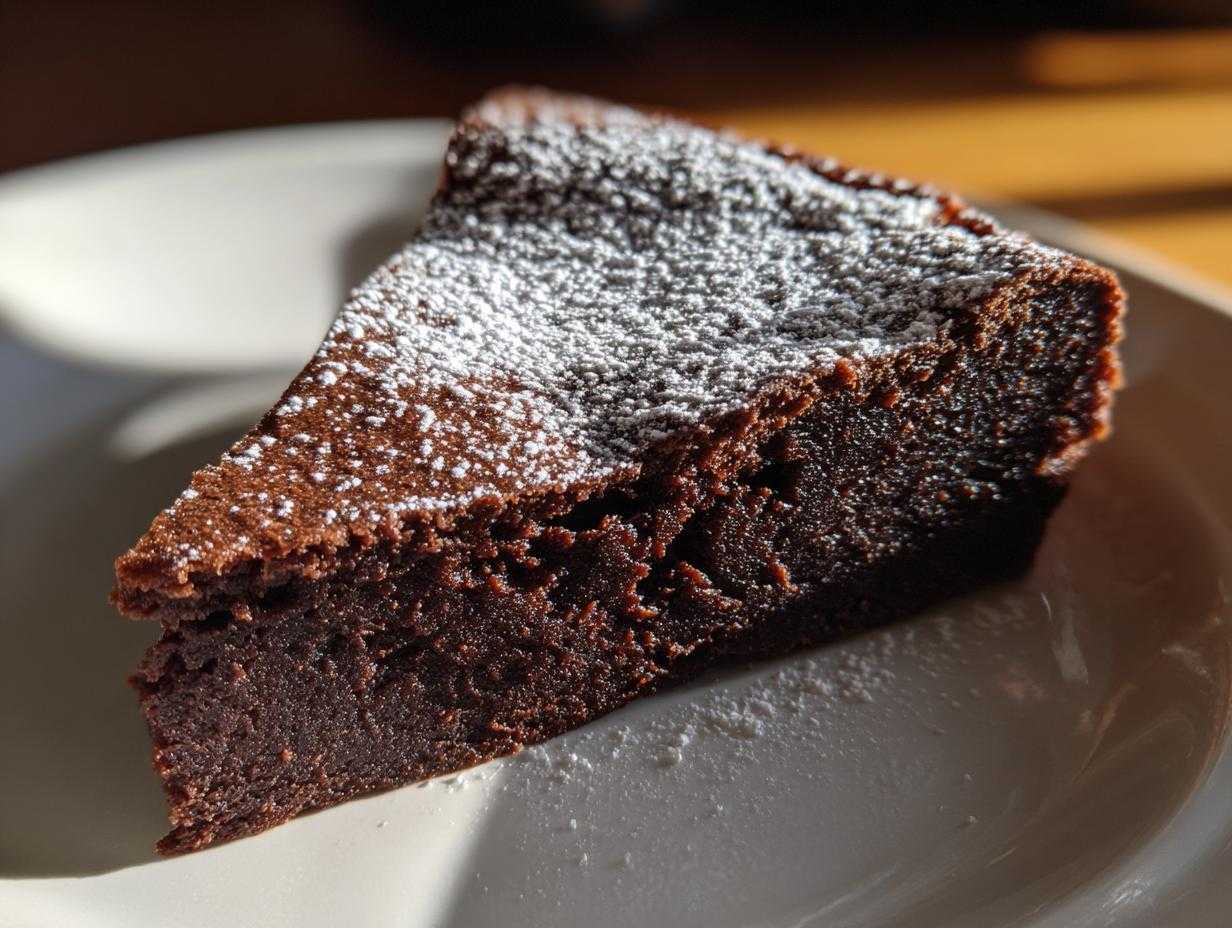
Forget every dry, crumbly imitation you’ve ever had. When you need real, unapologetic chocolate indulgence, you need this recipe. I finally nailed the ultimate, deeply fudgy, and naturally gluten-free **flourless chocolate torte** recipe after weeks of testing for my anniversary dinner last year. Wow, was it worth it! This thing is pure, intense dark chocolate perfection—smooth, rich, and honestly almost like eating truffle filling that holds its shape. It absolutely blew everyone away, and the best part? No flour needed! Seriously, once you see how simple this comes together, it becomes your immediate go-to for any special occasion chocolate craving.
Why This Flourless Chocolate Torte is Your New Go-To Dessert
I get it, you want a showstopper, but you don’t want to spend all day folding egg whites into oblivion. This recipe gives you the best of everything. It’s the perfect chocolate indulgence without the stress!
-
Deeply Rich and Velvety Texture
Because we skip the flour entirely, the texture is pure velvet—dense, moist, and intensely chocolatey. It melts right on your tongue, which is exactly what a real dark chocolate indulgence should do.
-
Naturally Gluten Free Chocolate Torte
This is a winner for absolutely everyone at the table. It’s completely reliant on high-quality chocolate and eggs for structure, making it a naturally safe and delicious **flourless chocolate torte** for any guest needs.
-
Simple Steps for an Elegant Gluten Free Dessert
Even though the result looks like it came from a fancy French patisserie, the construction is shockingly simple. We melt, we whisk, we fold—that’s it! You get an amazing elegant gluten free dessert that takes less time than baking half an hour.
Gathering Ingredients for the Perfect Flourless Chocolate Torte
Okay, listen up, because with a recipe this simple, your ingredients have to be top-notch. We’re not hiding anything behind flour, so every single flavor has to sing its heart out. You need the right stuff, ready to go, before you even think about turning on the stove. Don’t substitute unless you absolutely have to—this torte demands fidelity to the recipe!
Here is exactly what you need for this incredible homemade chocolate torte:
- 8 ounces bittersweet chocolate, and I mean *chopped*! Get that good stuff ready.
- 8 ounces unsalted butter, cut into neat little pieces so it melts evenly.
- 1 full cup of granulated sugar—yes, a cup, that’s part of the structure!
- 1/4 cup unsweetened cocoa powder, sifted if you can manage it.
- A good pinch of salt—don’t skip this! It keeps the chocolate from tasting flat.
- 4 large eggs, and this is super important: they must be separated like we talk about later.
- Just 1 teaspoon of vanilla extract to round out all that rich flavor.
- And finally, powdered sugar, just reserved for dusting the top when it’s done.
Chocolate Quality Matters for Your Decadent Chocolate Dessert
This is where you spend your money, friend. Since this is a **decadent chocolate dessert** defined by chocolate, use the best bittersweet you can find. I insist on aiming for at least 60% cacao, but if you truly want that deep, dark, intense chocolate flavor, try to go for 70% or even 72%. Milk chocolate just won’t cut it here; it gets too soft, and you lose that perfect dense snap when you slice it. Trust me, using quality chocolate is the secret to avoiding a sad, floppy mess.
Essential Equipment for Making Your Flourless Chocolate Torte
Before we even talk about separating those eggs, let’s get our arsenal ready! Because this is essentially a chocolate custard baked very gently, you need the right tools to handle both the heat and the delicate folding process. Don’t worry, you probably have most of this stuff hiding in a drawer somewhere.
You definitely need to have these few items prepped and ready to go. Trust me, you do NOT want to realize you don’t have a springform pan halfway through melting that expensive chocolate!
- An 8-Inch Springform Pan: This is non-negotiable for any decent **flourless chocolate torte**. Because there’s no flour to give it rigid structure, you need those latching sides to gently release the cake after it cools. We’ll talk about lining it later, but make sure the latch works smoothly!
- A Heatproof Bowl and Saucepan: We are using the gentle double-boiler method to melt the chocolate and butter. You need a sturdy bowl that sits nicely over simmering water without touching the water surface. If you dump the chocolate directly over the heat, you’ll burn it, and burnt chocolate is truly the saddest smell in the kitchen.
- Whisks and Spatulas: You’ll need a sturdy whisk for combining the sugar and yolks. More importantly, grab a nice, flexible rubber or silicone spatula—you’ll need that for folding the egg whites in later without deflating all the air we worked so hard to incorporate.
- Electric Mixer (Handheld or Stand): While Grandma probably used brute arm strength, we mortals should rely on our mixers! You need this to get those egg whites whipped up into stiff, glorious peaks. That step is where we build all the lift this **no flour cake recipe** has!
Step-by-Step Instructions for the Best Flourless Chocolate
Okay, grab your apron, because we are getting this glorious, dense dessert in the oven! Remember how I said preparation matters? Let’s get that oven hot right now so we aren’t standing around waiting later. You need to preheat your oven to 350 degrees F (175 degrees C) immediately. Next, grab your 8-inch springform pan. You need to grease it really well, and then cut a circle of parchment paper to line the bottom. Believe me, this step saves your torte when it comes time to release it later! If you are tackling a lot of baking, I always keep a jar of homemade pan release ready to go—it’s basically cheat code for cakes that stick, more on that another time, but for now, get that parchment down!
Melting the Base: Butter and Chocolate
This is where we build the intense flavor foundation for our **flourless chocolate torte**. You need to get your chopped chocolate and your butter pieces into that heatproof bowl. Set that bowl right over a saucepan of barely simmering water—we’re using a double boiler, remember? Don’t let that water touch the bottom of the bowl, or you’ll scorch that beautiful chocolate! Stir it patiently until it’s completely melted down and perfectly smooth. Once it’s liquid silk, pull it right off the heat; we don’t want it getting too hot before the eggs go in.
Whipping Egg Whites for Lightness in the Flourless Chocolate Torte
While the chocolate base is cooling just a tad, you need to whip those four egg whites. This is the only thing giving our **flourless chocolate torte** any lift whatsoever, so treat them gently! Beat them until they form stiff peaks—they should hold their shape proudly when you lift the whisk. Now, the folding part is crucial! Try not to deflate them. First, scoop about a third of the whites into the chocolate mixture and stir them in vigorously—this lightens up the heavy chocolate base. Then, gently, ever so gently, fold in the remaining whites in two additions until they are just barely combined. Don’t go crazy overmixing! We want air, not soup!
Baking and Cooling the Rich Fudgy Cake Recipe
Pour that magnificent batter into your prepared pan. It’s going into that 350-degree oven for only about 30 to 35 minutes. You’re looking for a visual cue: the center should look set, but honestly, if you gently jiggle the pan, it should still look *slightly* soft. That’s the key to a wonderfully **rich fudgy cake recipe**! Once it’s out, let it cool down completely in that pan on a rack. Seriously, don’t touch it! Although these aren’t like my no-bake treats that firm up fast, this torte needs time. It will sink a little as it cools, and that’s totally normal for this kind of dessert. We’ll finish the assembly once it’s fully cooled.
Tips for Success with Your Homemade Chocolate Torte
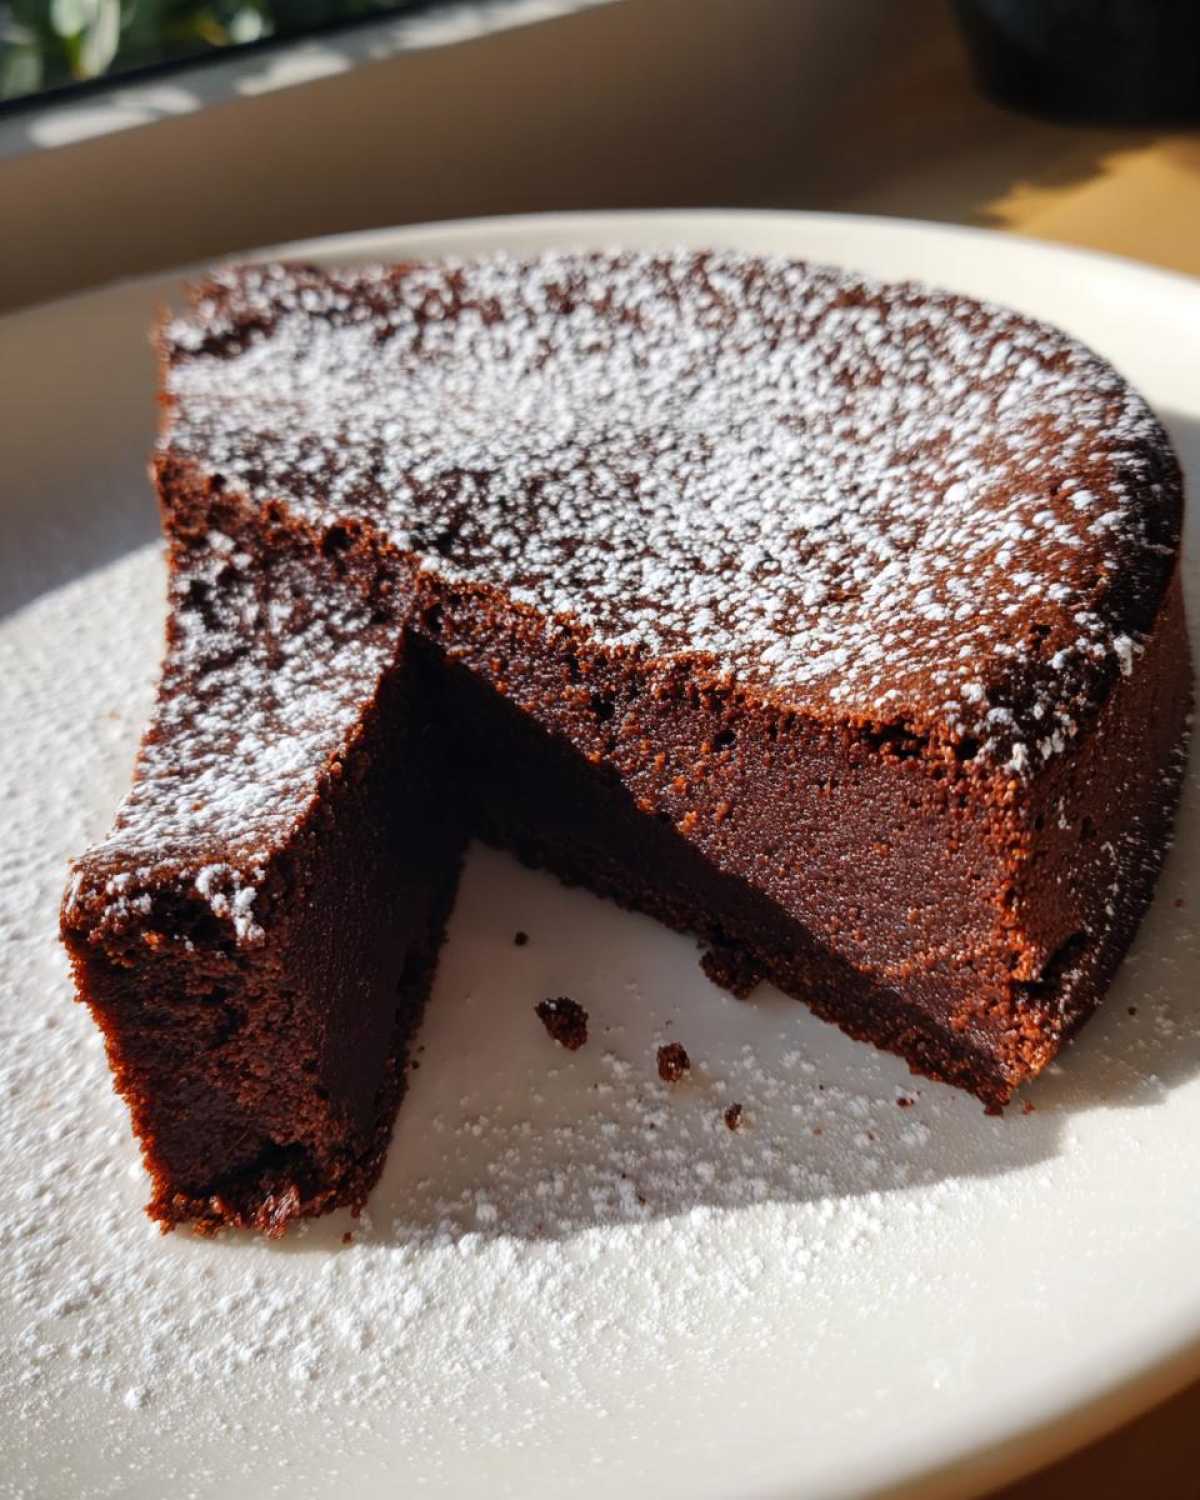
I know you’re probably eager to slice into this masterpiece right when it comes out of the oven, but trust me, patience pays off ten-fold here. This **flourless chocolate torte** needs a little time to settle down and develop that perfect, dense structure we are looking for. I’ve learned these little tricks over the years, and they are the difference between just good and truly unforgettable dark chocolate indulgence!
First, let’s talk chocolate again. I mentioned quality, but it bears repeating: use the bittersweet stuff, 60% cacao minimum. If you use anything softer, the final texture of the torte just won’t hold up like a proper **homemade chocolate torte** should.
My biggest tip, and this is where you really earn that smooth, velvety texture, is the chilling time. You absolutely must let this torte cool completely in the pan, and then you need to move it to the fridge. I aim for at least two hours chilling before I even think about cutting it. When it’s cold, it firms up beautifully, giving you those clean, gorgeous slices. If you try serving it warm, it’s almost sauce-like!
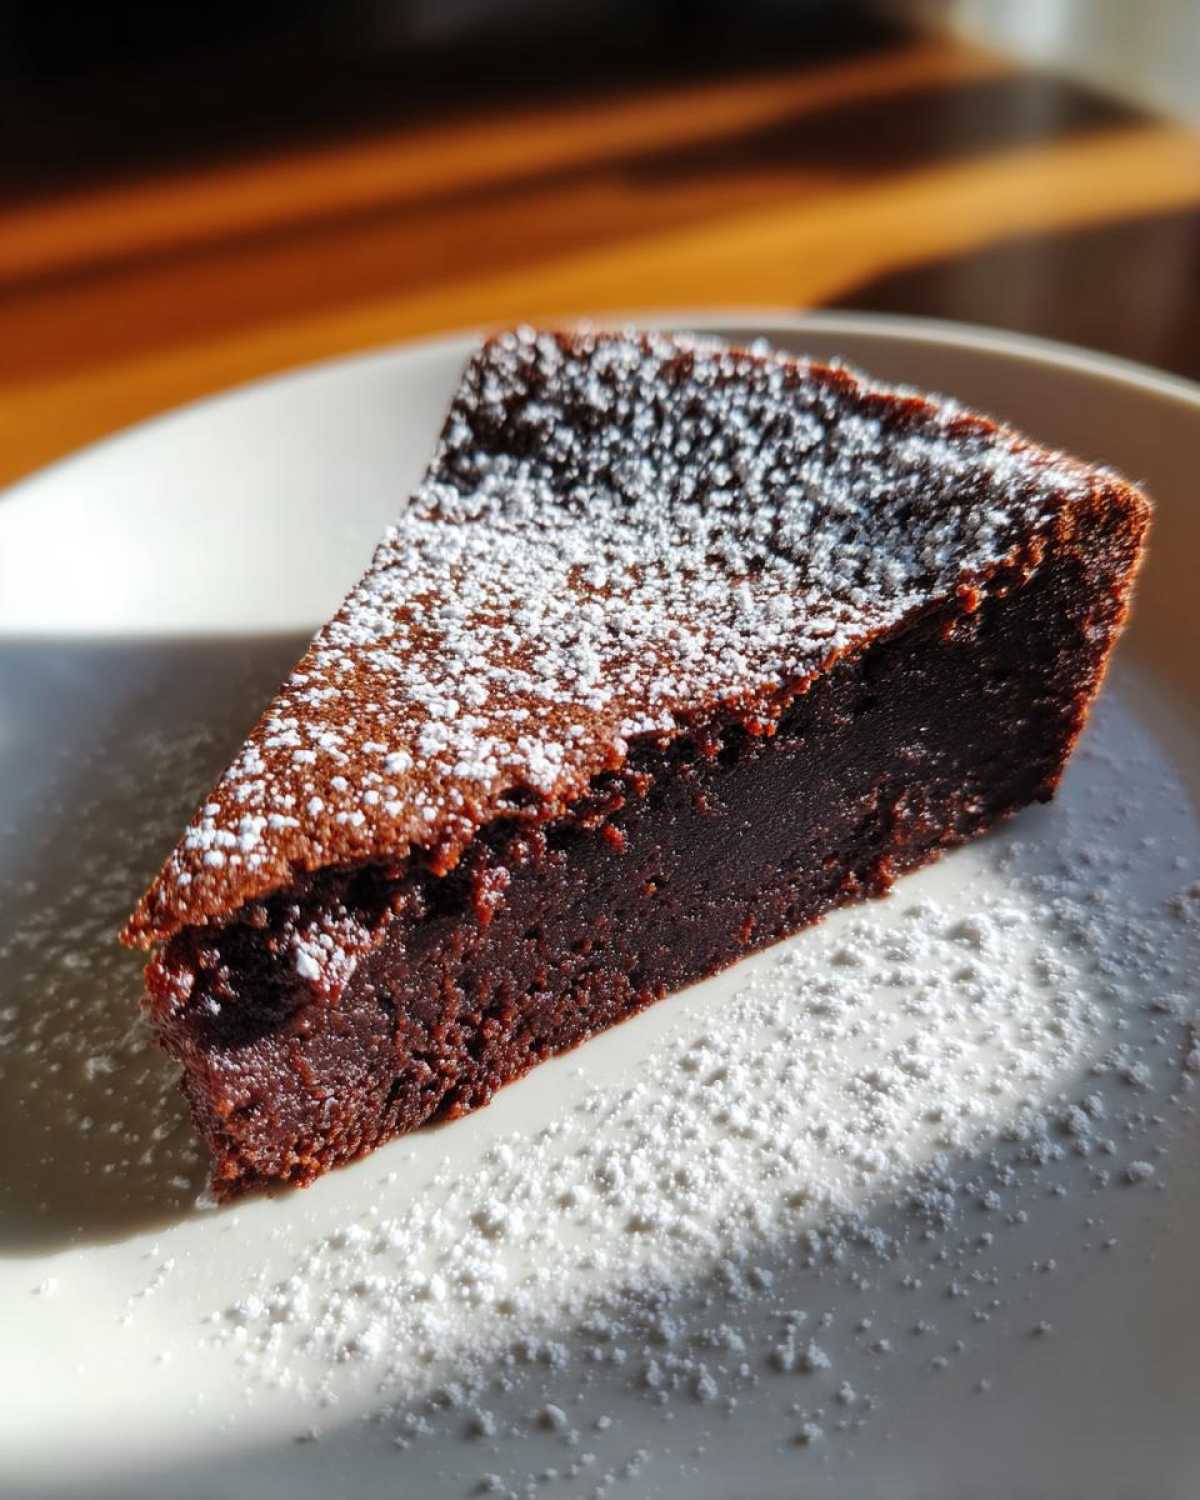
Now, for a flavor secret I often use—especially when I know the torte has to last more than a day—I sometimes swap out a tiny bit of the cocoa powder for espresso powder. Just a teaspoon, whisked into the dry ingredients. It doesn’t make the torte taste like coffee, not at all! It just deepens the chocolate flavor, making it taste even richer and more intense. It’s an amazing trick for dialing up the intensity in any chocolate recipe, and it works wonders here.
Finally, when you pull it out of the fridge to serve, let it sit on the counter for about 15 minutes before slicing. This lets the chill come off just enough so it isn’t rock-hard but still holds perfectly, giving you that perfect melt-in-your-mouth experience.
Serving Suggestions for This Intense Chocolate Flavor
After all that hard work creating such a deep, dark, intensely chocolatey dessert, the last thing you want to do is serve it plain! This **velvety chocolate torte** is so rich and decadent that it really just begs for something light and bright to cut through all that intensity. It’s all about balance, right?
When serving, presentation is everything, especially when you’ve made something this elegant. I always dust mine with a little cloud of powdered sugar right before bringing it to the table, but the real magic happens when you add a contrasting side element. Here are the pairings I always reach for when I have this incredible **chocolate lover’s torte** ready to go:
- Fresh, Tangy Berries: Nothing beats the brightness of fresh raspberries or thinly sliced strawberries against deep chocolate. If you have time, a simple quick maceration (tossing them with just a tiny bit of sugar) wakes them right up. If you have fresh berries on hand, I suggest checking out my recipe for easy berry cobbler just for inspiration on handling fruit—you can use that same technique for a quick sauce!
- Unsweetened Whipped Cream: Seriously, use unsweetened heavy cream whipped until it just forms soft peaks. That tiny bit of airiness and lack of sugar is the perfect foil for the fudgy texture. It lightens every bite beautifully.
- A Sharp Coulis: If you want to go the extra mile for a special occasion, a tart raspberry or tart cherry coulis is just heaven. The sharp acidity cleanses the palate, making you ready for the next bite of that amazingly rich base.
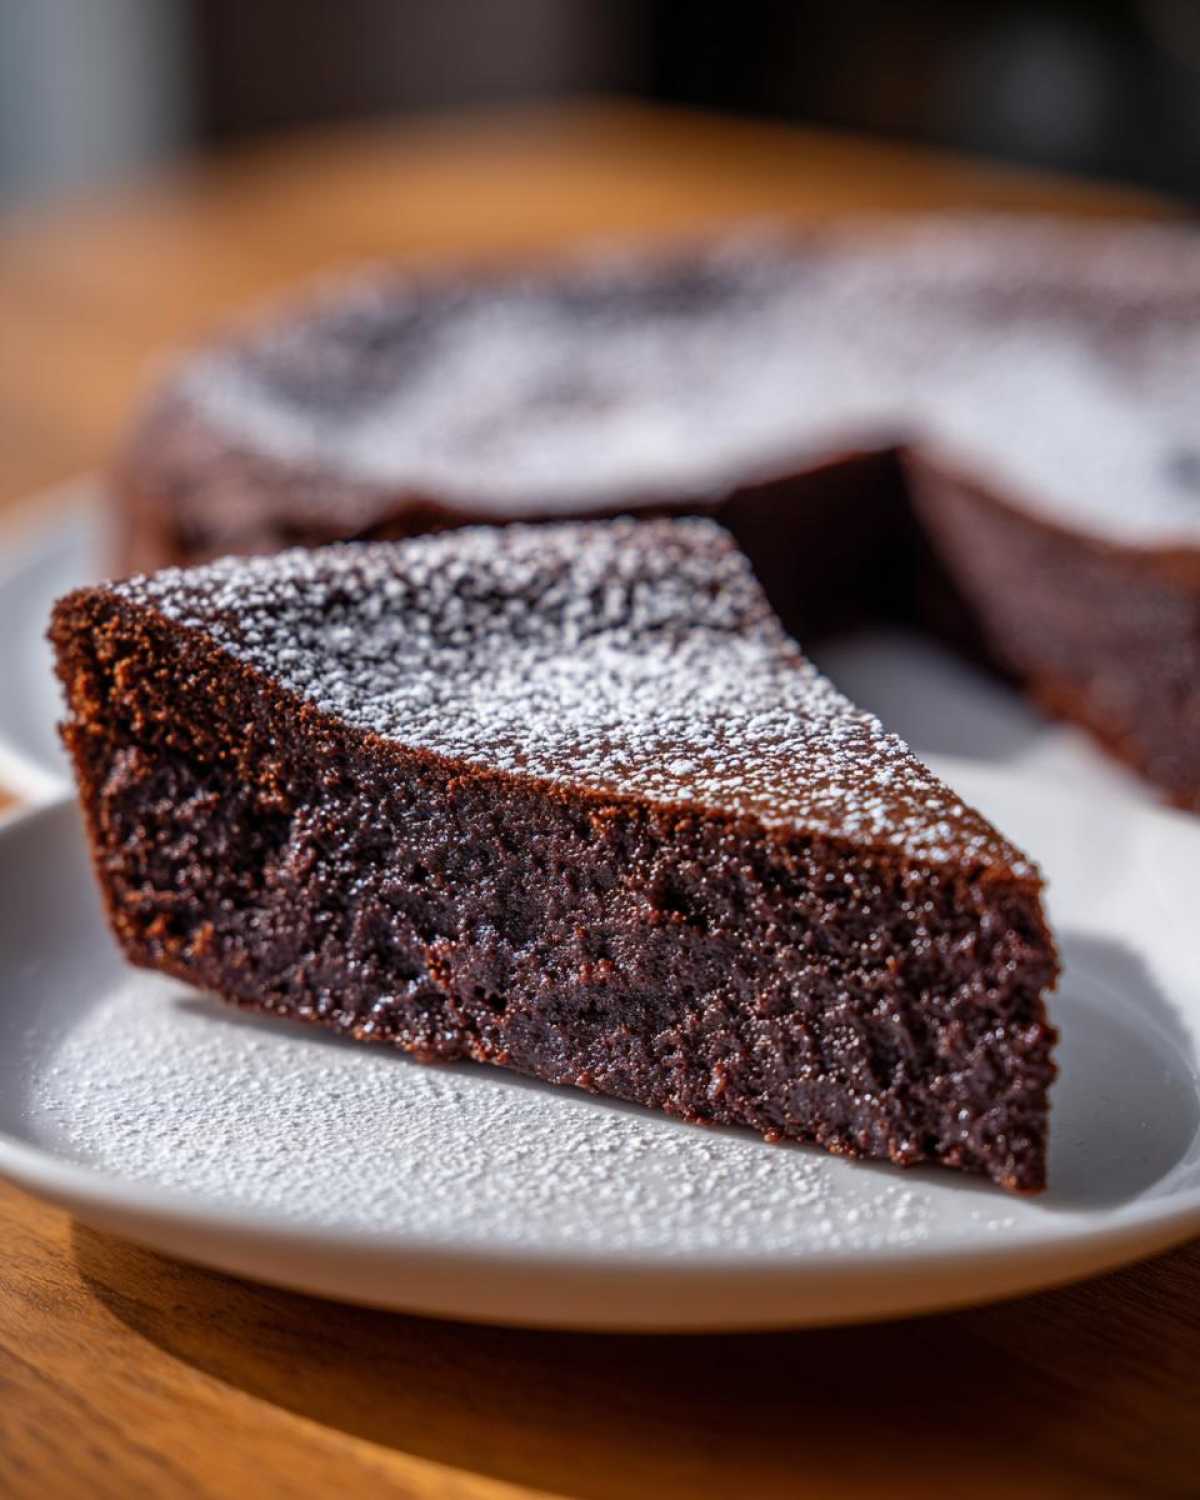
Avoid heavy ice creams, unless they are vanilla bean, because you don’t want to compete with the chocolate flavors! Keep the sides light, bright, and fresh, and you’ve managed the ultimate **special occasion chocolate** presentation.
Storage and Reheating Instructions for the Velvety Chocolate Torte
This is the great news about making a **flourless chocolate torte**: it loves leftovers! Unlike airy layer cakes that dry out the second day, this dense, high-fat chocolate creation actually gets better overnight. That chilling process we talked about? It works wonders for the final texture, firming it up beautifully so those slices look even cleaner the next day.
When you have leftovers—if you even have any left after the first night, ha!—you need to wrap them up tightly. I usually place a piece of plastic wrap directly over the surface of the torte to prevent any weird fridge smells from sneaking in, and then cover the whole thing loosely with foil. Keep this wrapped beauty in the refrigerator because the butter and chocolate need that cold temperature to stay firm.
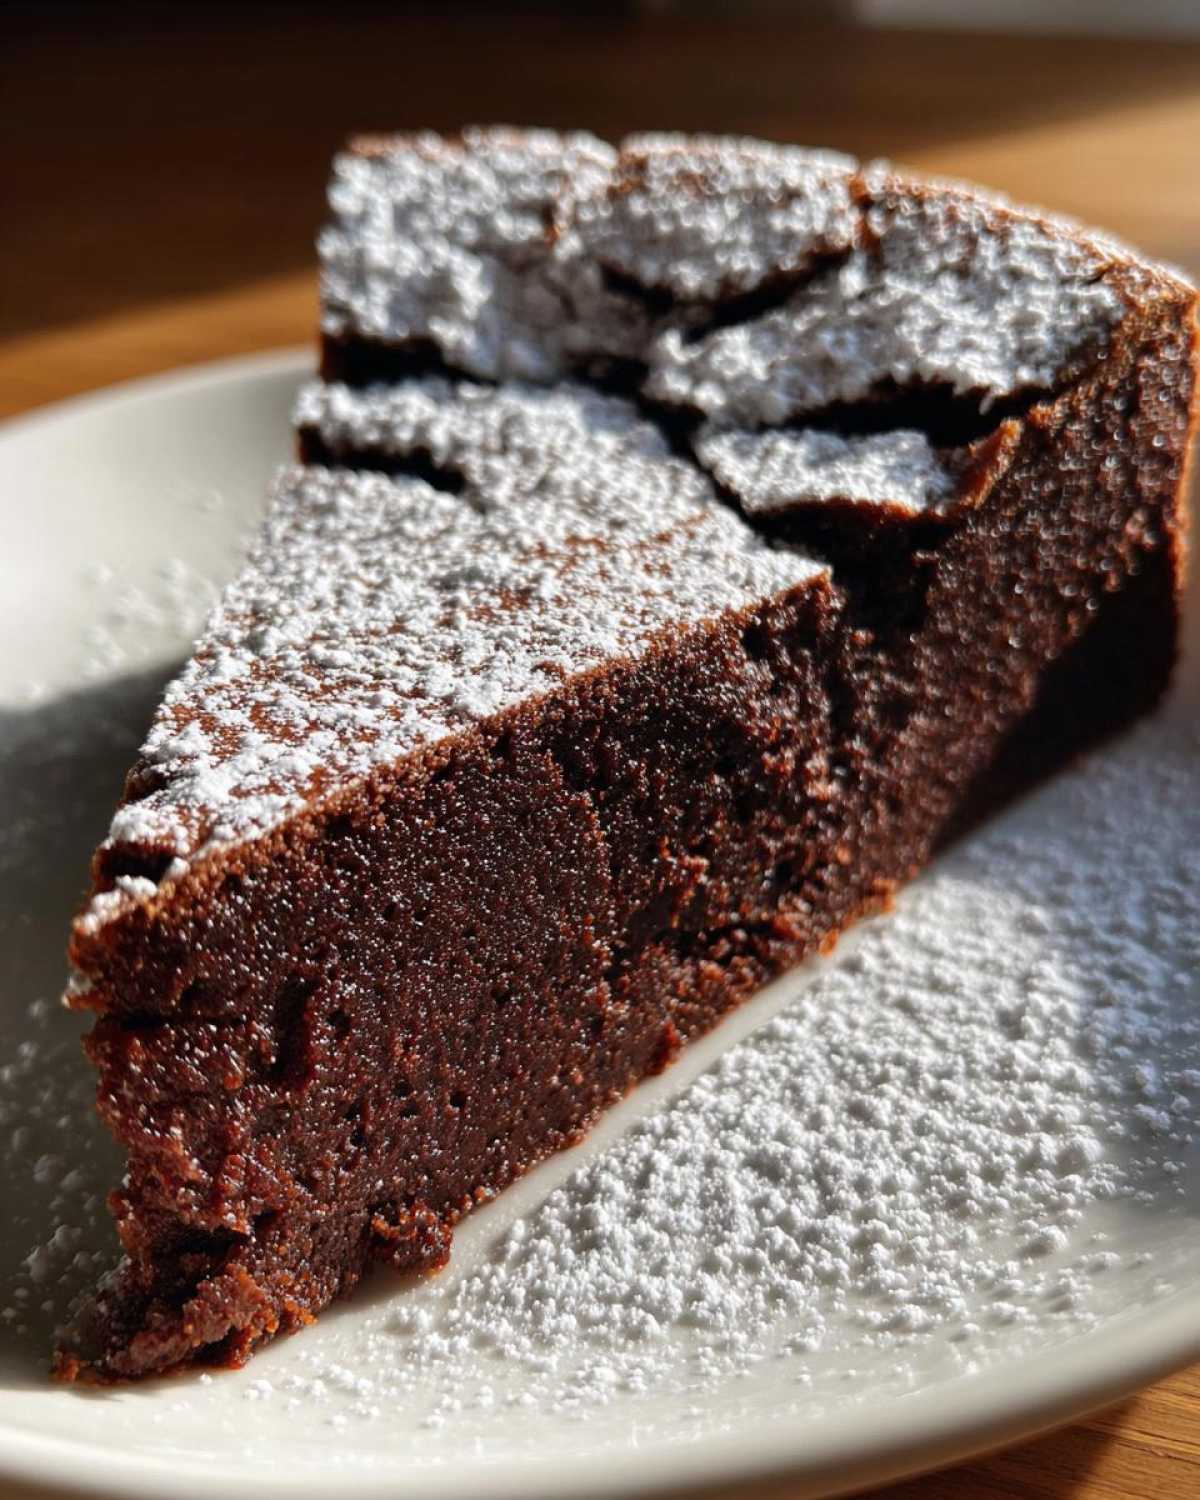
Now, how to serve it the next day? This is up to personal preference, but I have strong feelings! If you plan on serving it straight from the fridge, it will be extremely firm, almost like eating a dense fudge bar. That’s great for that ultra-intense “chocolate lover’s torte” hit, but it’s harder to chew through. For the absolute best experience—that smooth, velvety melt—you need to take your wrapped slice out of the fridge about 20 to 30 minutes before you plan on eating it. Letting it warm up ever so slightly softens the fats back up, and you get that incredible mouthfeel that makes this **flourless chocolate torte** legendary. You don’t need to reheat it, just let it breathe on the counter for a little while!
Frequently Asked Questions About the Flourless Chocolate Dessert
I know you might have a few last-minute questions swirling around before you commit to making this showstopper. It’s totally normal! When something is this intensely good, you want to make absolutely sure you get it right the first time. Here are the things I get asked most often about my **flourless chocolate dessert** recipe.
Can I substitute the dark chocolate?
Oh, I really advise against it if you want this specific texture! The bittersweet chocolate is what gives the torte its structure since we have no flour. If you switch to milk chocolate, it has way more sugar and fat, and it won’t set up correctly; you’ll end up with a puddle for your **gluten free chocolate torte**. If you absolutely must change it, use a bittersweet chocolate with a higher cacao load, maybe 75%, just to keep that richness intact. Stick to the recipe for the best result!
How do I know when the flourless chocolate torte is done baking?
This is a tricky one when you are used to fully set cakes! You want the edges to look firm and slightly puffed, but the dead center—maybe an inch right in the middle—should still look a little soft and almost shiny. Don’t panic! That soft spot is called carryover cooking. When you pull the **flourless chocolate torte** out, the residual heat finishes setting that center as it cools. If you bake it until the center looks totally dry, you’ll end up with a brownie texture instead of that soft, **velvety chocolate torte** consistency we are aiming for.
Is this considered a Simple Flourless Cake or Torte?
That’s a fair question! Generally speaking, a cake relies on flour (or flour substitutes) for a lighter, fluffier crumb. A torte, especially a **simple flourless cake** version like this, relies on eggs and high amounts of fat (butter and chocolate) for its structure. That means tortes are denser, richer, and usually served in smaller slices. This recipe fits firmly into that dense, decadent torte category—which is why you need chilling time, remember? If you’re looking for something lighter, you might want to check out my almond flour pancake recipe for a fluffier feel, but for deep chocolate love, this torte is IT.
Nutritional Estimate for This Special Occasion Chocolate
Now, I hate to bring up numbers when we are talking about pure, unadulterated chocolate bliss, but I know some of you want to keep track! Since this is such a rich, potent **special occasion chocolate** dessert, the portions are naturally smaller, but it is certainly an indulgence. I went ahead and pulled the standard estimates based on the ingredients chart I used for this recipe.
Please remember, these are just estimates! They don’t account for any substitutions you might make, like replacing sugar or changing the chocolate type. This is just a snapshot of what you can expect from a standard slice of this **velvety chocolate torte**.
- Serving Size: 1 slice (This thing is dense, so one slice goes a long way!)
- Calories: About 380 Calories
- Sugar: Roughly 28 grams
- Fat: Around 28 grams, yes, that includes the butter and rich chocolate!
I always remind folks that since this is packed with bittersweet chocolate, you’re getting a significant amount of saturated fat and sugar, but let’s be honest—that’s what makes it so incredible! On the upside, because we use high-quality chocolate, you sneak in some good fiber (about 3 grams) and a decent hit of protein (7 grams) thanks to all those eggs we folded in there. It’s a decadent dessert, so enjoy it guilt-free, or at least, tell yourself you are getting your daily dose of rich, dark chocolate indulgence!
Print
Decadent Fudgy Flourless Chocolate Torte
- Total Time: 50 min
- Yield: 8 servings
- Diet: Gluten Free
Description
Make a rich, dense, and intensely chocolatey torte that is naturally gluten-free. This recipe yields a velvety dessert perfect for special occasions.
Ingredients
- 8 ounces bittersweet chocolate, chopped
- 8 ounces unsalted butter, cut into pieces
- 1 cup granulated sugar
- 1/4 cup unsweetened cocoa powder
- 1/2 teaspoon salt
- 4 large eggs, separated
- 1 teaspoon vanilla extract
- Powdered sugar, for dusting
Instructions
- Preheat your oven to 350 degrees F (175 degrees C). Grease and line the bottom of an 8-inch springform pan with parchment paper.
- Place the chopped chocolate and butter in a heatproof bowl set over a saucepan of simmering water. Stir until completely melted and smooth. Remove from heat.
- Whisk the granulated sugar, cocoa powder, and salt into the melted chocolate mixture until combined.
- Beat in the egg yolks one at a time, mixing well after each addition. Stir in the vanilla extract.
- In a separate clean bowl, beat the egg whites until stiff peaks form.
- Gently fold one-third of the beaten egg whites into the chocolate mixture to lighten it. Then, fold in the remaining egg whites until just combined. Do not overmix.
- Pour the batter into the prepared springform pan.
- Bake for 30 to 35 minutes. The center should look set but still slightly soft.
- Let the torte cool completely in the pan on a wire rack. The center may sink slightly as it cools.
- Once cool, carefully remove the sides of the springform pan. Dust the top with powdered sugar before slicing and serving.
Notes
- For a smoother texture, use high-quality chocolate with at least 60 percent cacao.
- Chill the torte for at least 2 hours before serving for the densest texture.
- You can substitute cocoa powder with espresso powder for a deeper chocolate taste.
- Prep Time: 15 min
- Cook Time: 35 min
- Category: Dessert
- Method: Baking
- Cuisine: American
Nutrition
- Serving Size: 1 slice
- Calories: 380
- Sugar: 28
- Sodium: 150
- Fat: 28
- Saturated Fat: 17
- Unsaturated Fat: 11
- Trans Fat: 0.5
- Carbohydrates: 30
- Fiber: 3
- Protein: 7
- Cholesterol: 140